Now Reading: 70 Mesmerizing Nail Art Inspired by Natural Stones
-
01
70 Mesmerizing Nail Art Inspired by Natural Stones
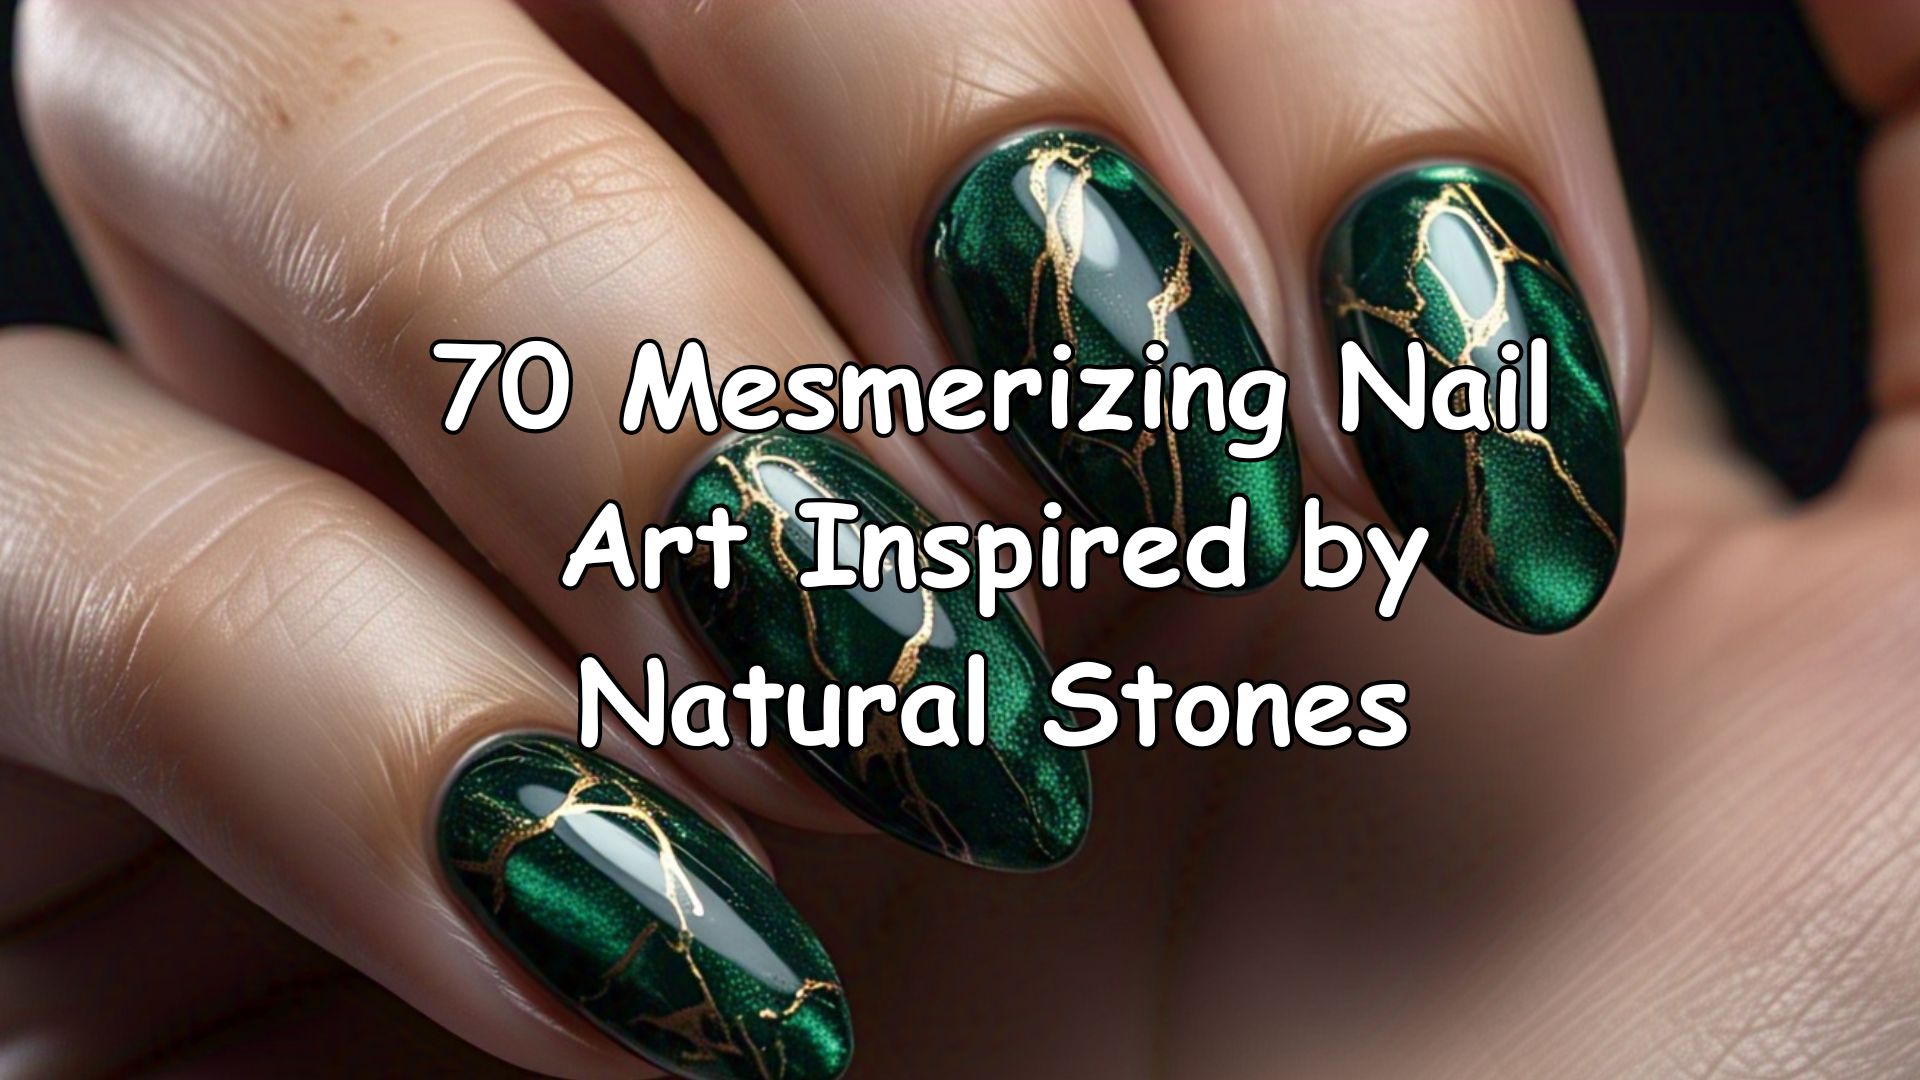
Natural stones hold unique textures, patterns, and colors that spark creativity in nail art. I explore the beauty of these stones and translate their features into nail designs. From bold gem tones to soft iridescence, each stone tells a story. Below, I share 70 nail art ideas inspired by 15 natural stones, with each stone having multiple design concepts. These styles range from simple elegance to complex, detailed patterns.
I use these ideas to spark inspiration for at-home manicures, salon visits, or creative content. Each section focuses on one stone and offers distinct ways to reflect its essence on nails.
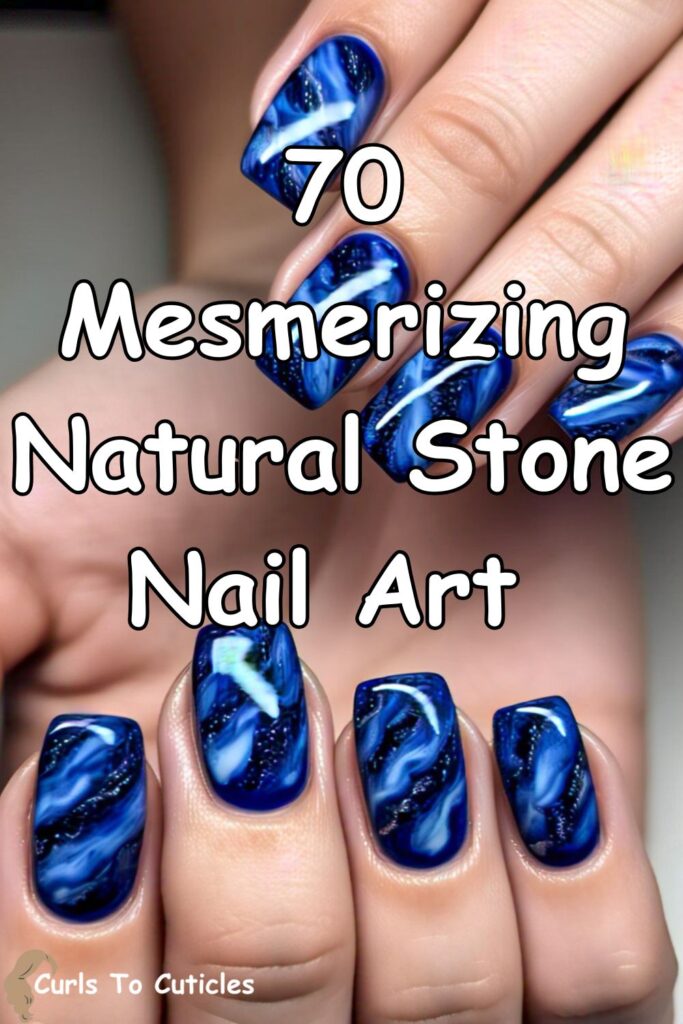
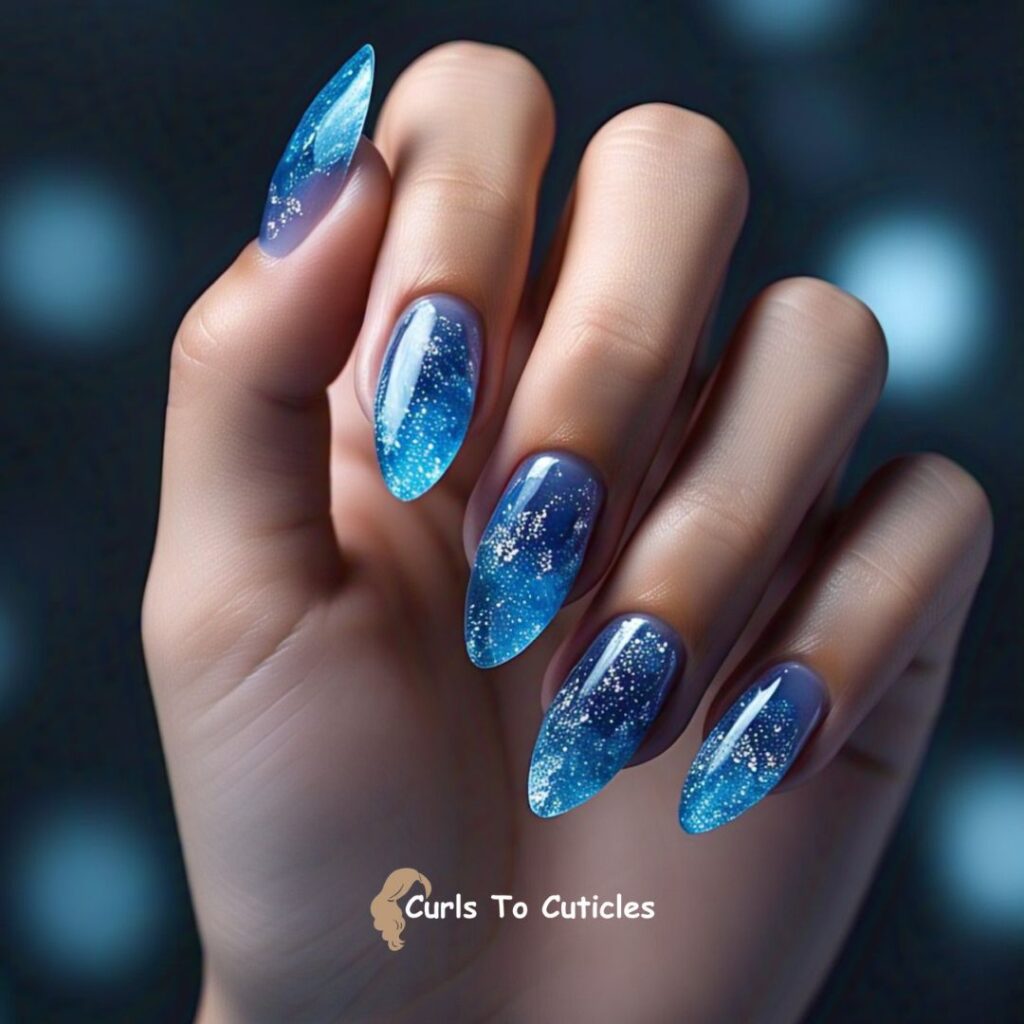
Sapphire-Inspired Nail Art Designs
1. Deep Blue Gloss
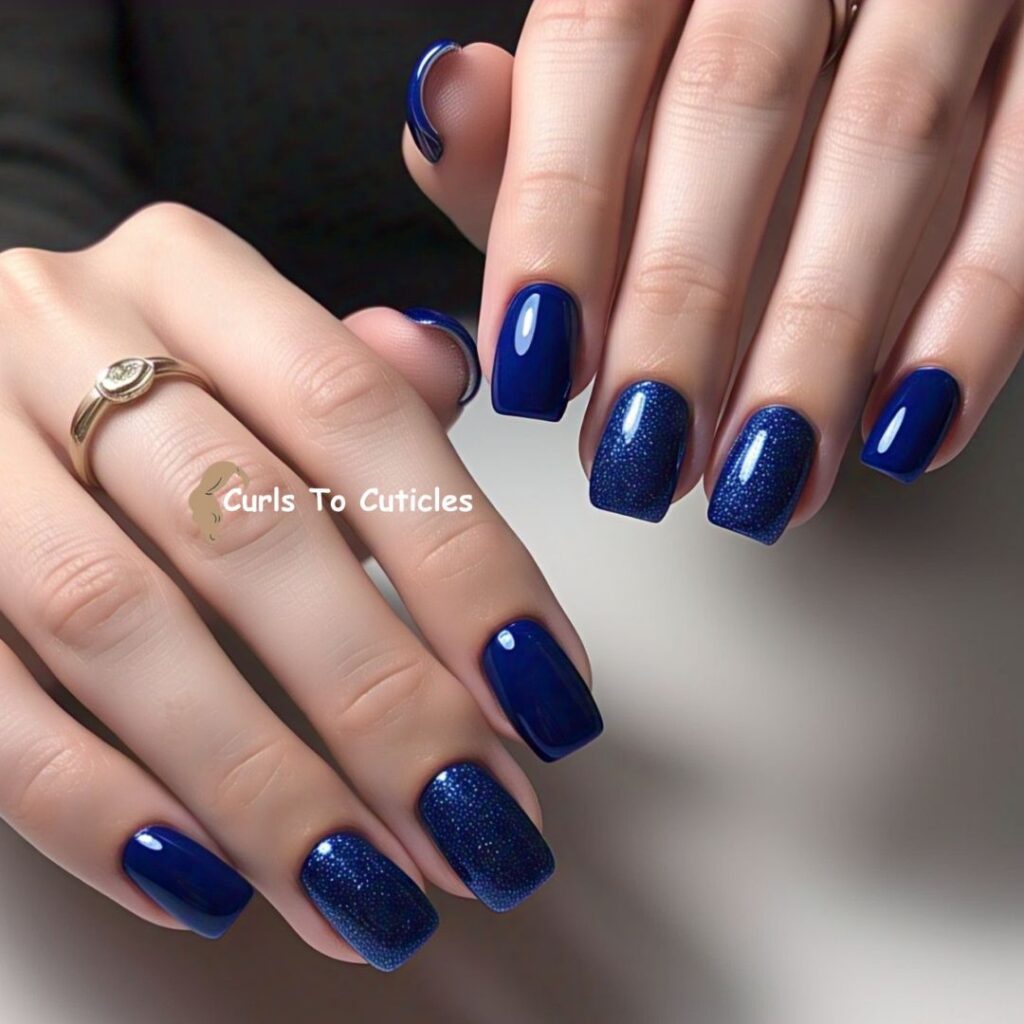
I use rich cobalt or navy blue polish to recreate sapphire’s deep color. I apply two coats for full opacity and seal it with a high-shine topcoat.
2. Marble Sapphire Swirls
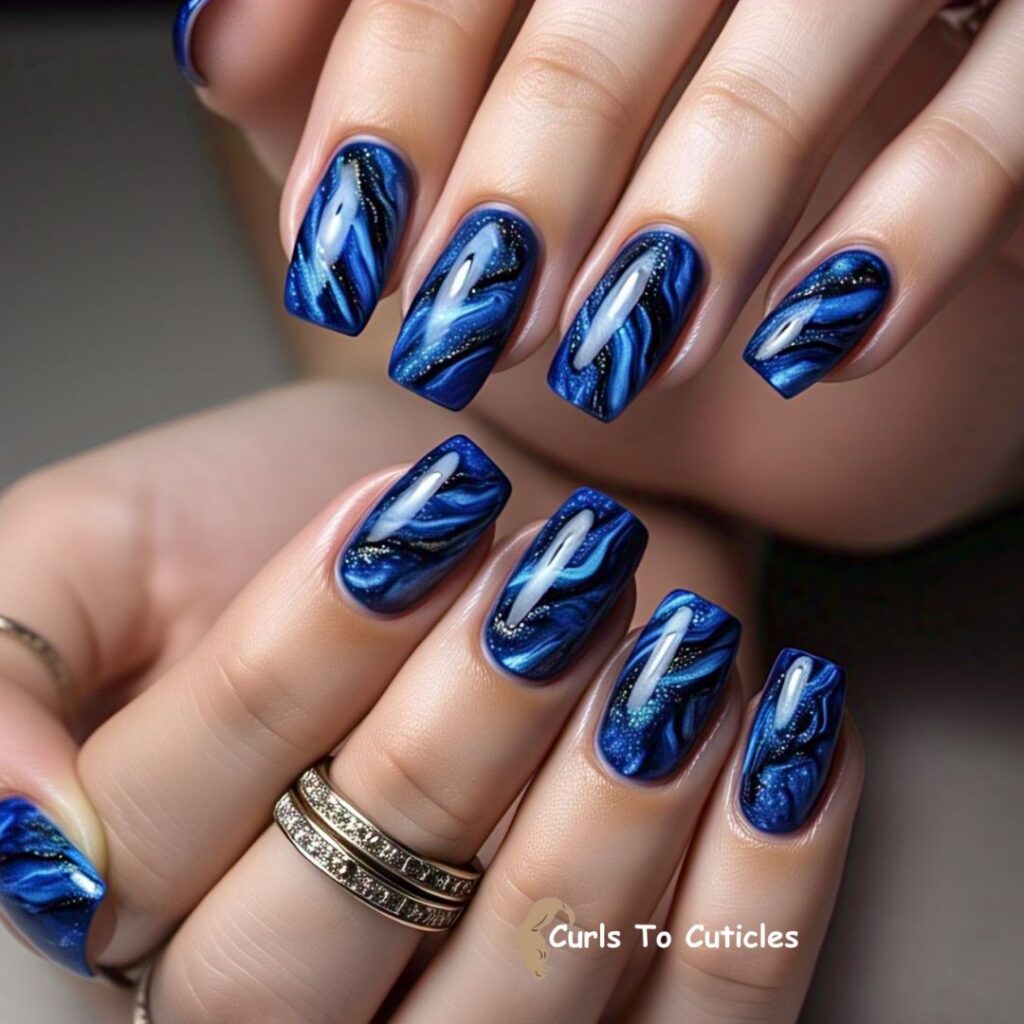
To get a realistic stone pattern, I swirl dark and light blues with a touch of black. I drag the colors with a toothpick to mimic natural marble veins.
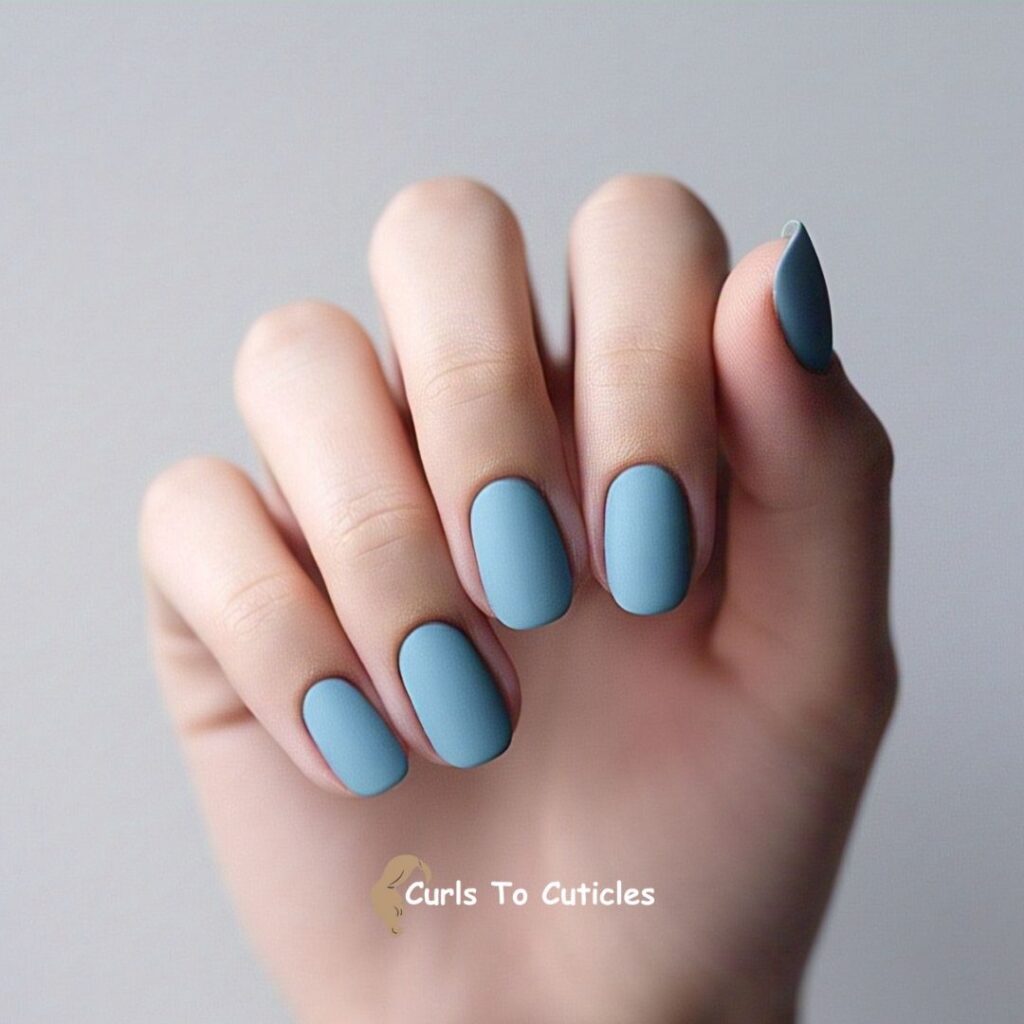
3. Blue Velvet Finish
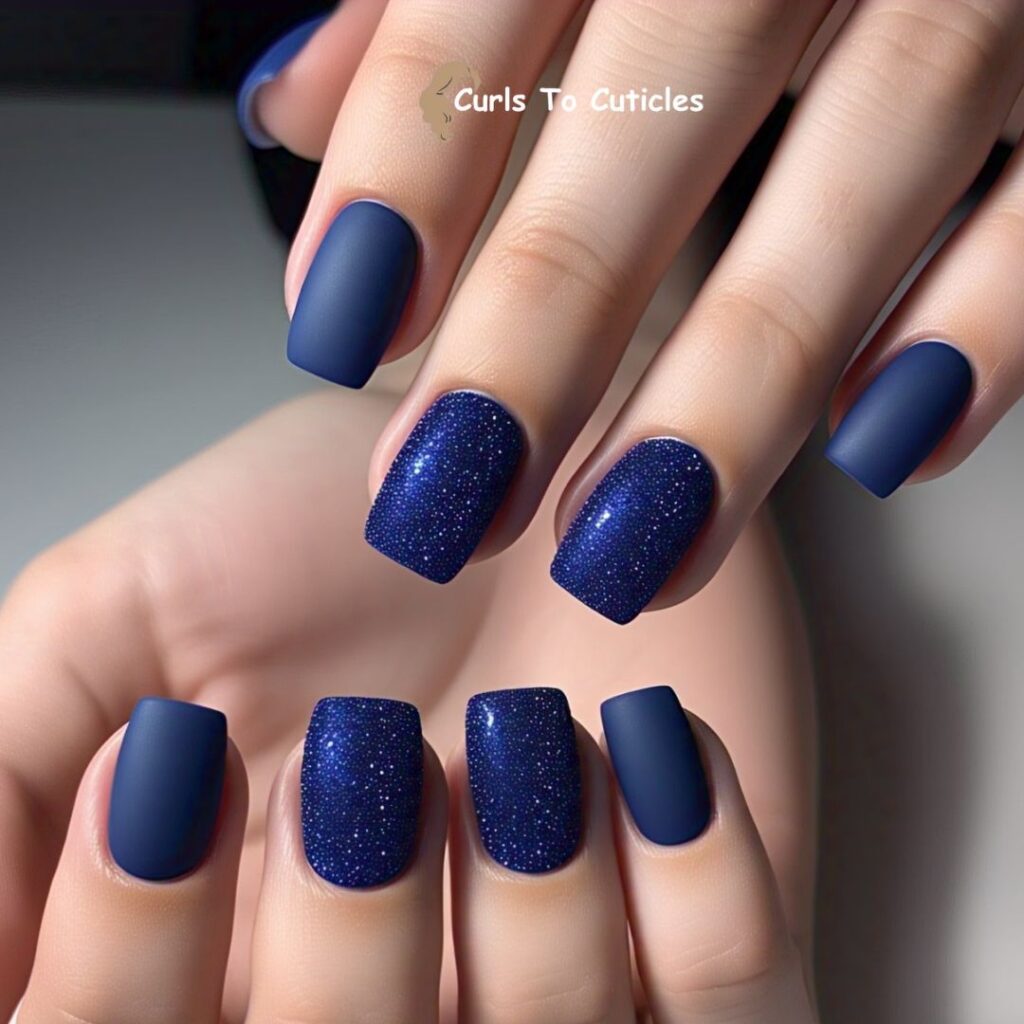
I use matte blue polish to give a velvet-like look. This style captures sapphire’s elegance without high gloss.
4. Gold-Edged Sapphire
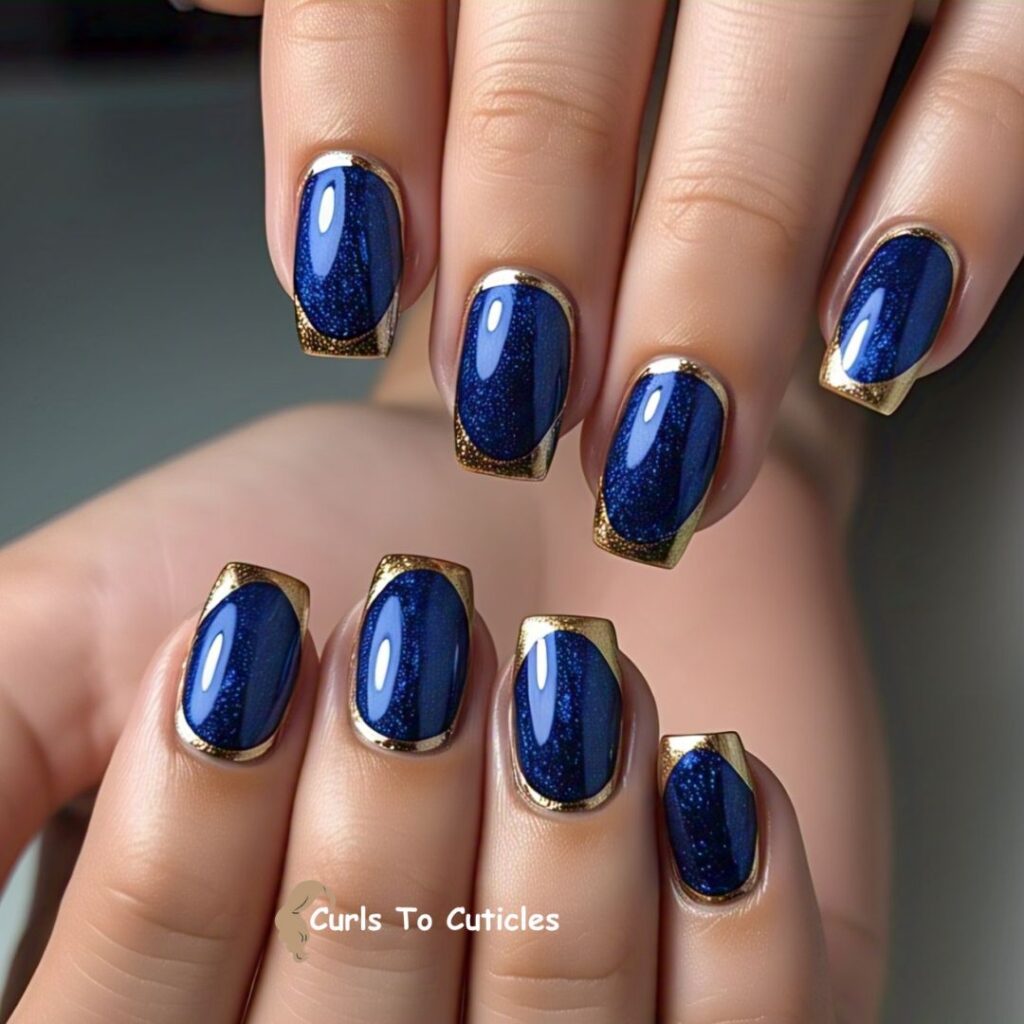
I paint a sapphire blue base and outline each nail with a thin metallic gold border. This reflects the luxury of sapphire jewelry.
5. Glitter Sapphire Tips
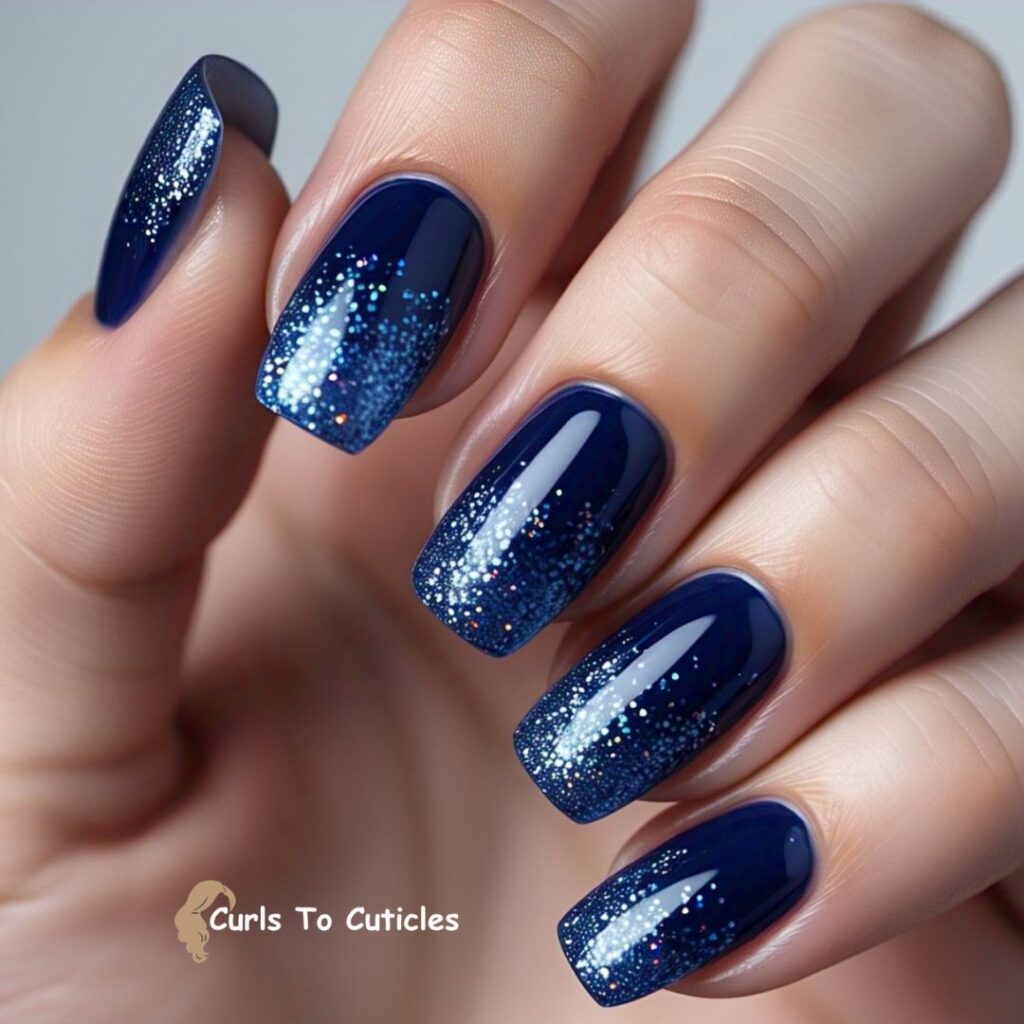
I add glitter to just the tips of navy nails to create a soft gradient. It gives the feel of light reflecting off sapphire edges.
Diamond-Inspired Nail Art Designs
6. Clear Crystal Shine

I use a translucent base with fine silver glitter to recreate the sparkle of a diamond. The shine mimics the way light passes through a diamond’s facets. I top it with a glossy finish for a glass-like effect.
7. Faceted Geometry

This design includes geometric lines that resemble diamond cuts. I apply thin silver striping tape or white polish to create angular shapes over a sheer nude or soft grey base.
8. Icy French Tips
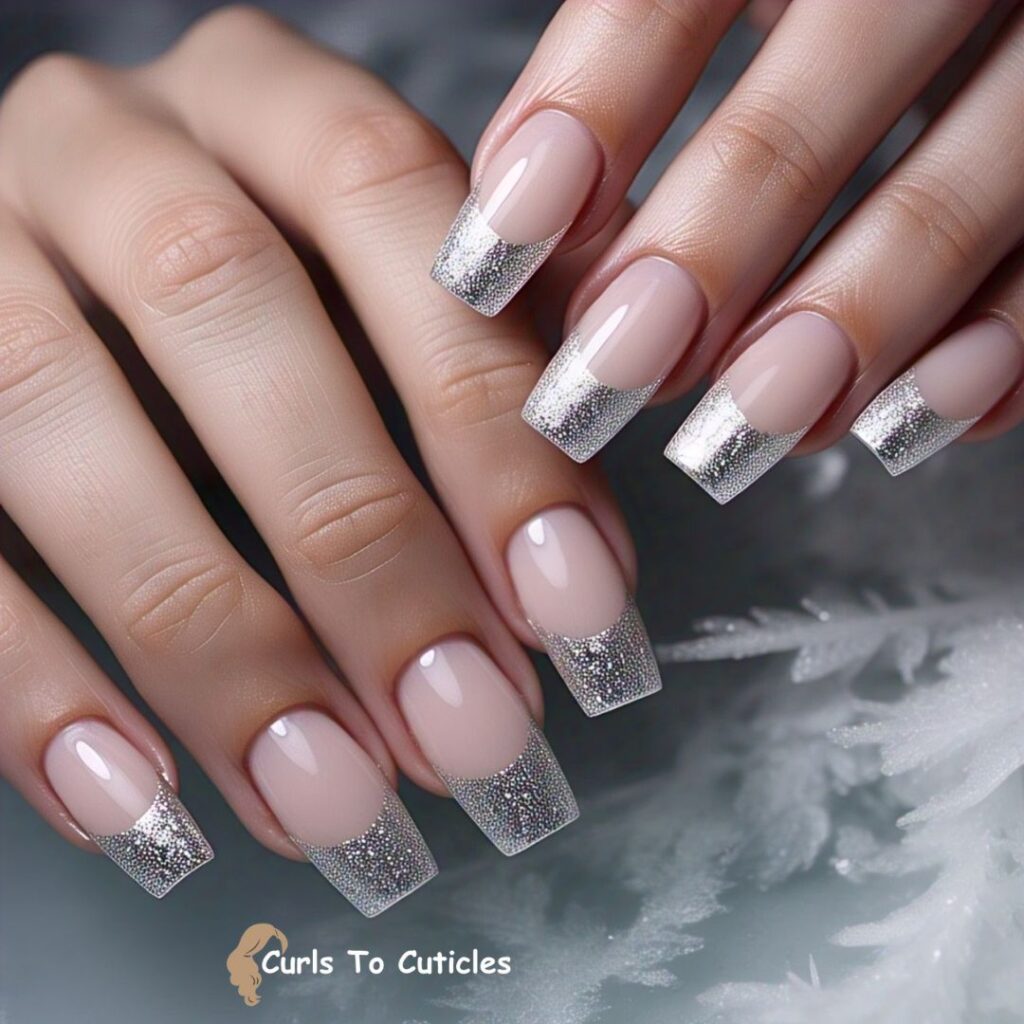
To reflect the cold brilliance of diamonds, I paint classic French tips with a silver chrome polish. It adds a cool shimmer while keeping the design sophisticated and wearable.
9. 3D Diamond Embellishments
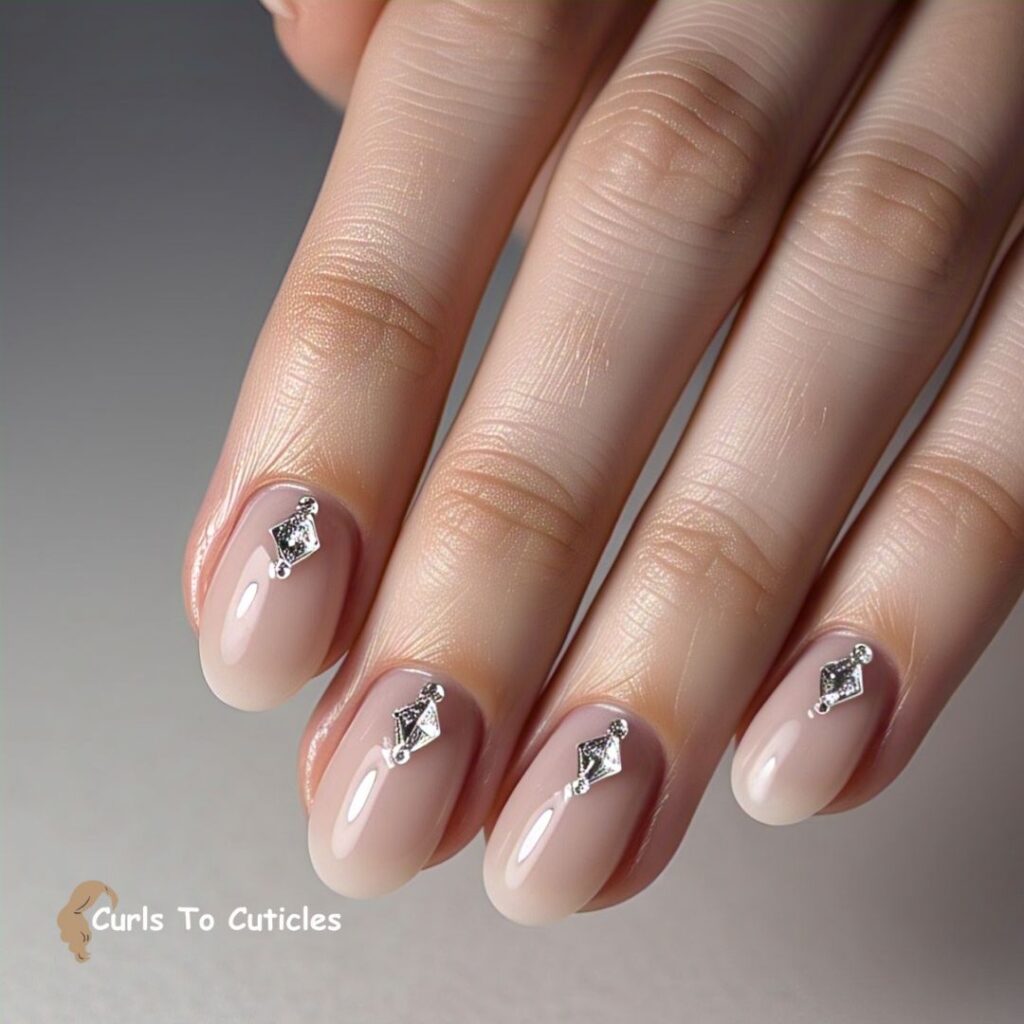
For a bold look, I apply small diamond-like rhinestones at the base of each nail. I keep the base nude or pastel to let the stones stand out.
10. Diamond Dust Ombre
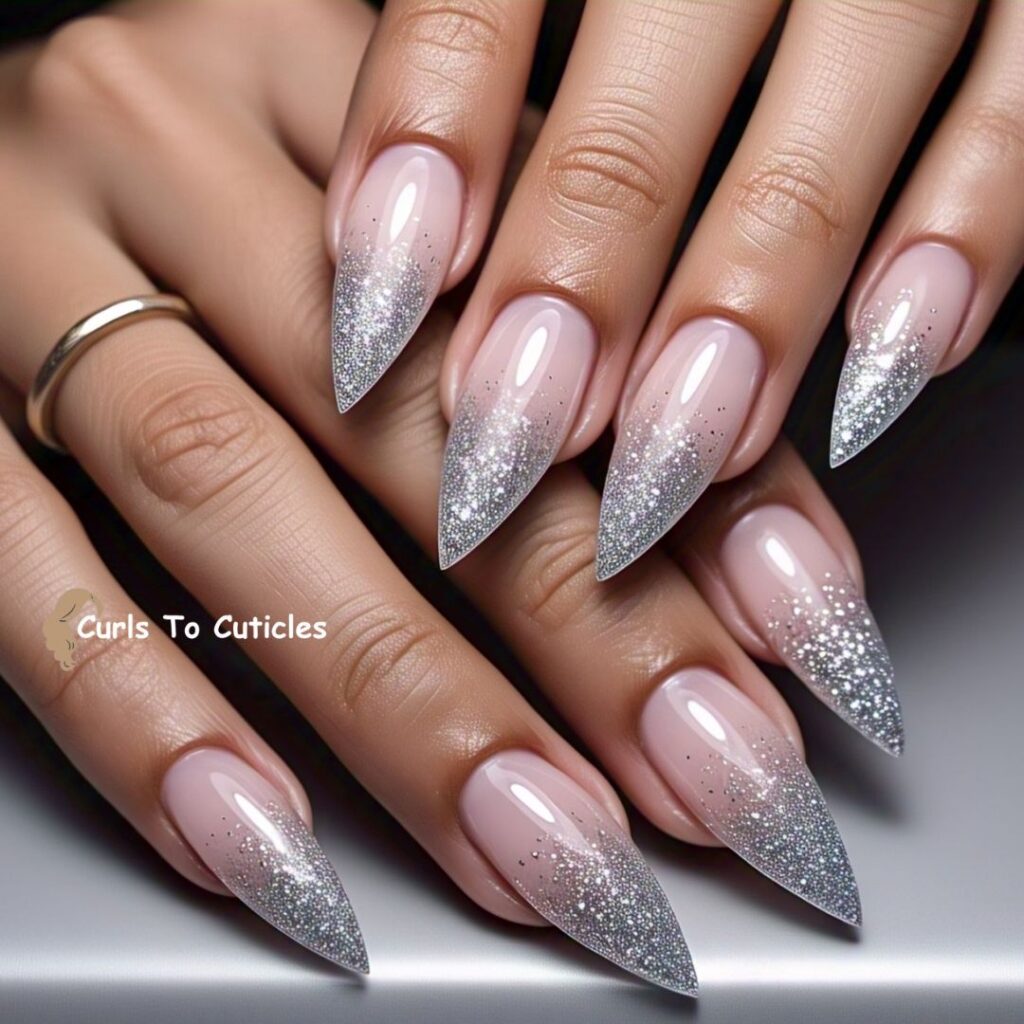
I blend fine silver glitter from the tip to the center of the nail. The ombre creates depth, mimicking the light play inside a cut diamond.
Ruby-Inspired Nail Art Designs
11. Classic Red Gloss
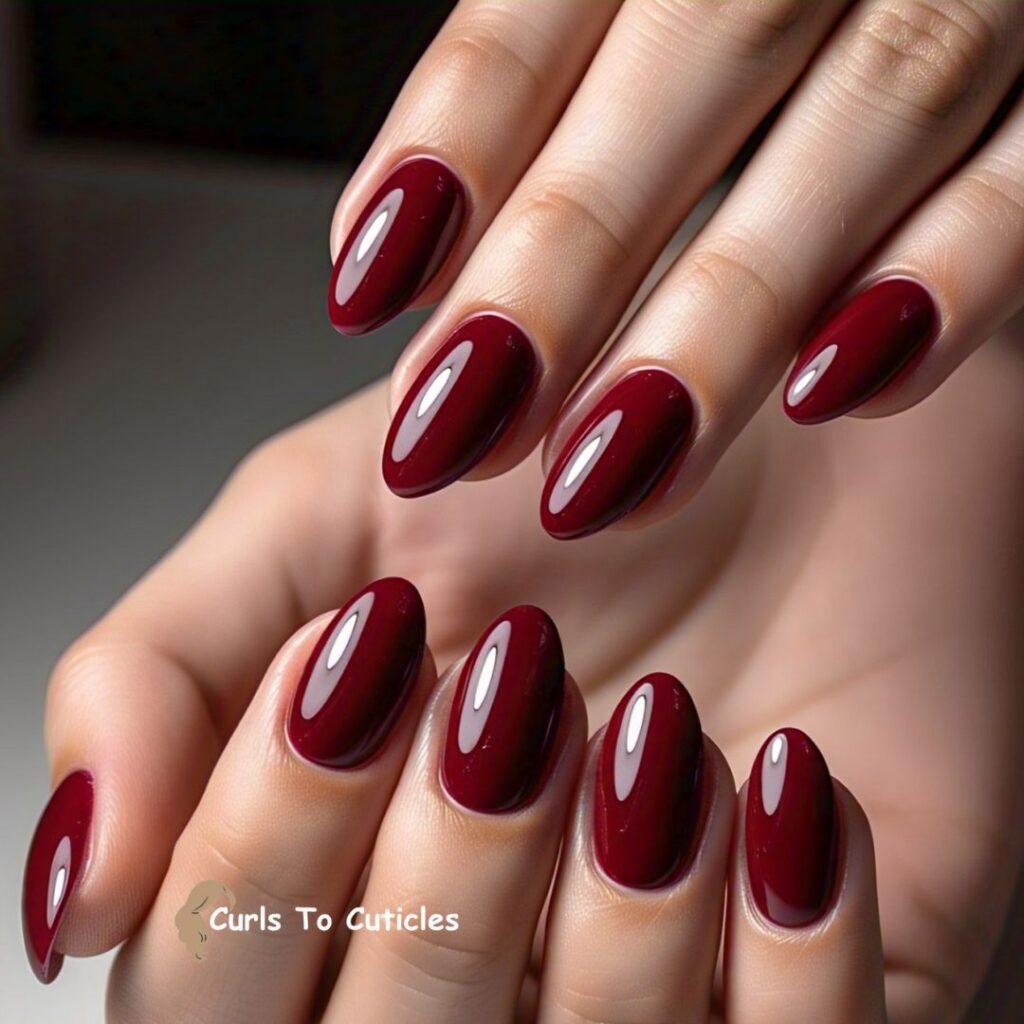
I use a rich, deep red polish to echo ruby’s bold tone. One or two coats give a powerful finish.
12. Ruby Flame Art
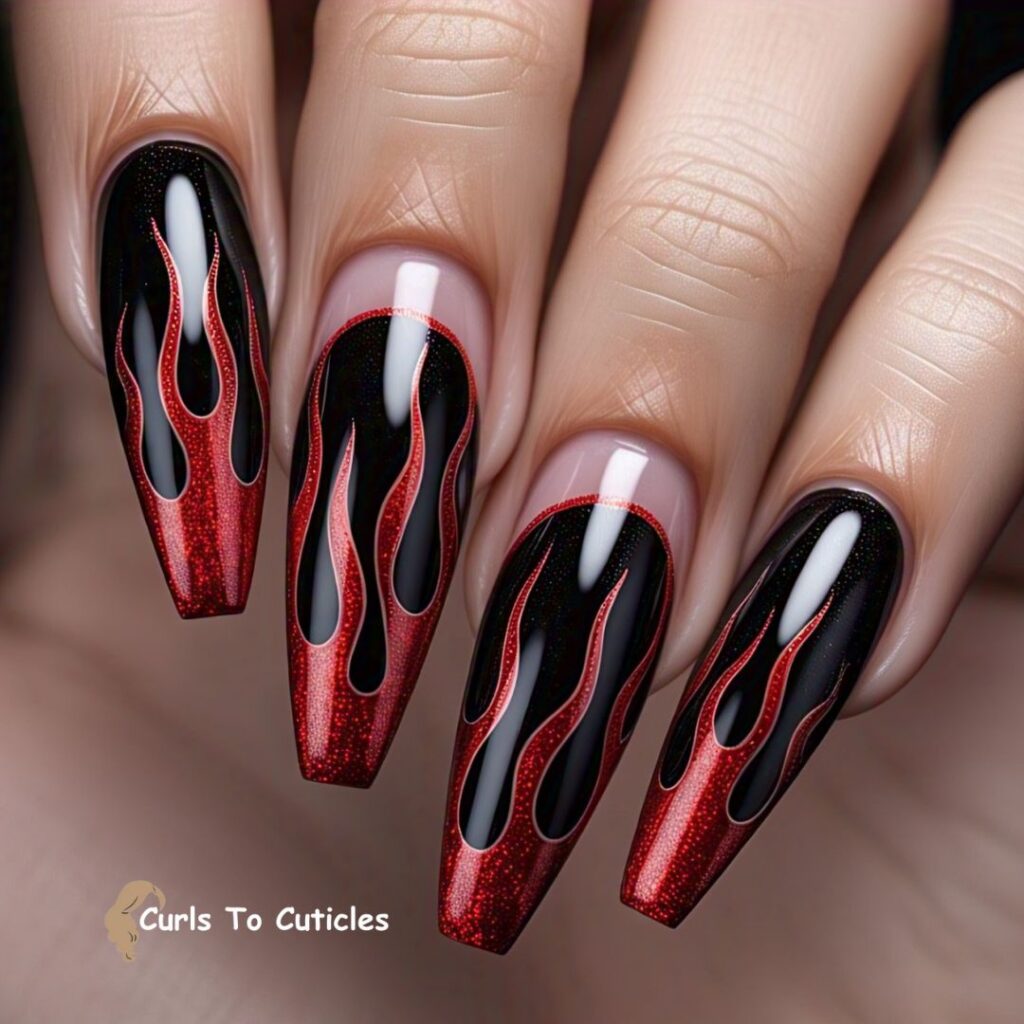
I paint red and black flame designs to represent the heat and passion tied to rubies. The blend of tones gives a fiery appearance.
13. Jewel Accents
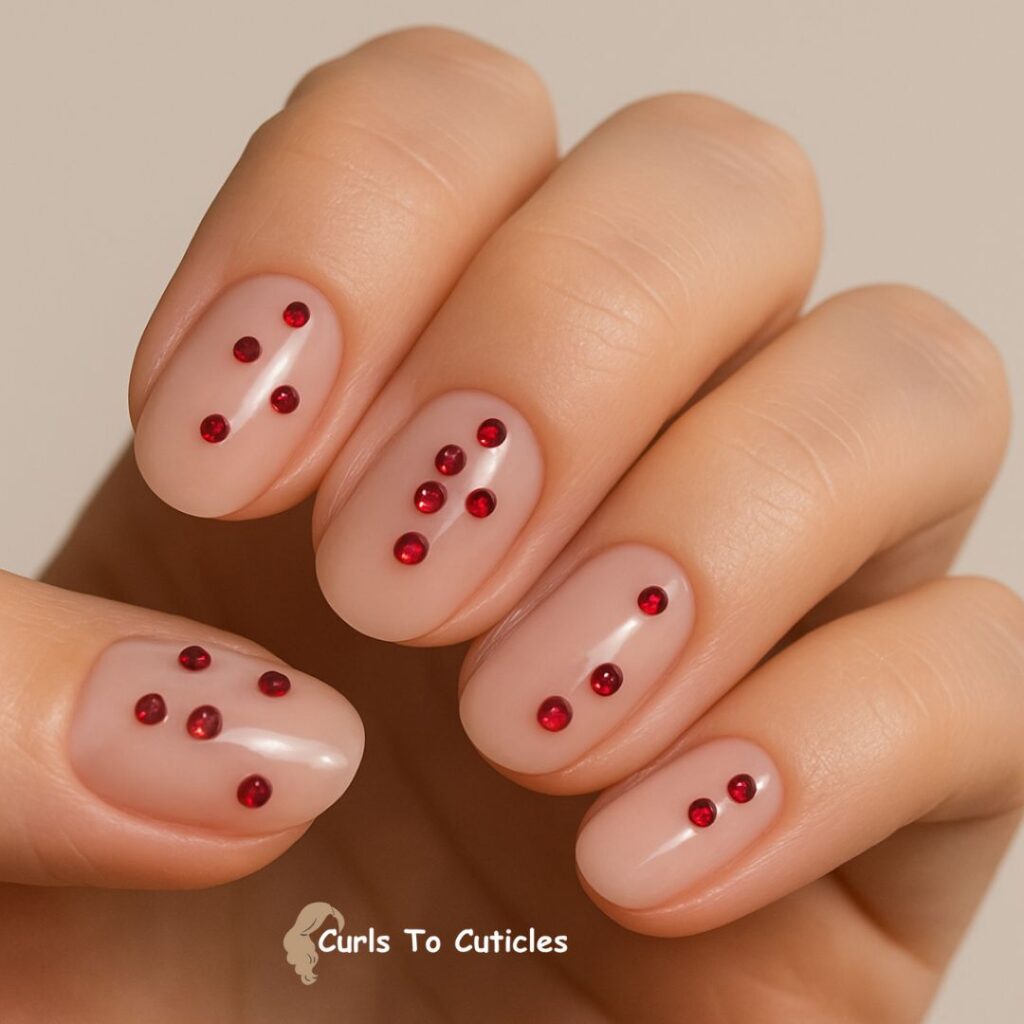
I add small red rhinestones on a nude or pink base to mimic ruby gems. They add texture and sparkle.
14. Red Marble Blend
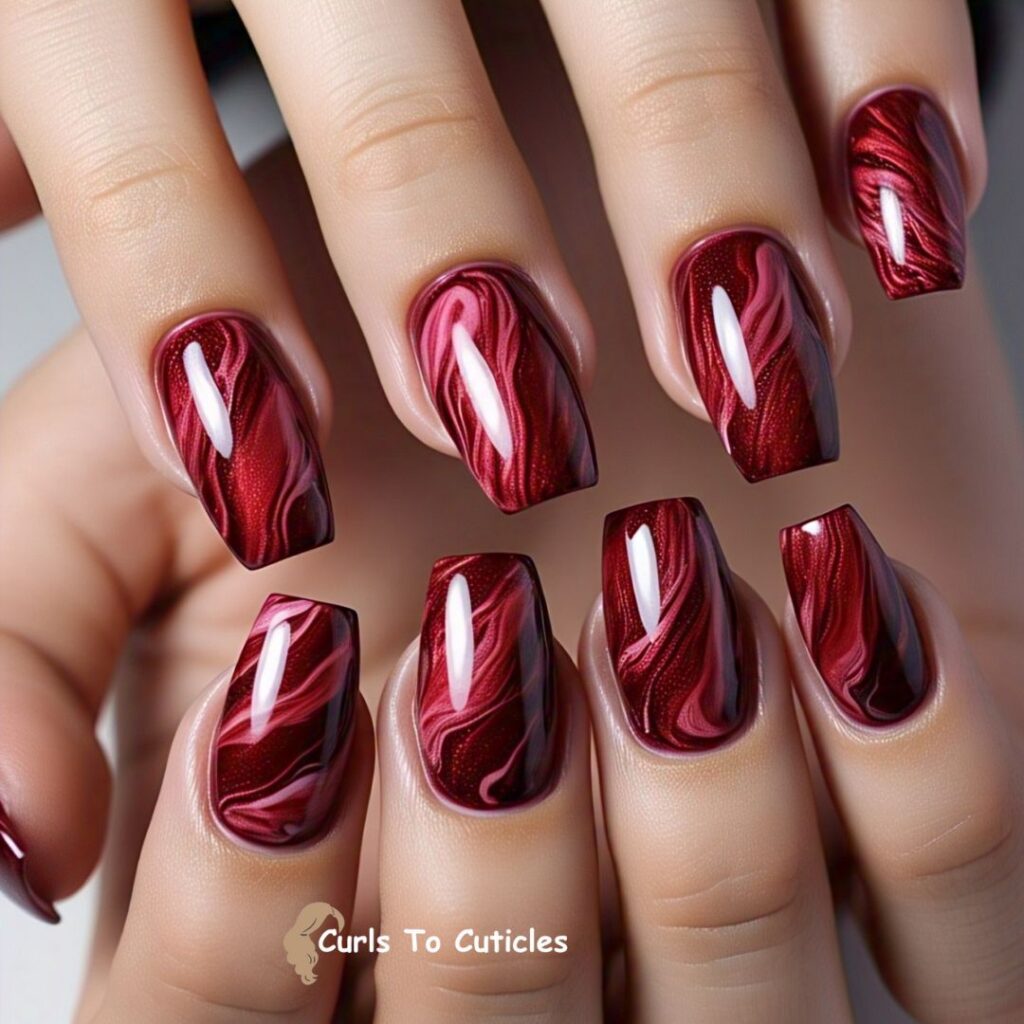
I mix burgundy, cherry red, and a little black for a marbled ruby effect. I apply it with a thin brush in flowing patterns.
15. Matte Ruby Finish

I go for a deep red matte polish that feels like raw, uncut ruby stone. It looks bold yet classy.
Emerald-Inspired Nail Art Designs
16. Deep Green Gloss
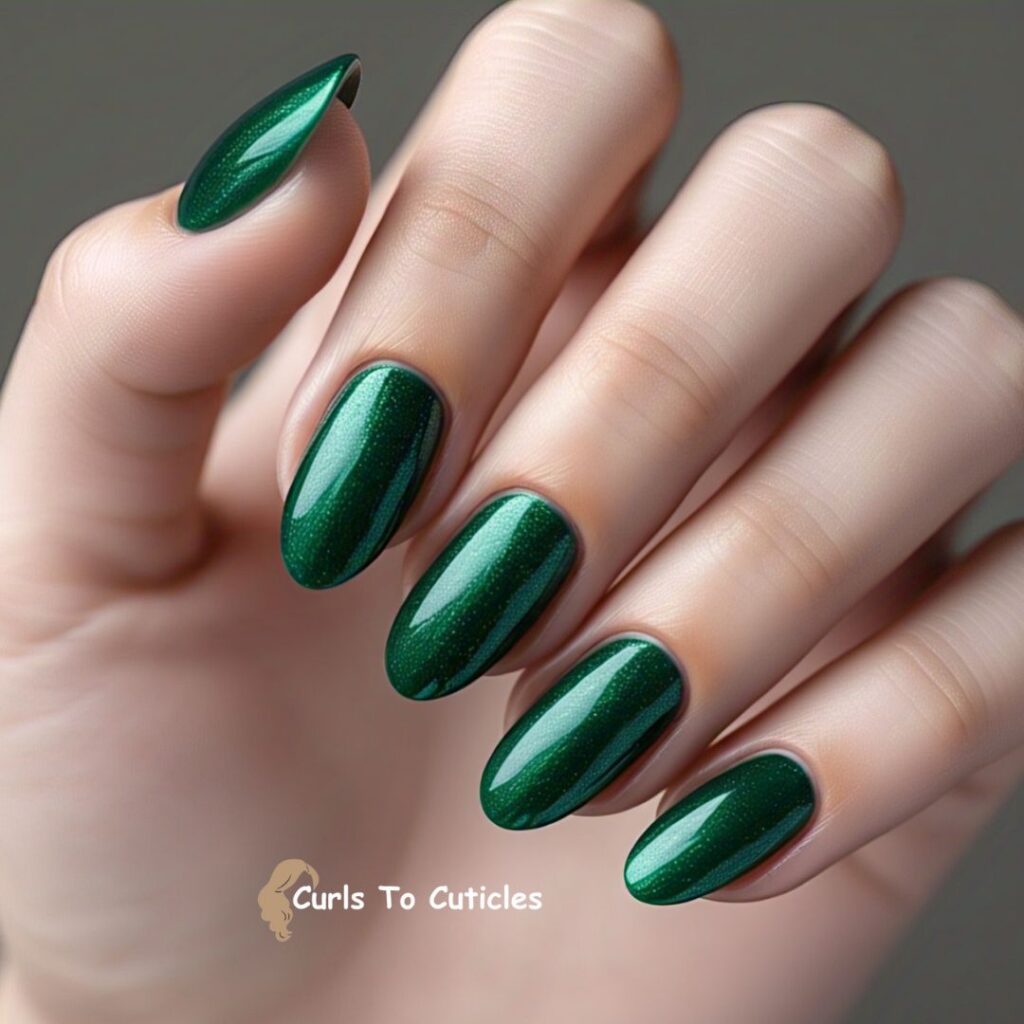
I use forest green or emerald green polish to capture the richness of the stone. I keep the finish shiny to enhance depth.
17. Green Gold Veins
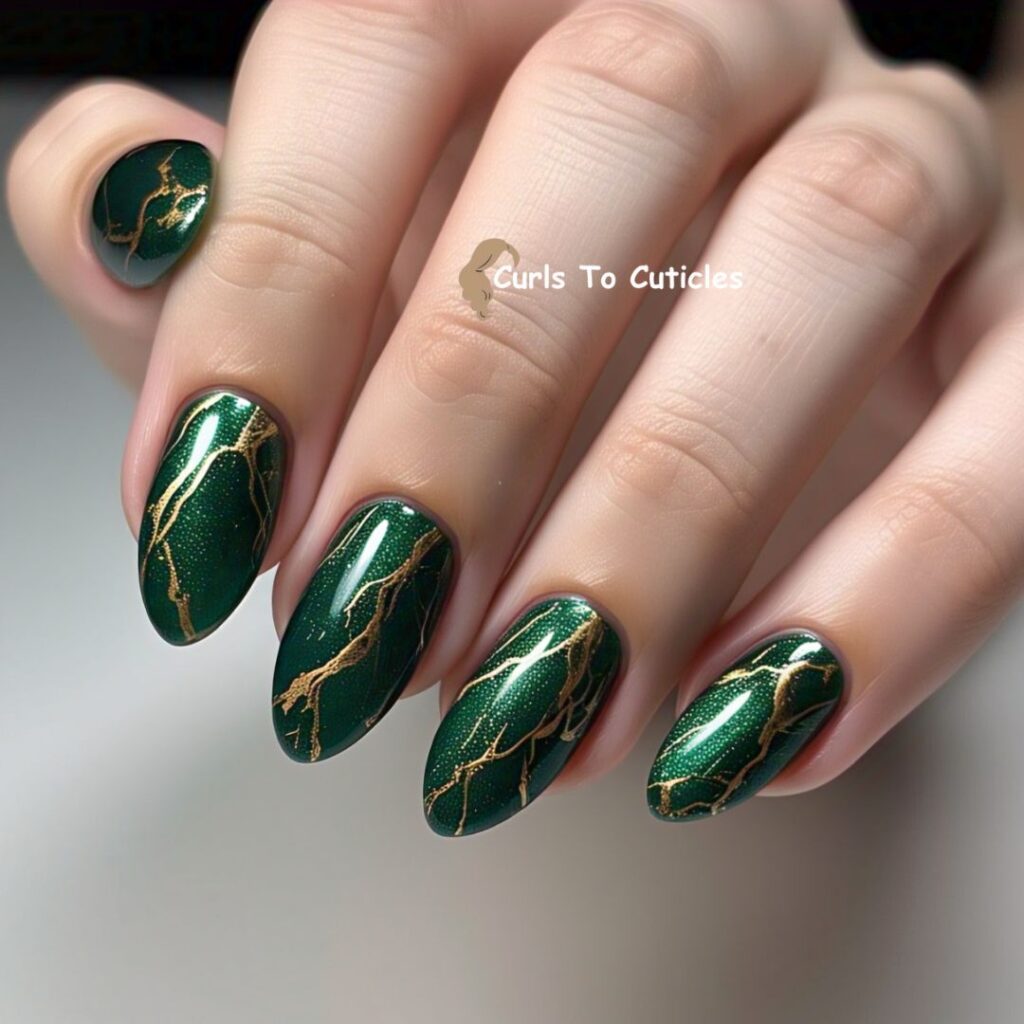
I draw gold lines over a deep green base to mimic veins in emerald stones. It adds a luxurious touch.
18. Transparent Emerald Wash
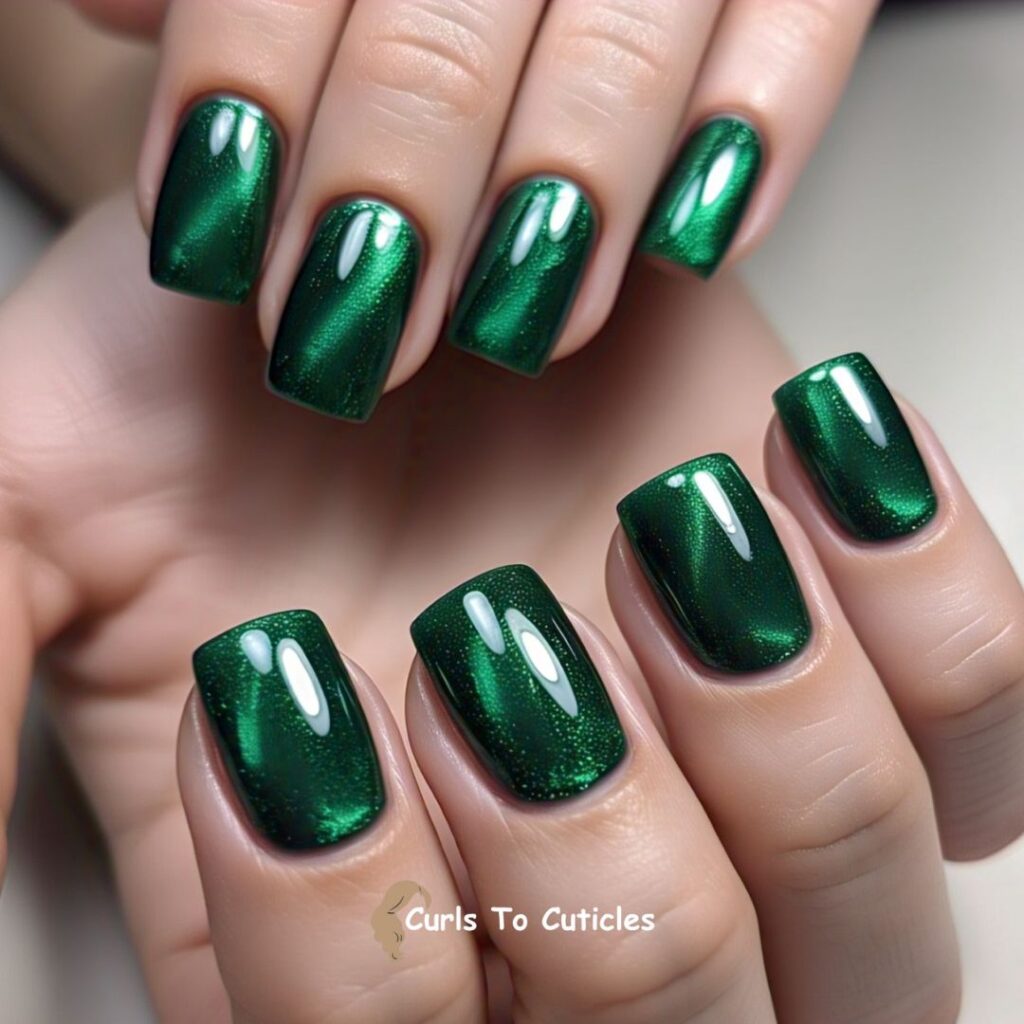
I use a jelly green polish for a semi-sheer look. This mimics how light passes through real emeralds.
19. Emerald Gemstone Clusters
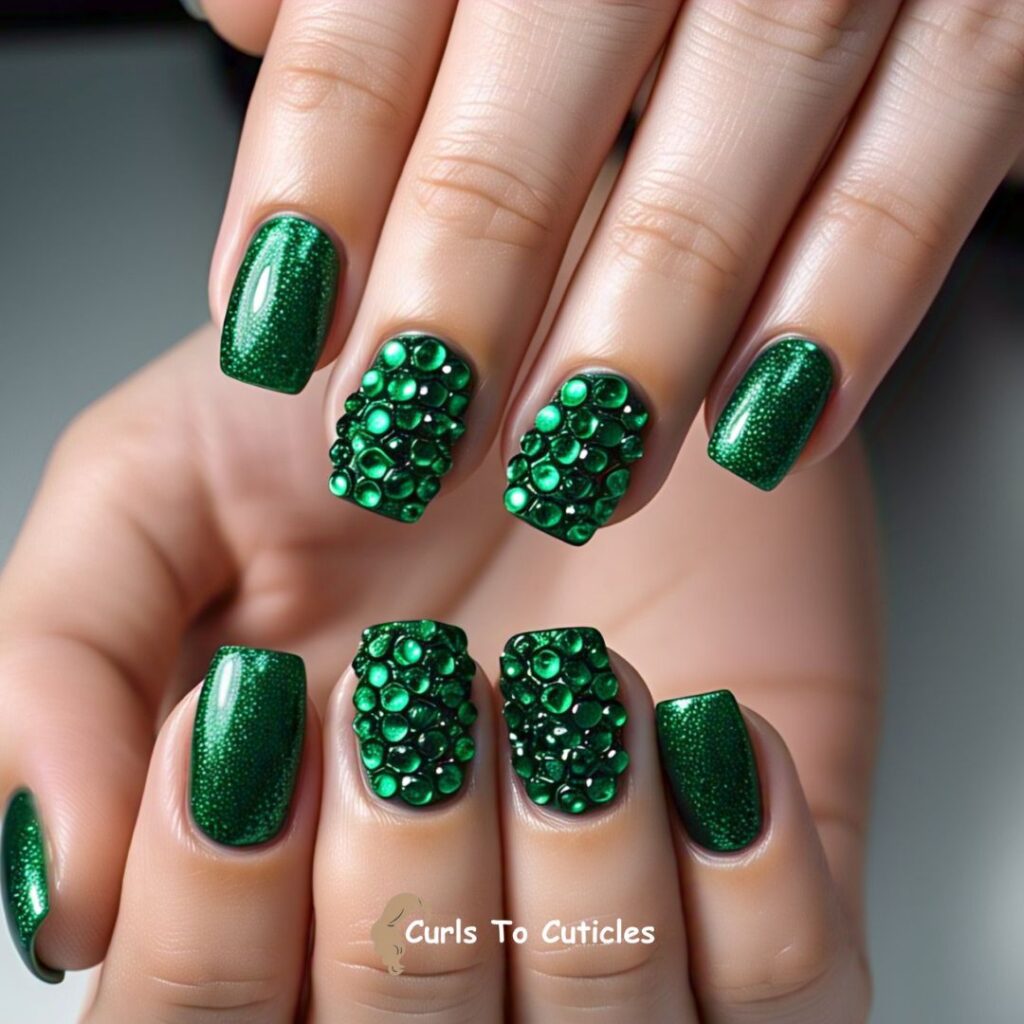
I cluster small green rhinestones on one or two nails as accent pieces. The rest stay simple to balance the design.
20. Emerald and Black Contrast
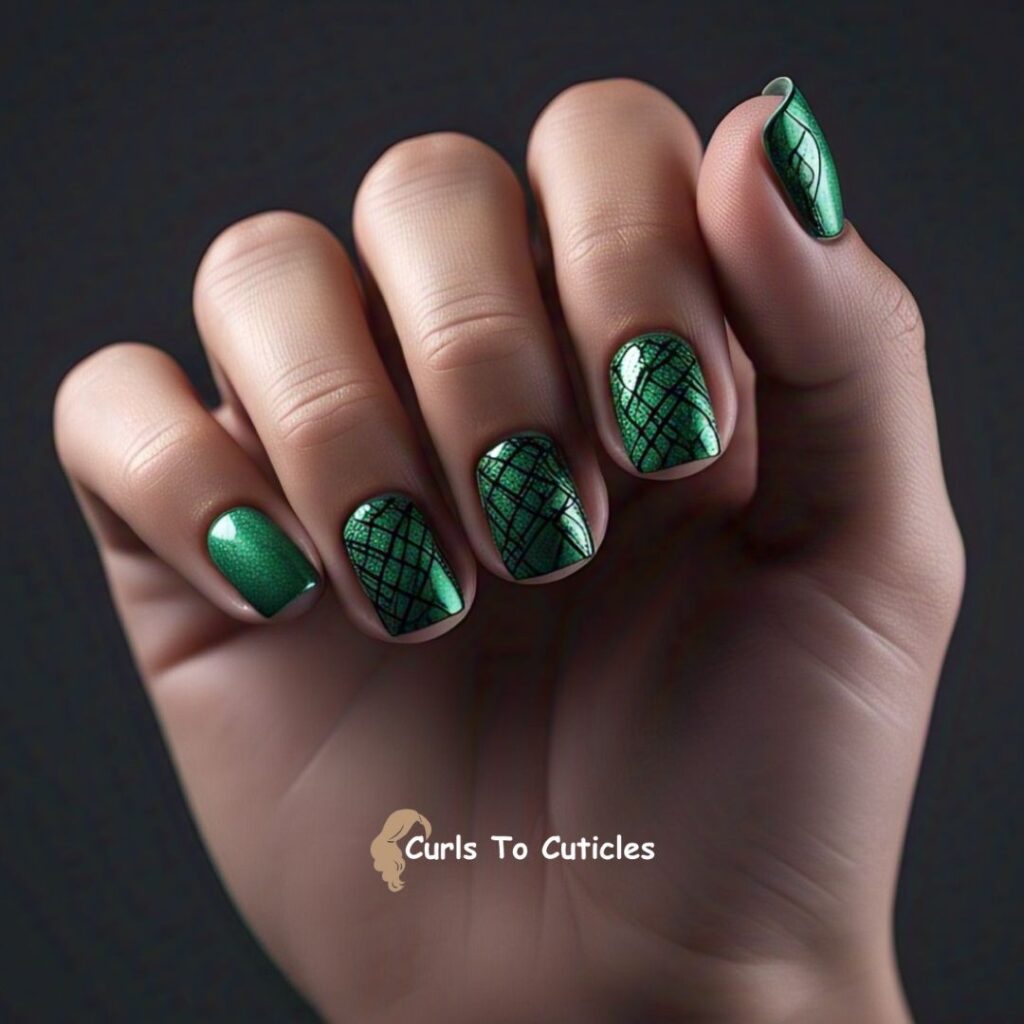
I pair a green polish with black accents, like lines or small dots, for an edgy emerald-inspired look.
Amethyst-Inspired Nail Art Designs
21. Lavender Veins
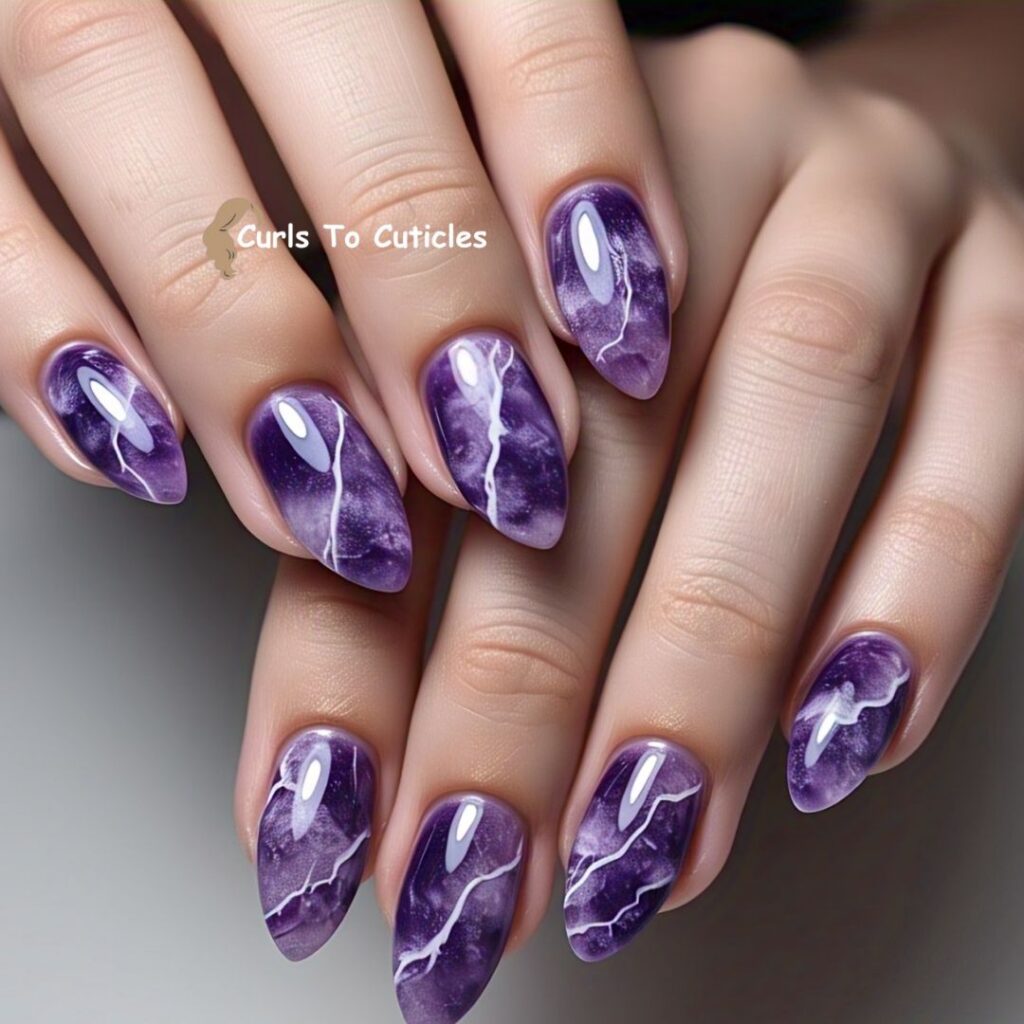
I mix light and dark purple polish using a sponge to create a veined, natural look. I add white streaks for detail.
22. Crystal Slice Nail Art

I paint amethyst slices with translucent purple layers and soft glitter edges. I outline them with metallic silver to define each layer.
23. Soft Purple Matte
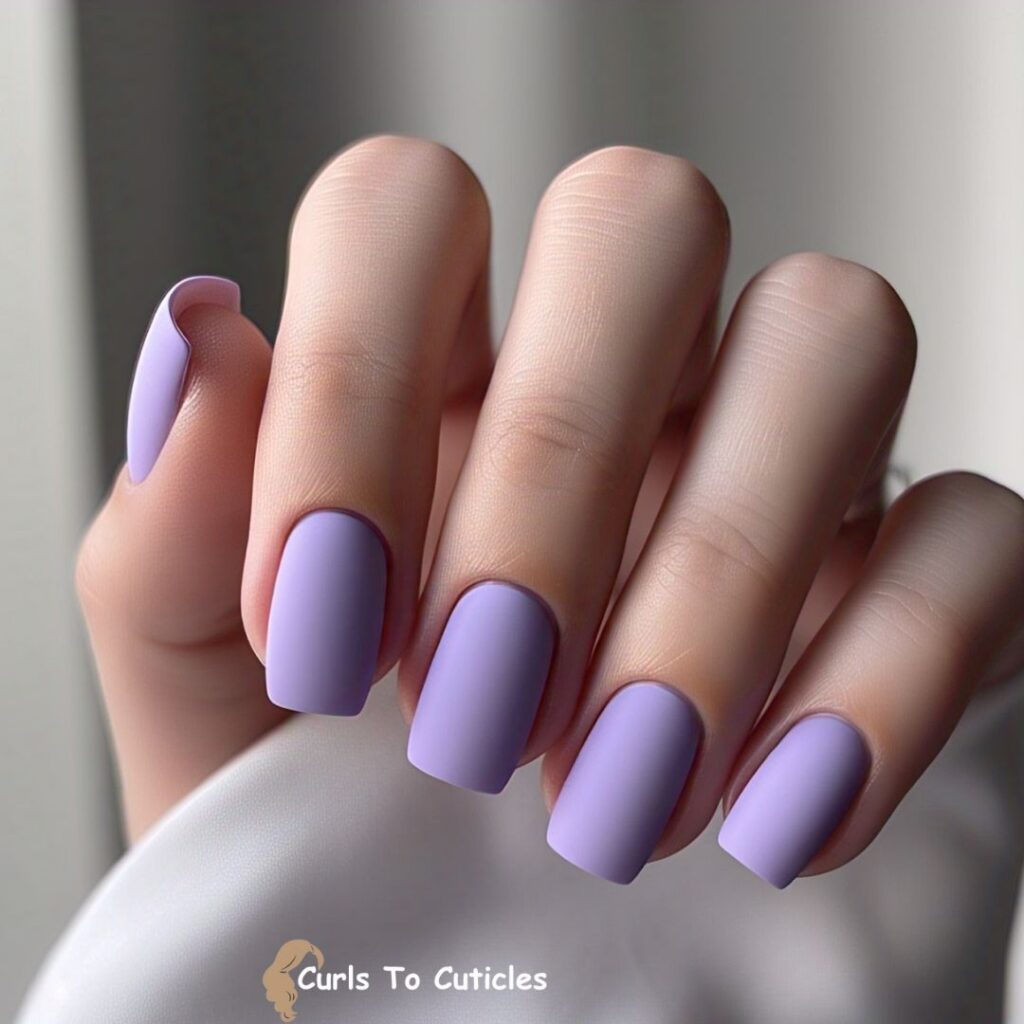
I apply matte lavender polish for a soft, dreamy finish. It reflects the calming energy of amethyst.
24. Purple Gradient
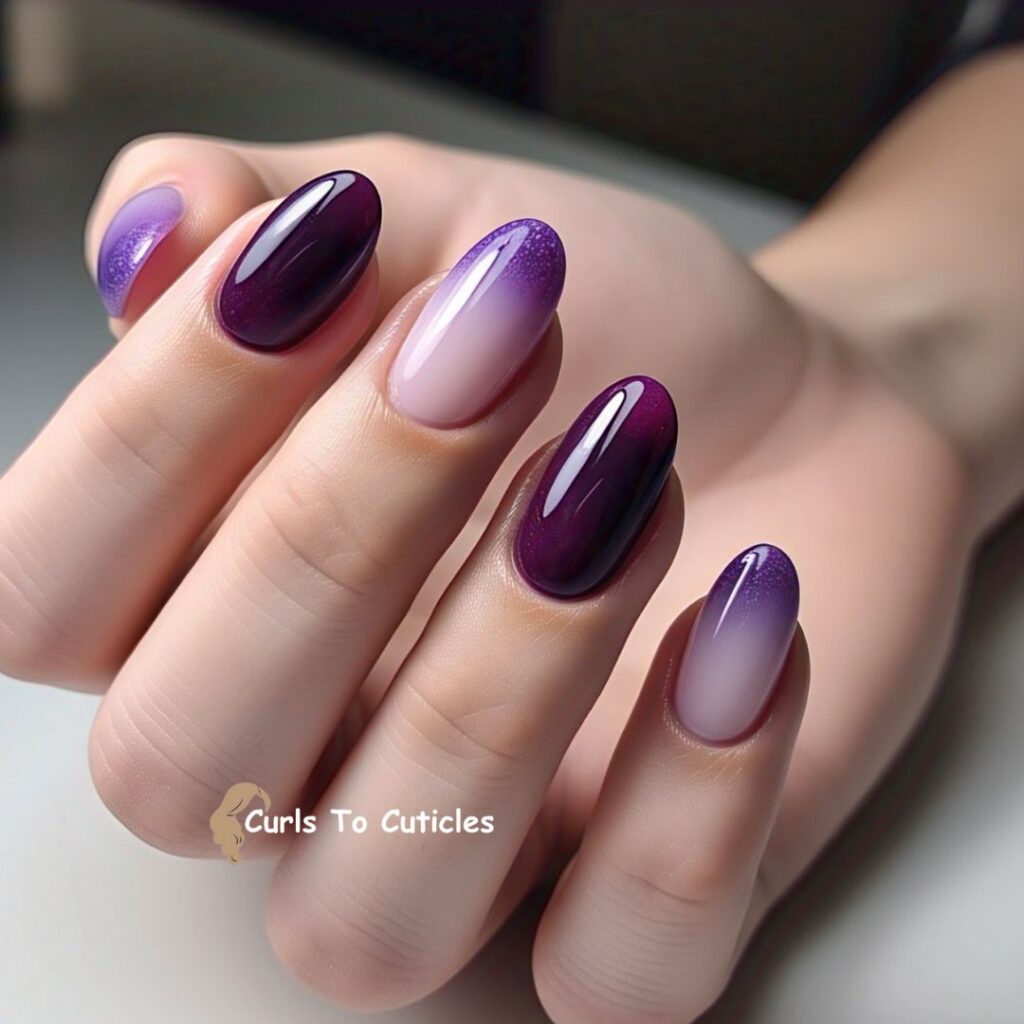
I blend deep plum to lilac in an ombre effect. This mimics the color range found in natural amethyst crystals.
25. Amethyst Chunk Accents
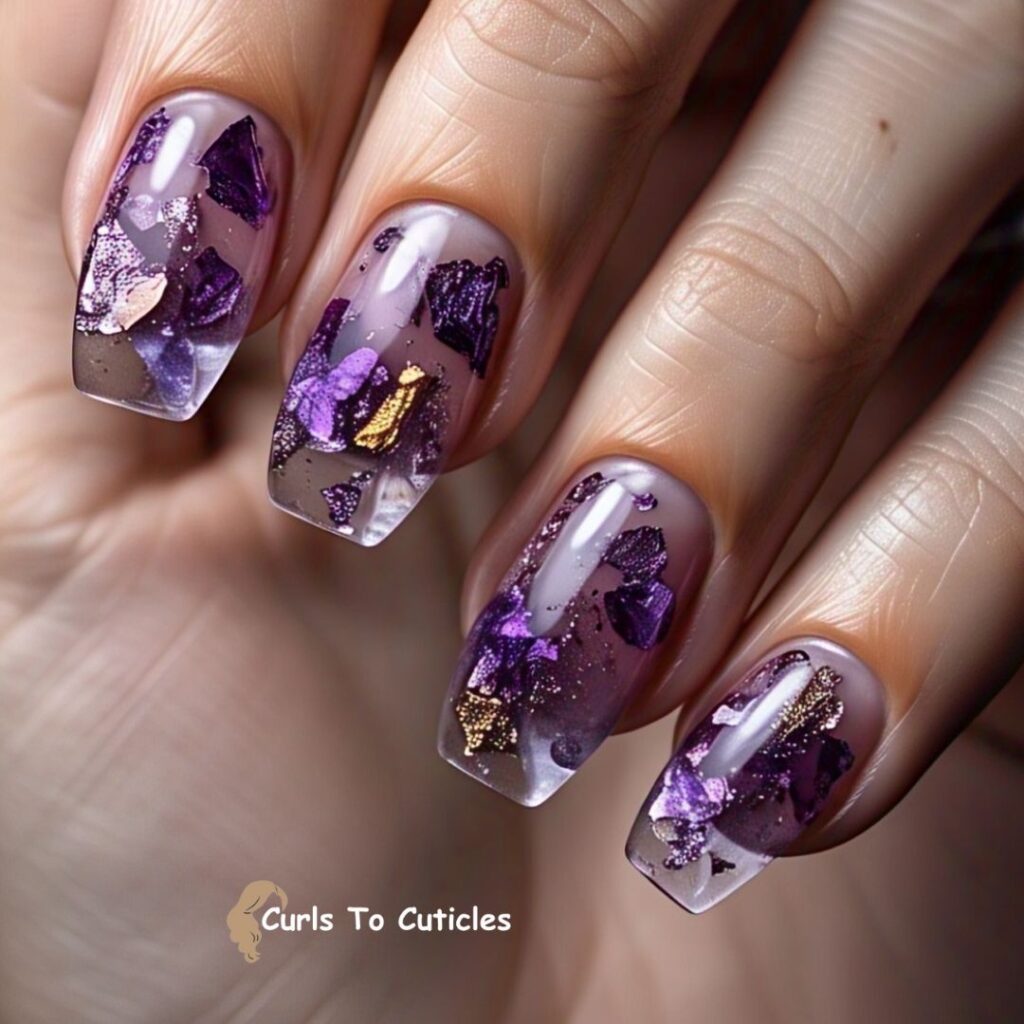
I glue small pieces of purple foil or dried flower petals under a clear coat to resemble raw amethyst textures.
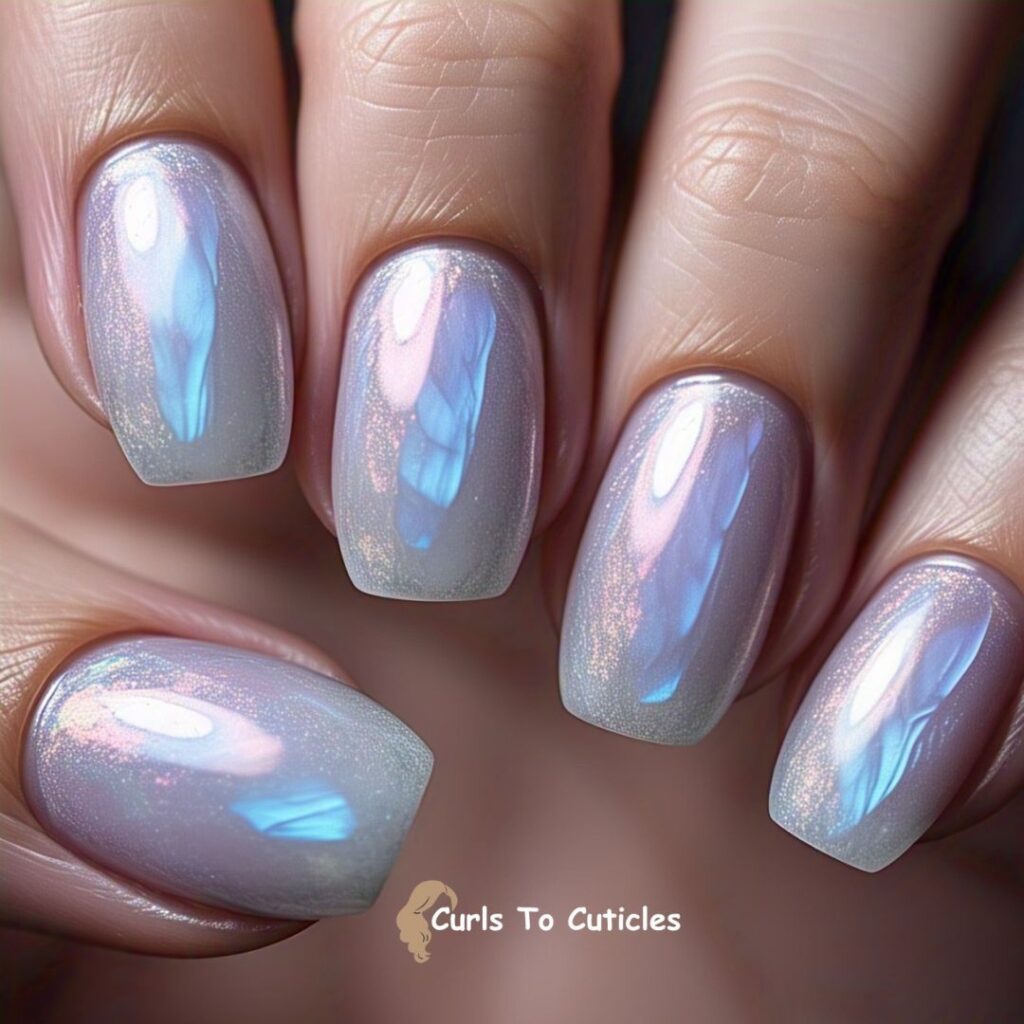
Opal-Inspired Nail Art Designs
26. Iridescent White Base
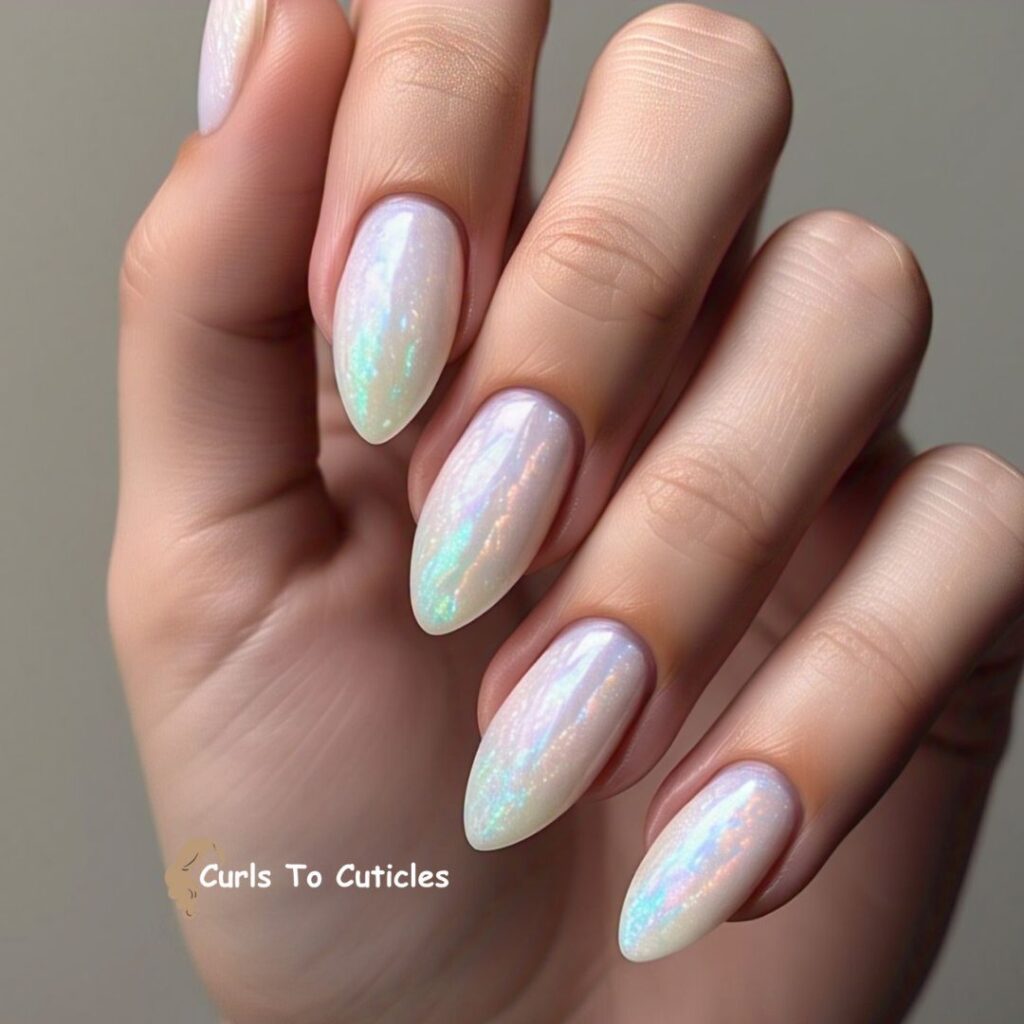
I use pearlescent polish that reflects pink, green, and blue. It mimics the shifting colors seen in opal.
27. Opal Shimmer Flakes
I layer fine shimmer flakes over a white or nude base. The flakes scatter light in different directions.
28. Subtle Opal French
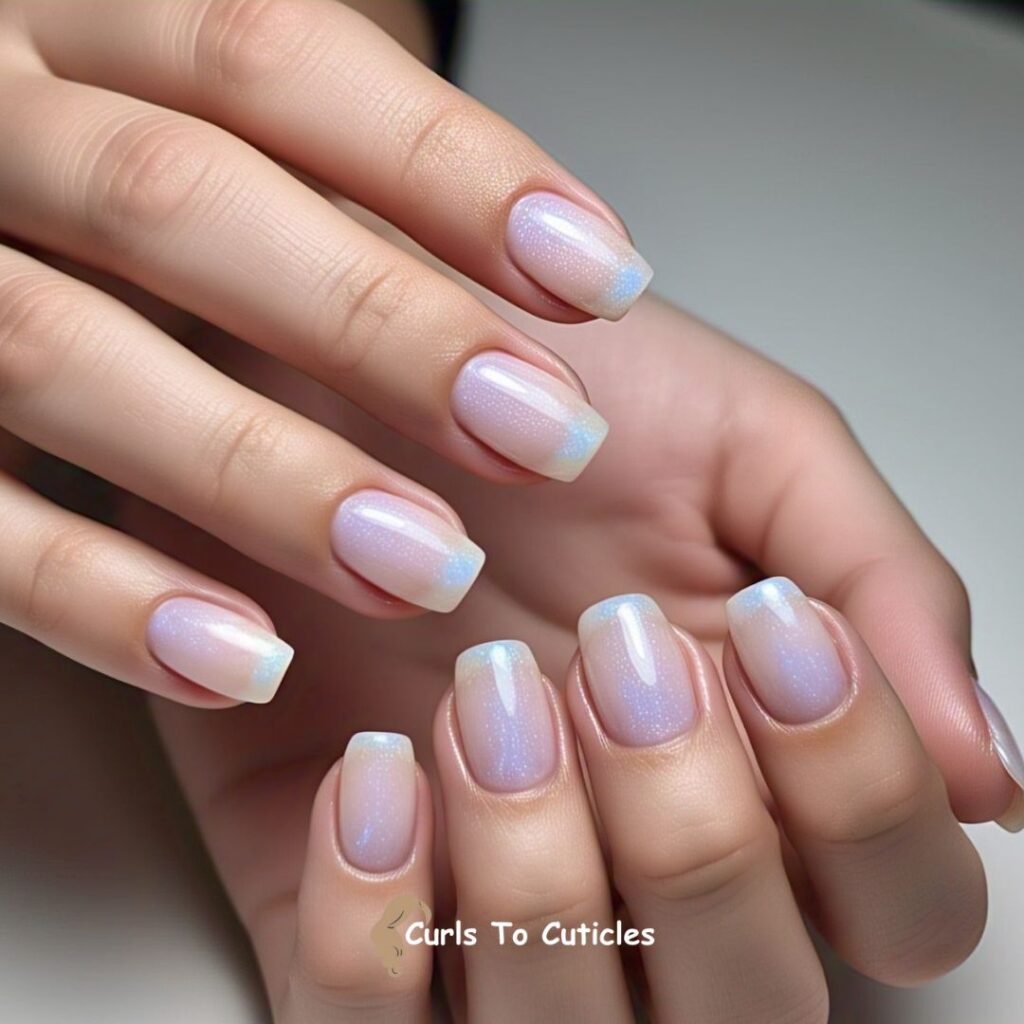
I apply opalescent polish only on the tips of the nails for a subtle but eye-catching French manicure.
29. Milky Opal Overlay
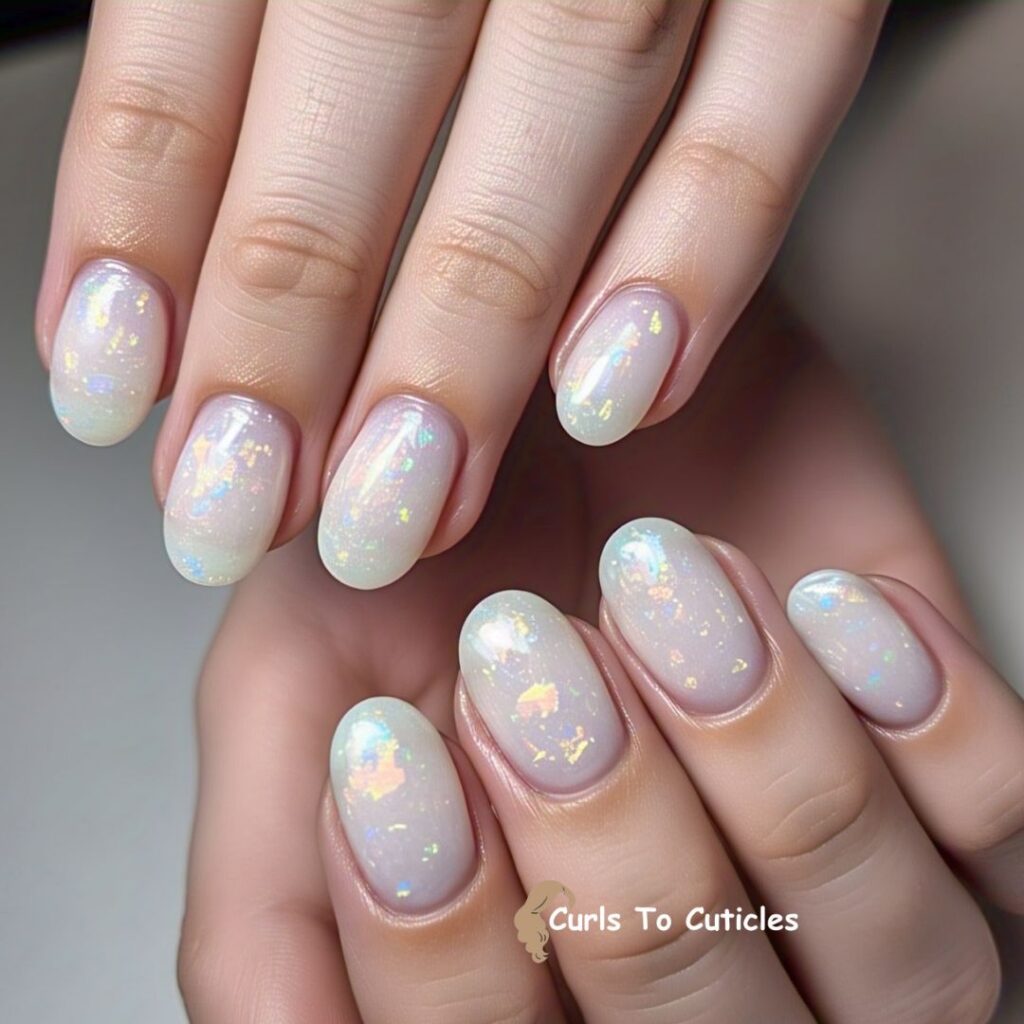
I paint a sheer milky base with opal foil pieces pressed in. The layered look feels soft and multi-dimensional.
30. Opal Stone Texture
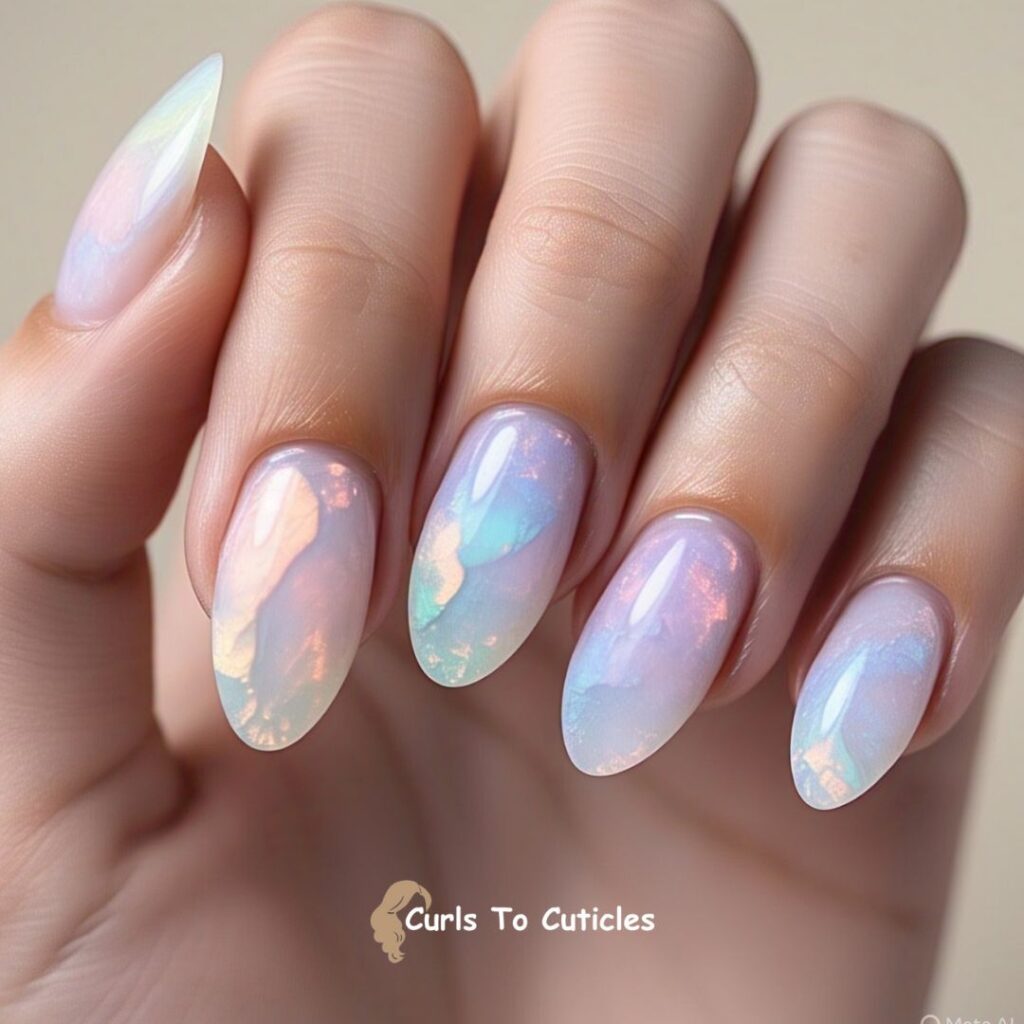
I apply a jelly white base and use a toothpick to swirl in pastel pink, blue, and lavender for a cloudy effect.
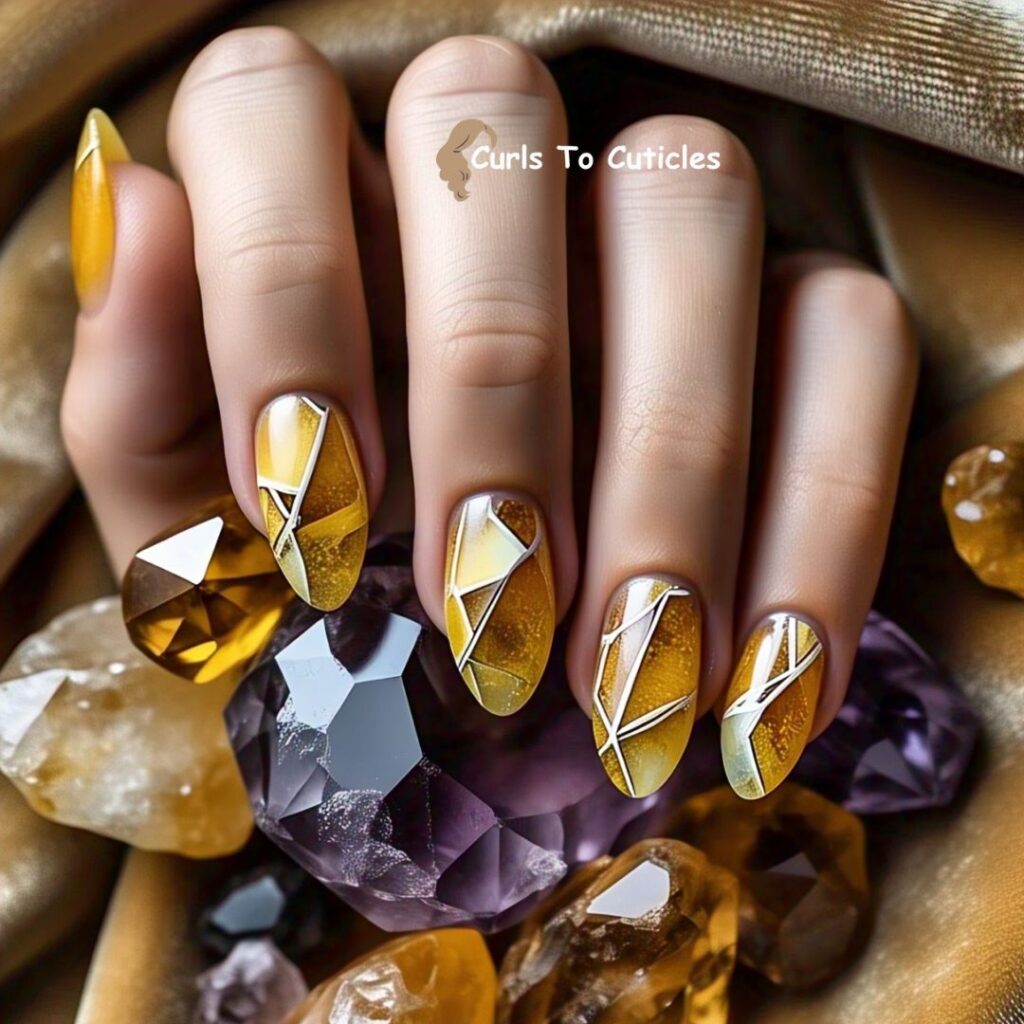
Topaz-Inspired Nail Art Designs
31. Warm Golden Base
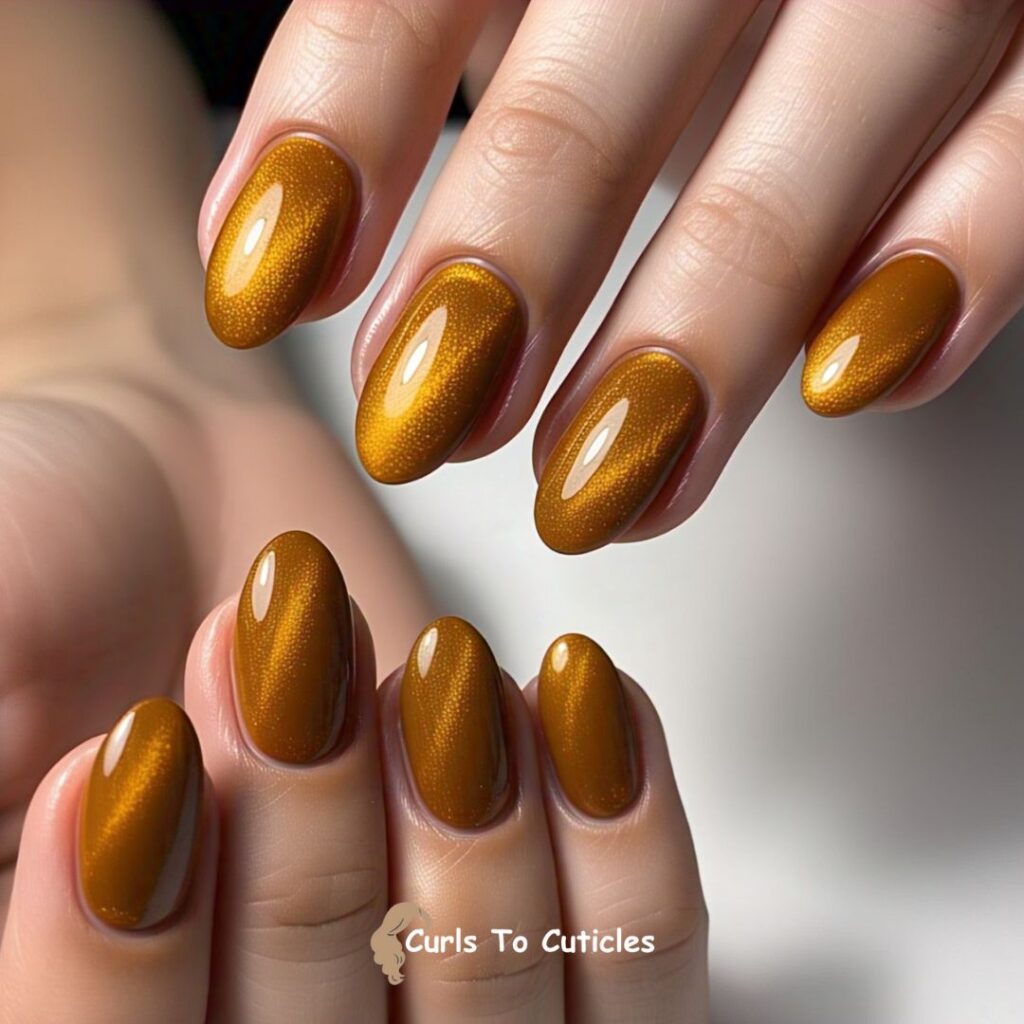
I use amber or golden-yellow polish to reflect topaz’s warm hue. The tone feels rich but still approachable.
32. Topaz Flame Design
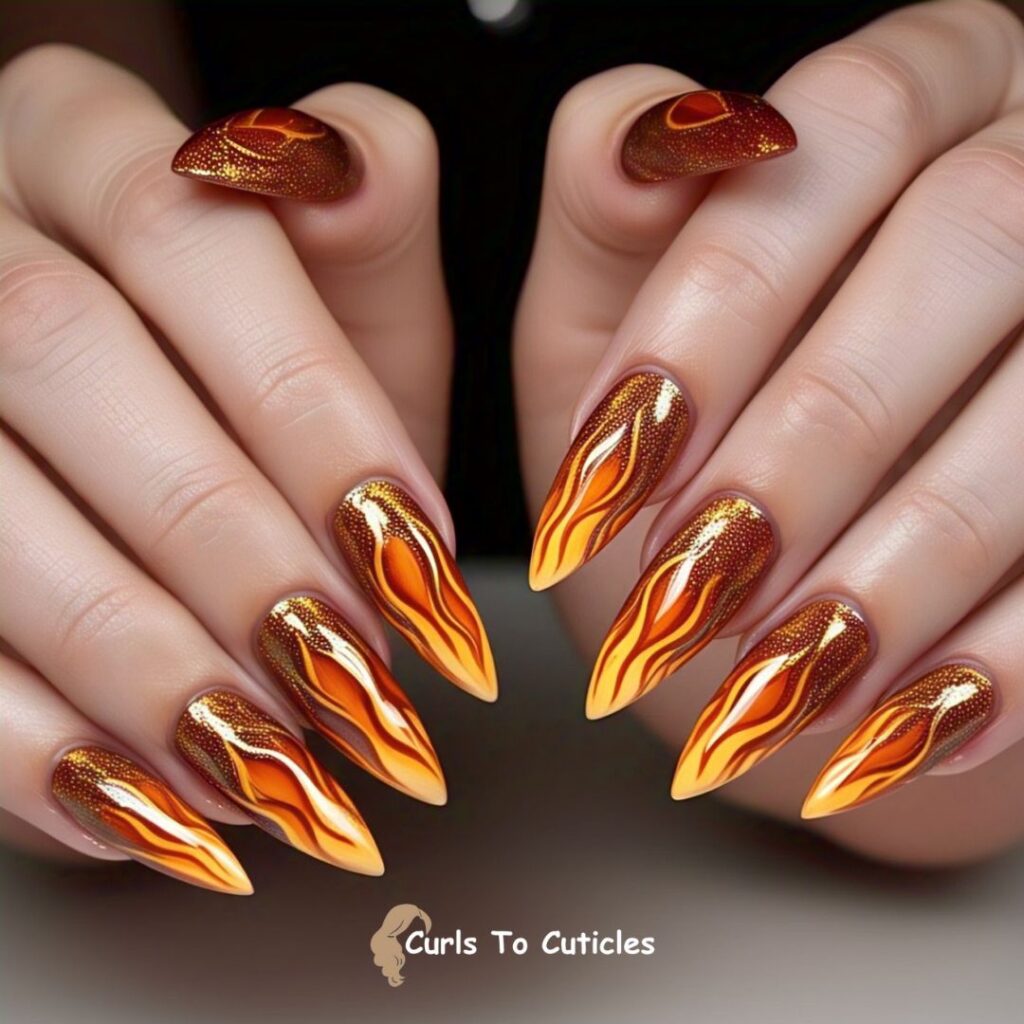
I draw flame patterns in orange and gold over a topaz-colored base. It adds intensity and motion.
33. Foil Accents
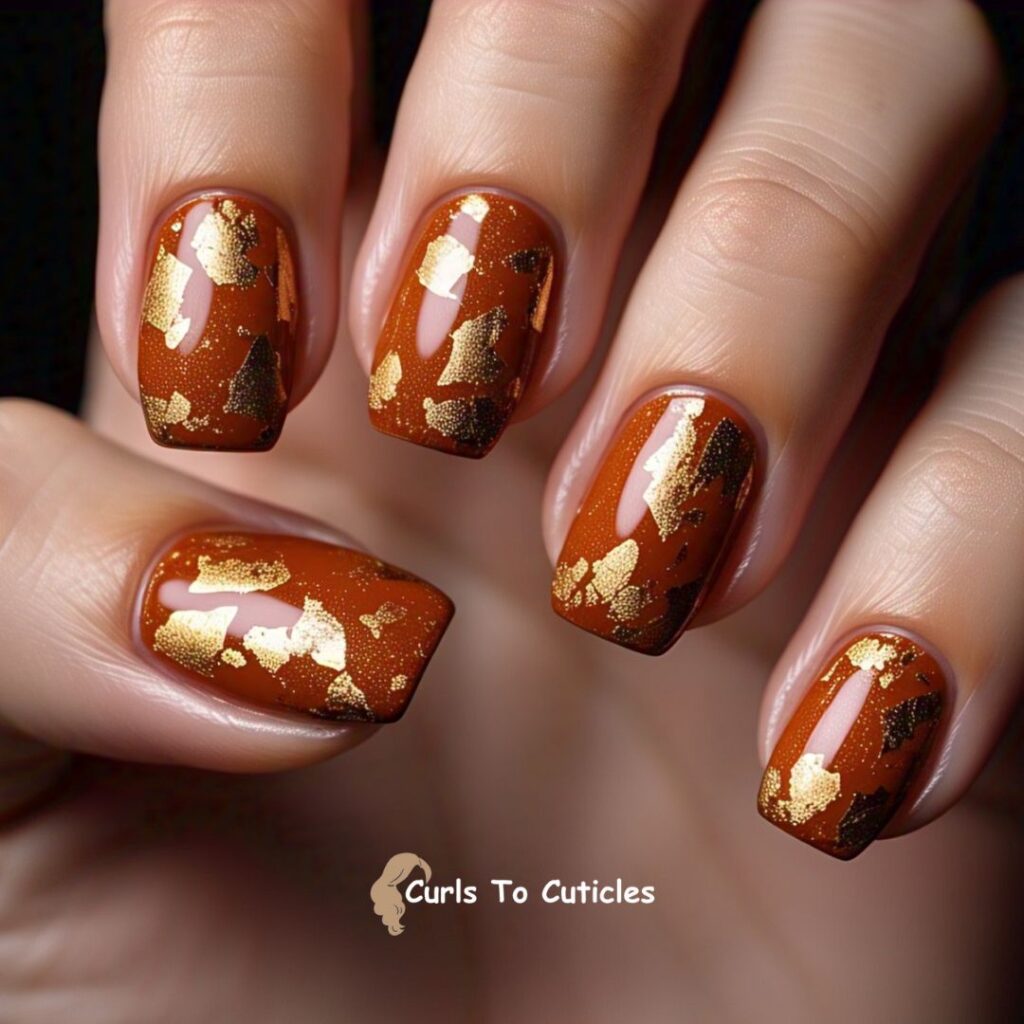
I press small pieces of gold foil onto a burnt orange or golden polish. It gives a cracked-stone look.
34. Burnished Topaz Effect
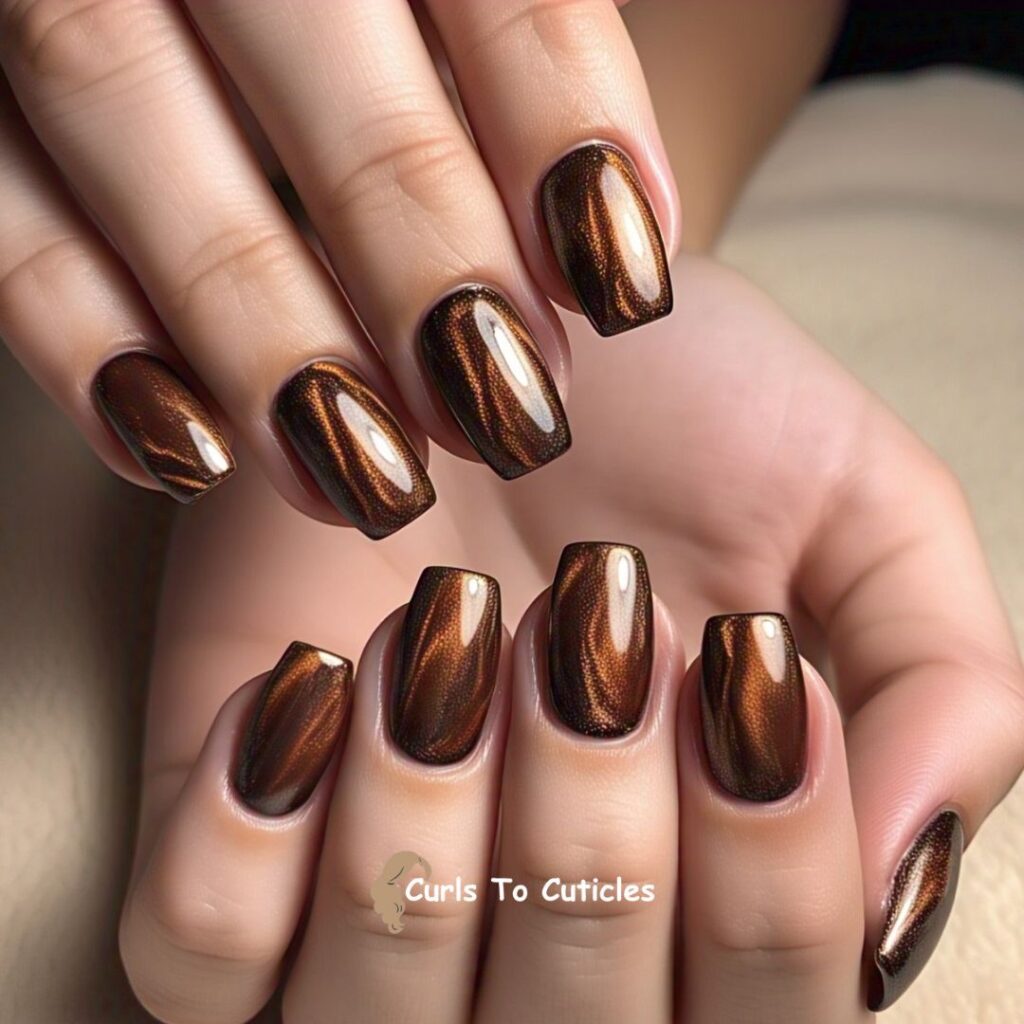
I blend bronze, amber, and copper polish for a layered finish. It reflects topaz’s natural color variations.
35. Topaz Glitter Ombre Nails
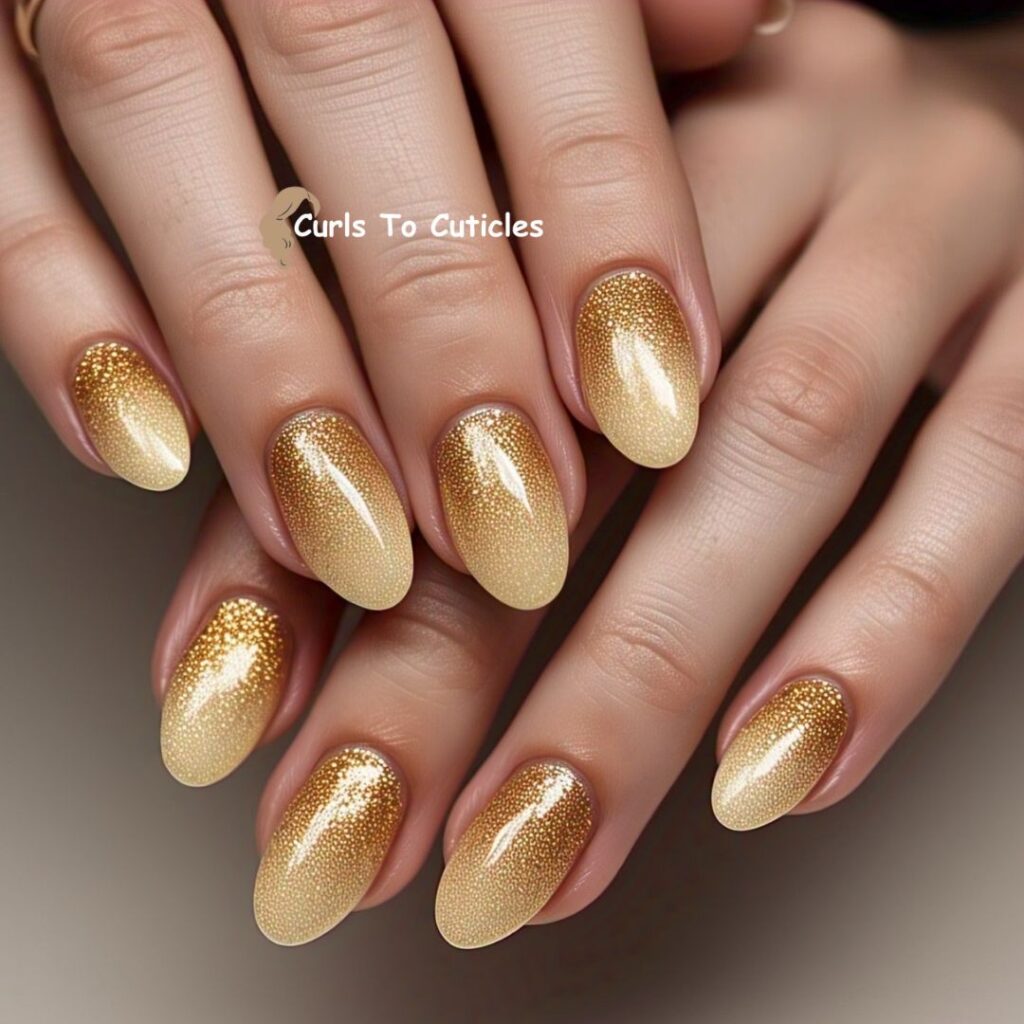
I fade gold glitter into a warm beige or yellow base to give a soft sparkle effect.
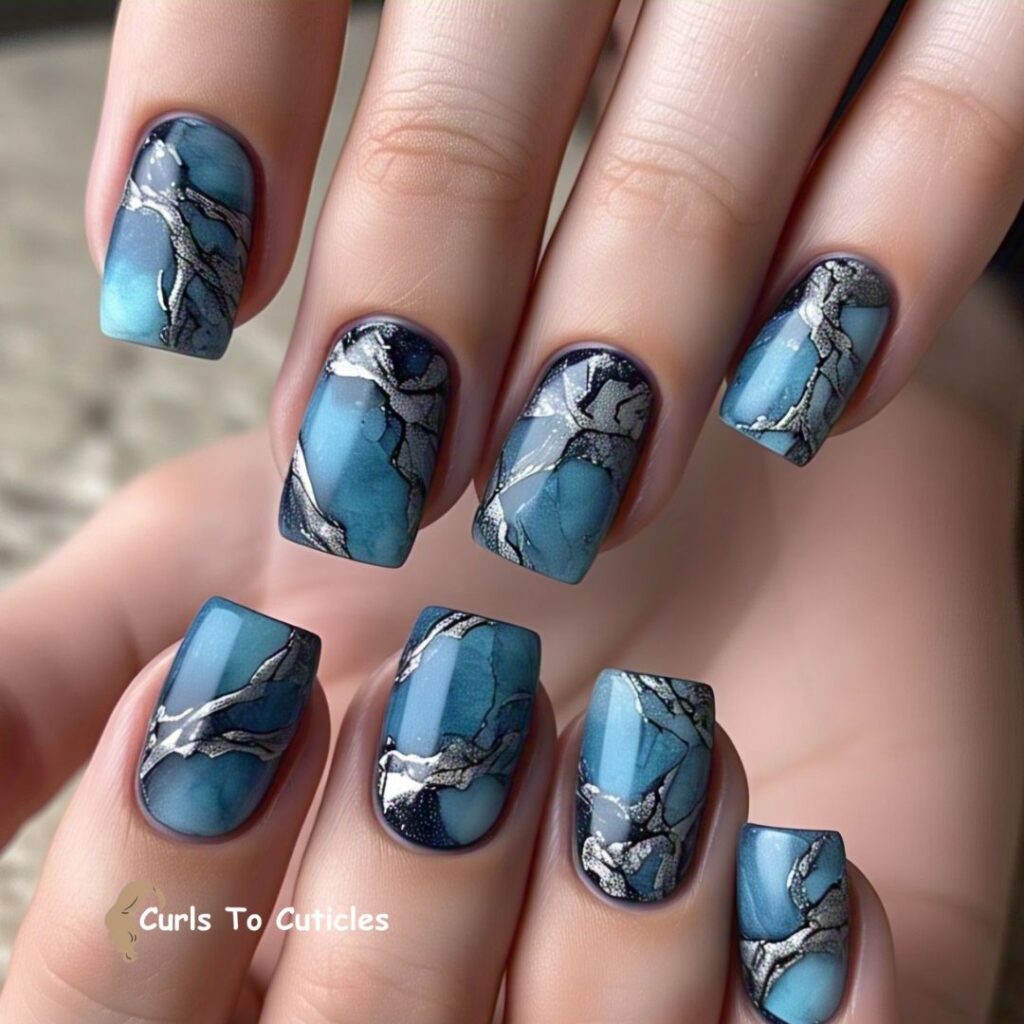
Turquoise-Inspired Nail Art Designs
36. Bright Turquoise Base
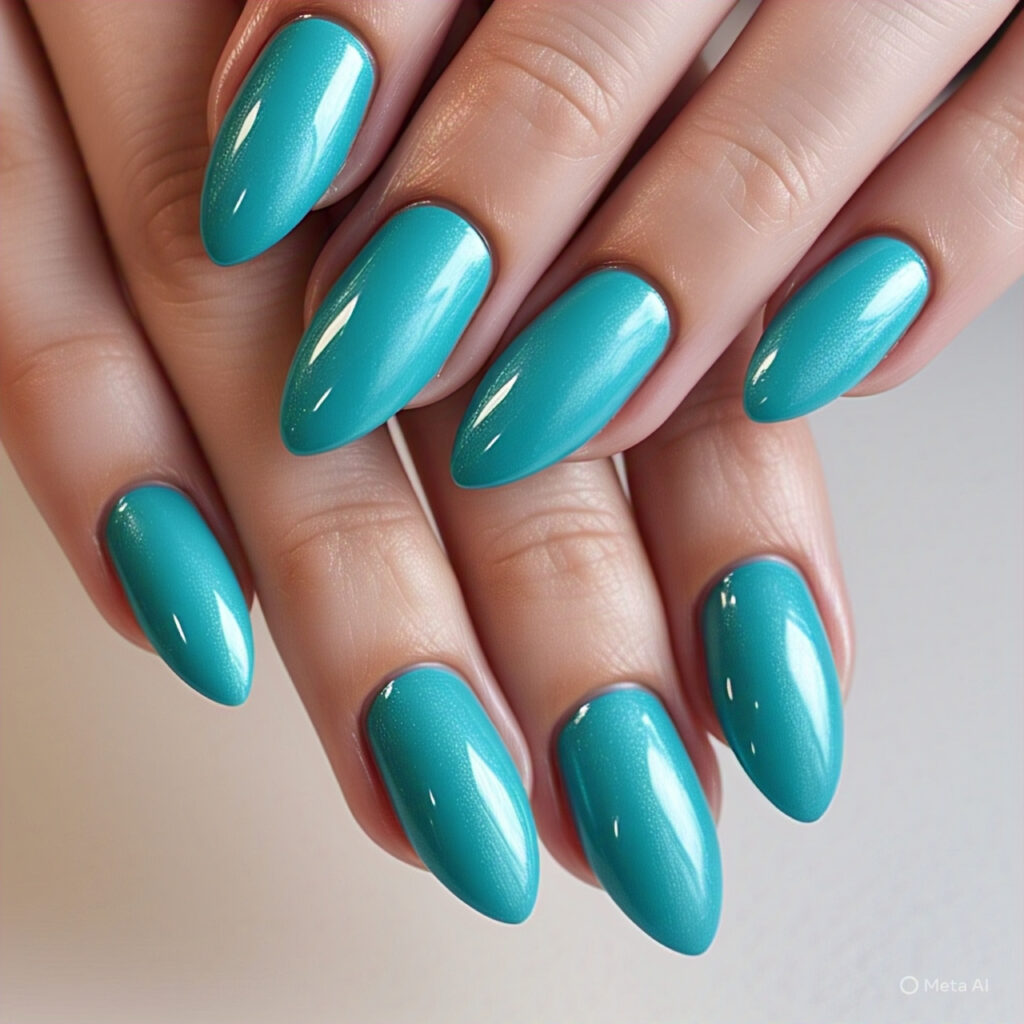
I use bright aqua or turquoise polish as a base color. It’s fresh and energetic.
37. Black Veins
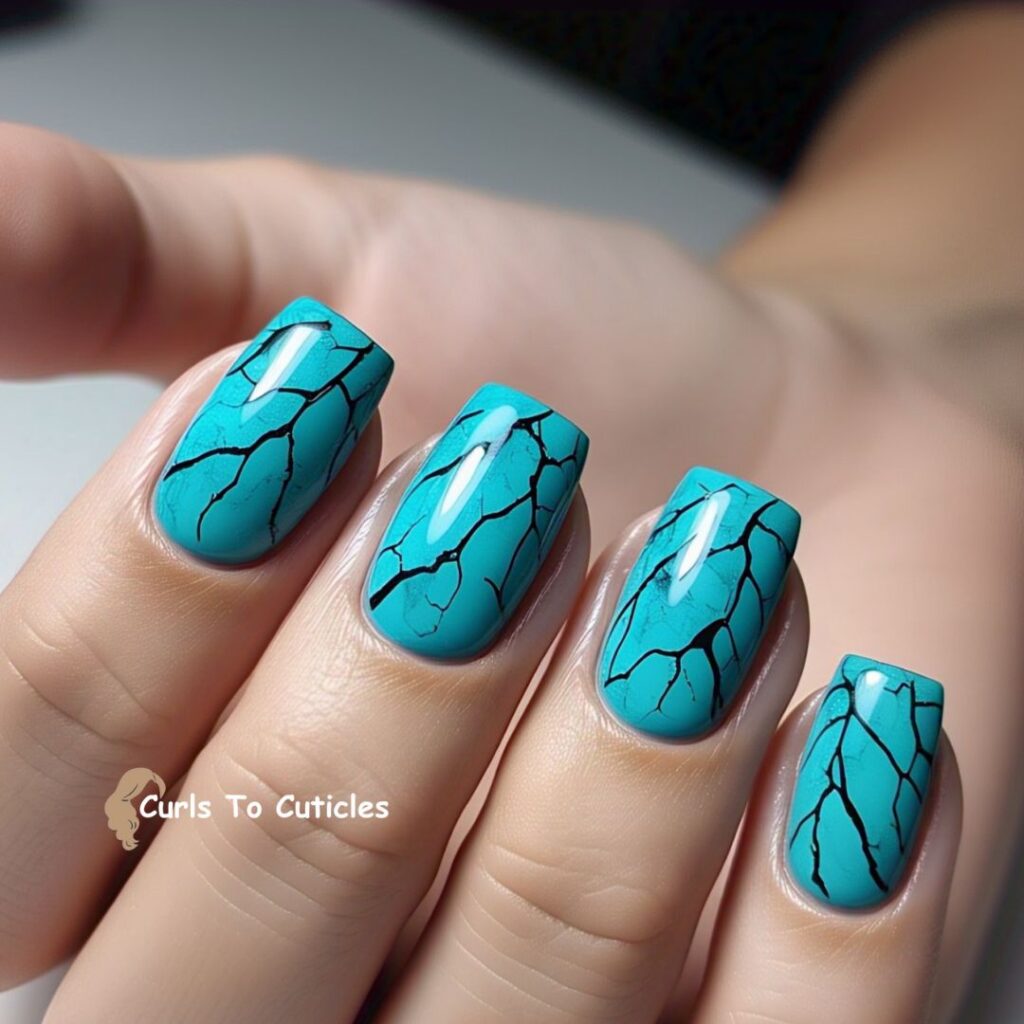
I draw thin black lines across the turquoise base to mimic the natural matrix found in turquoise stones.
38. Turquoise and Gold Combo
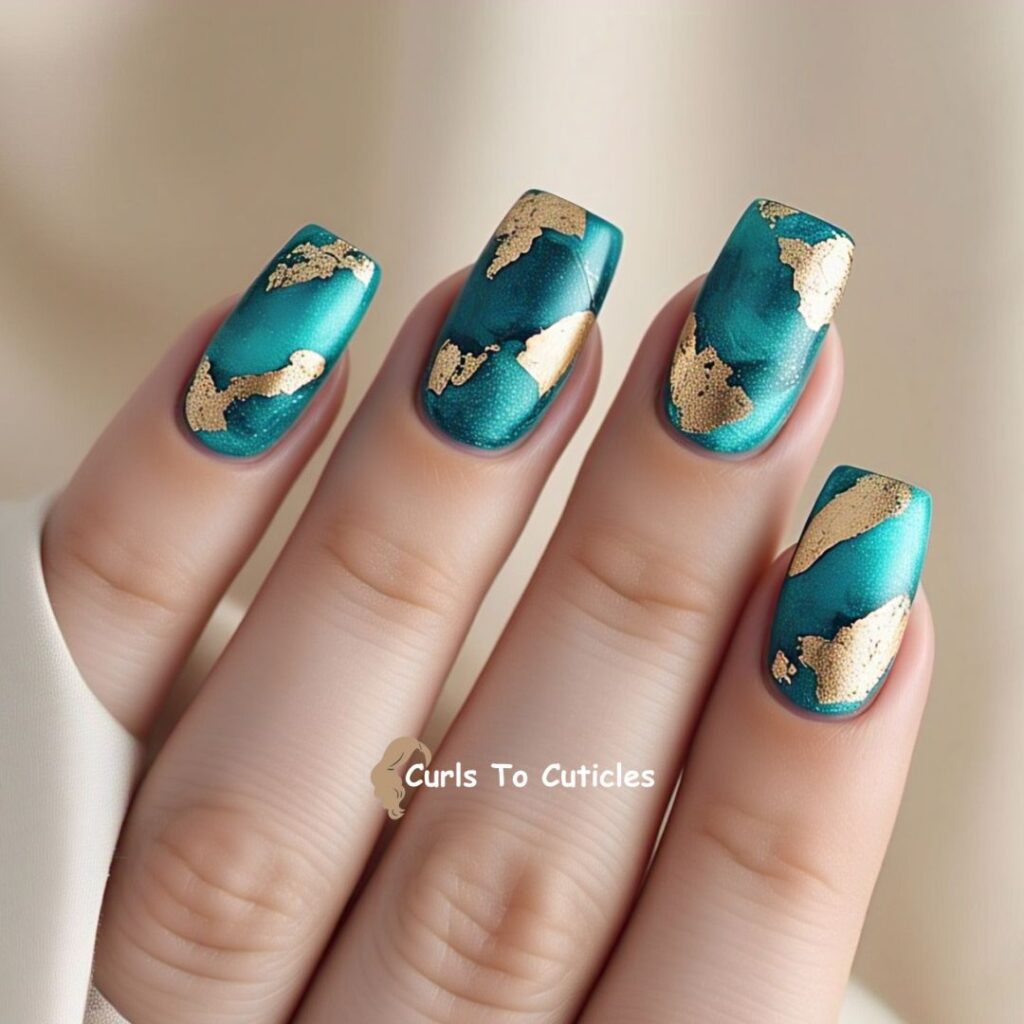
I pair turquoise nails with gold foil or accents. This enhances the contrast and makes the colors pop.
39. Raw Stone Texture
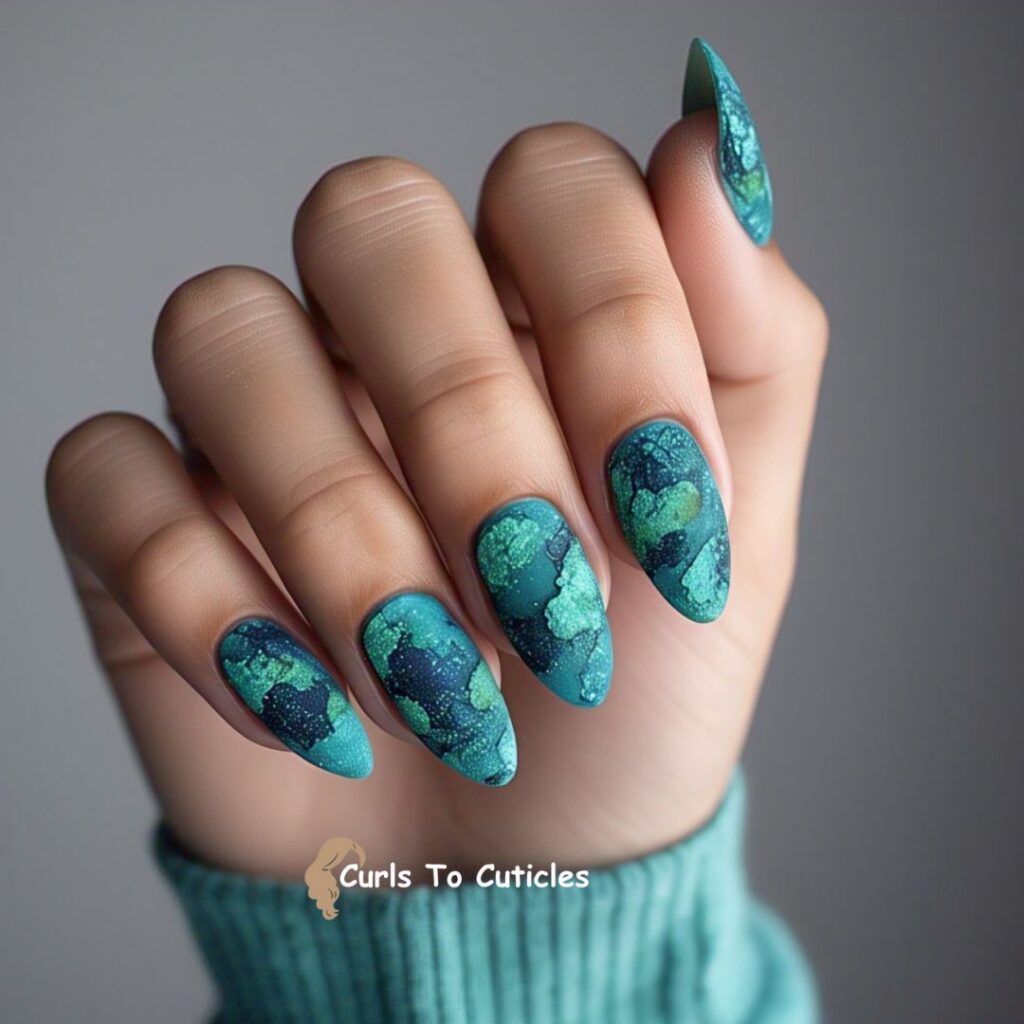
I dab dark blue and light green onto turquoise polish for a raw mineral appearance.
40. Matte Turquoise Look
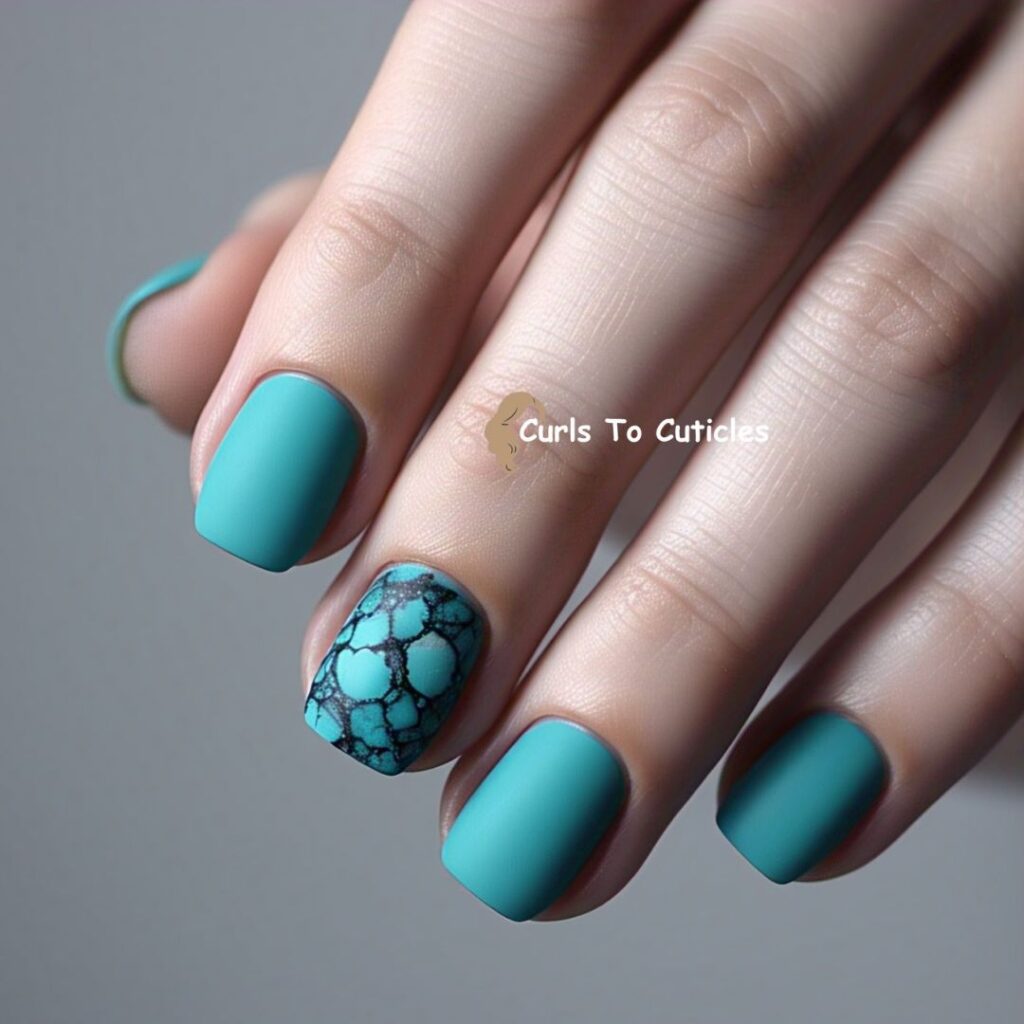
I go for a matte finish to tone down the brightness and resemble unpolished turquoise.
Garnet-Inspired Nail Art Designs
41. Deep Wine Red Base
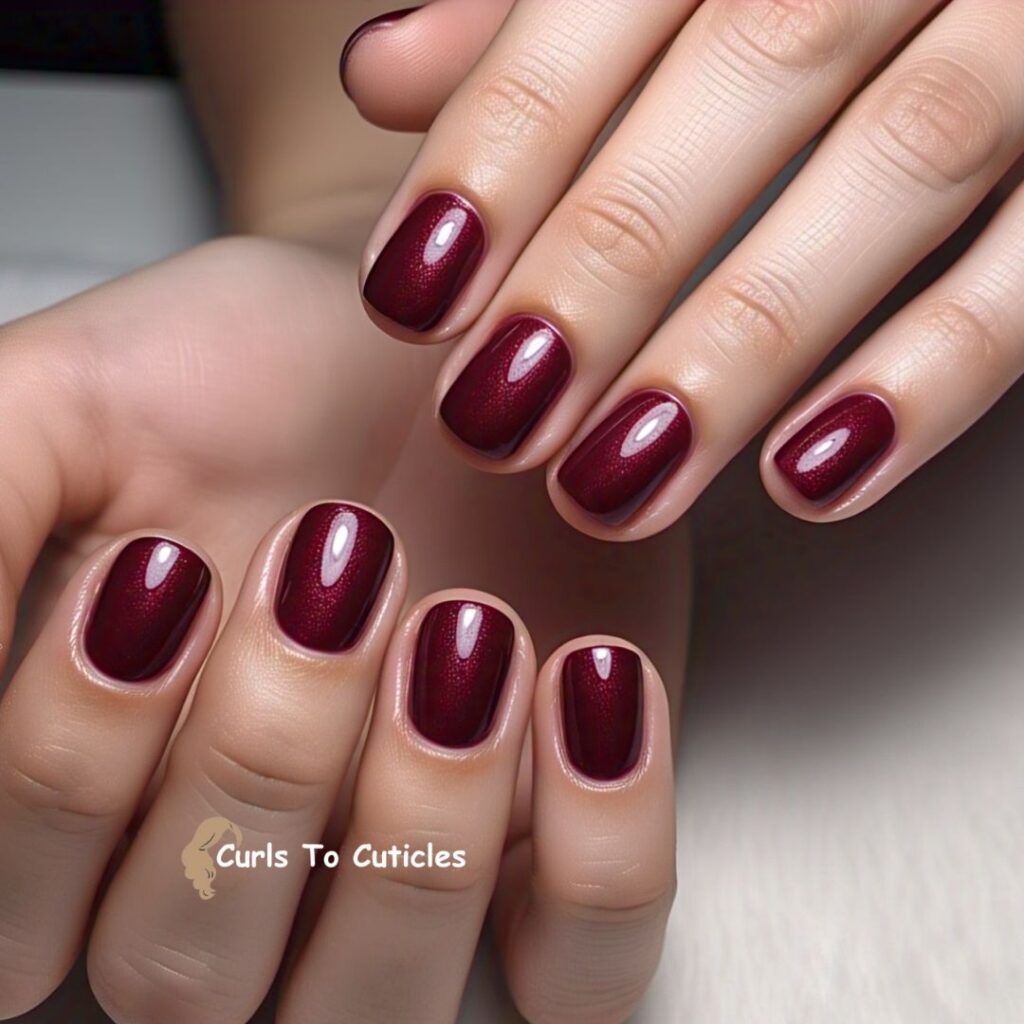
I use a burgundy or dark cherry polish to mimic garnet’s rich tone. Two coats give full depth.
42. Glossy Garnet Shine
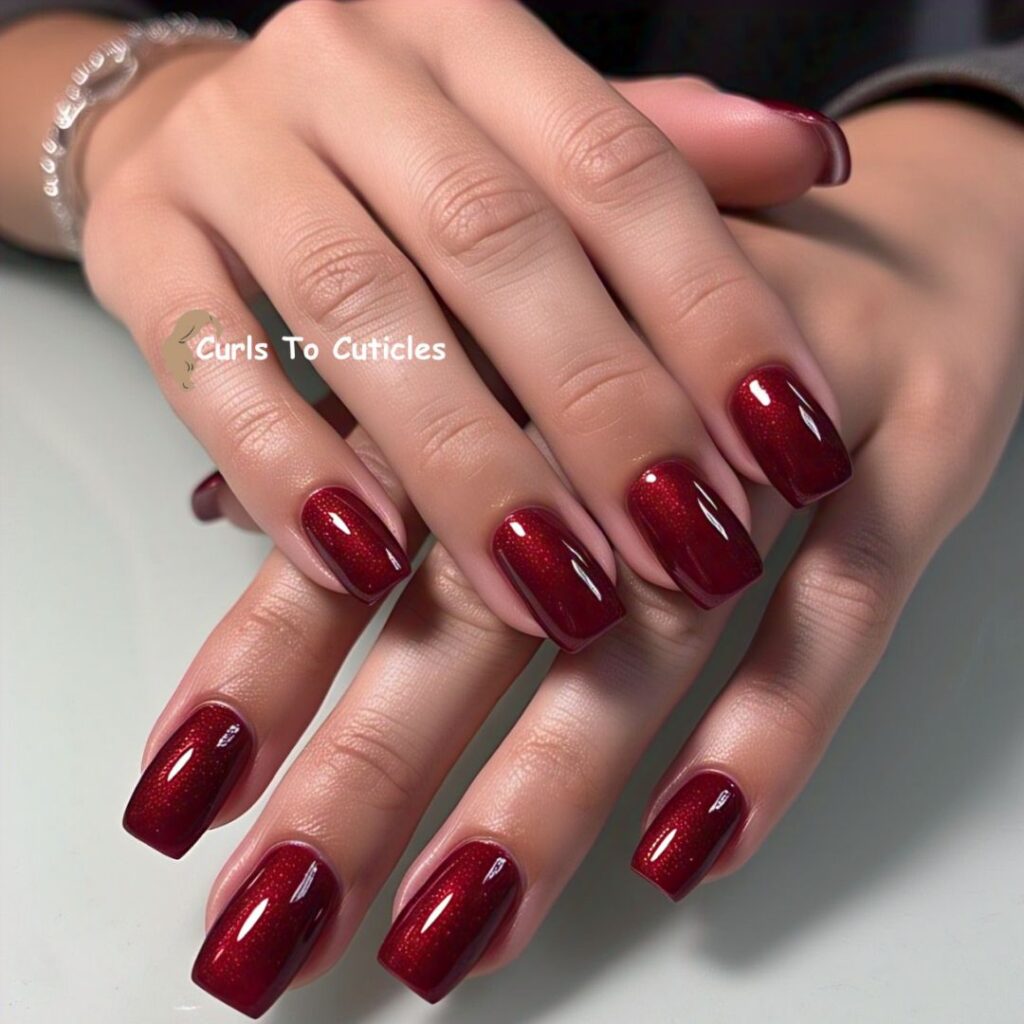
I apply a deep red base with a high-shine topcoat to create a gemstone glow.
43. Garnet Jewel Nails

I add tiny garnet-colored rhinestones at the cuticle area on a neutral nail base.
44. Black and Garnet Blend
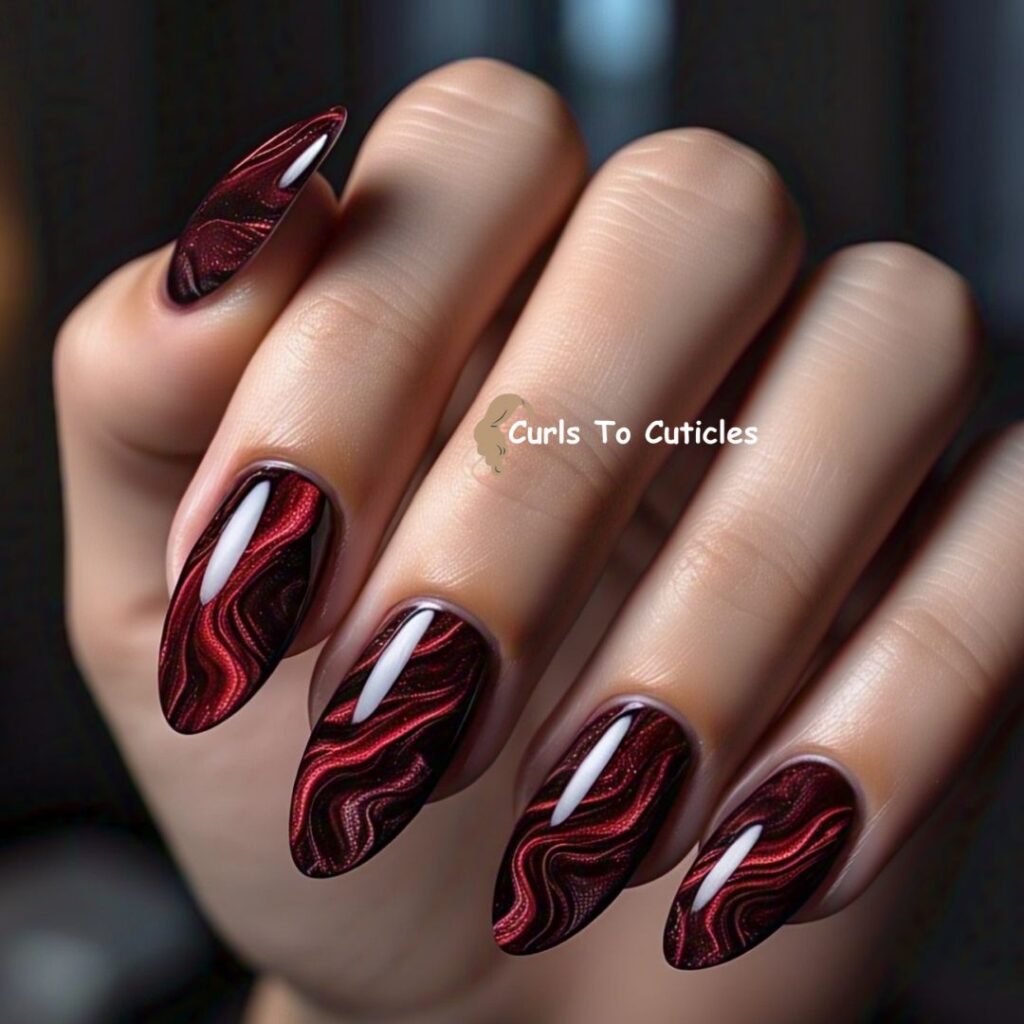
I swirl black and deep red polish together for a bold, smoky garnet effect.
45. Garnet Crystal Tip Accent
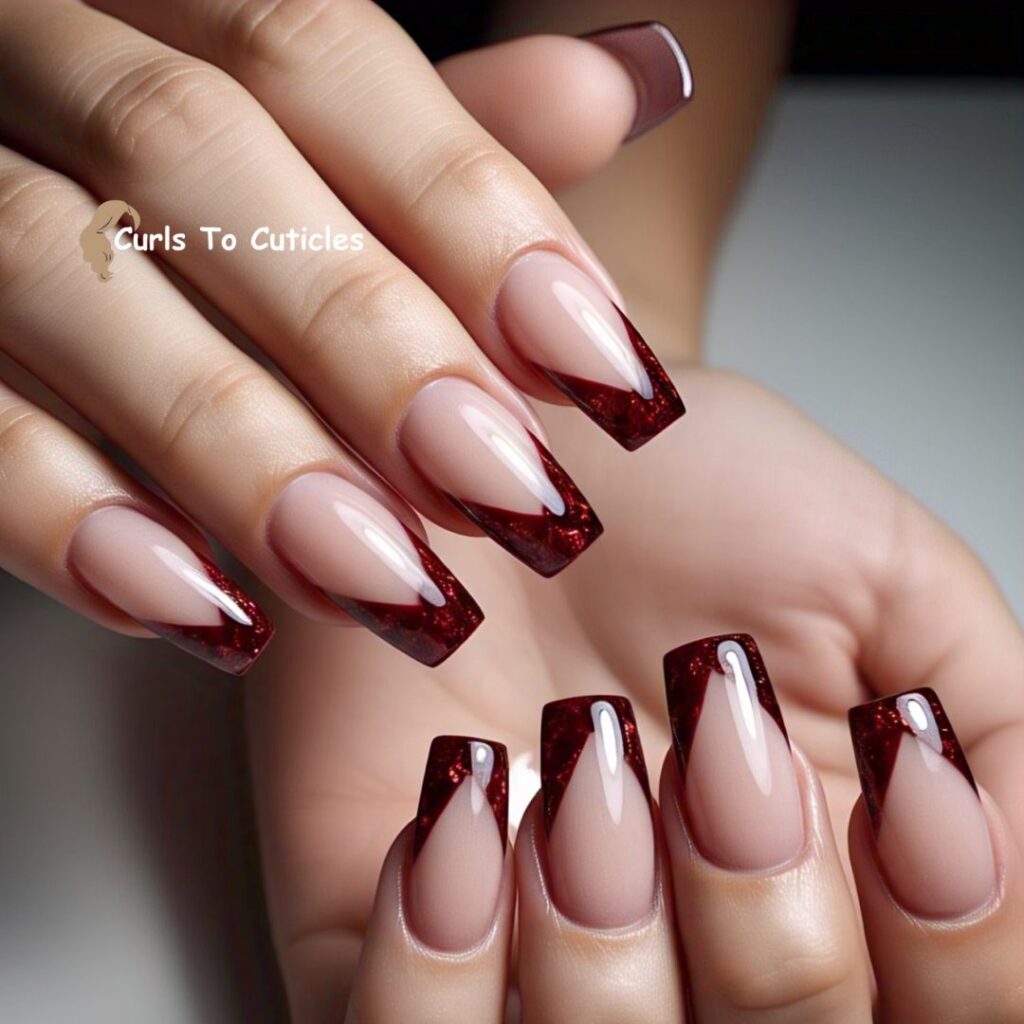
I paint nails nude and add a strip of deep red along the tips to resemble raw garnet edges.
Aquamarine-Inspired Nail Art Designs
46. Soft Blue Wash
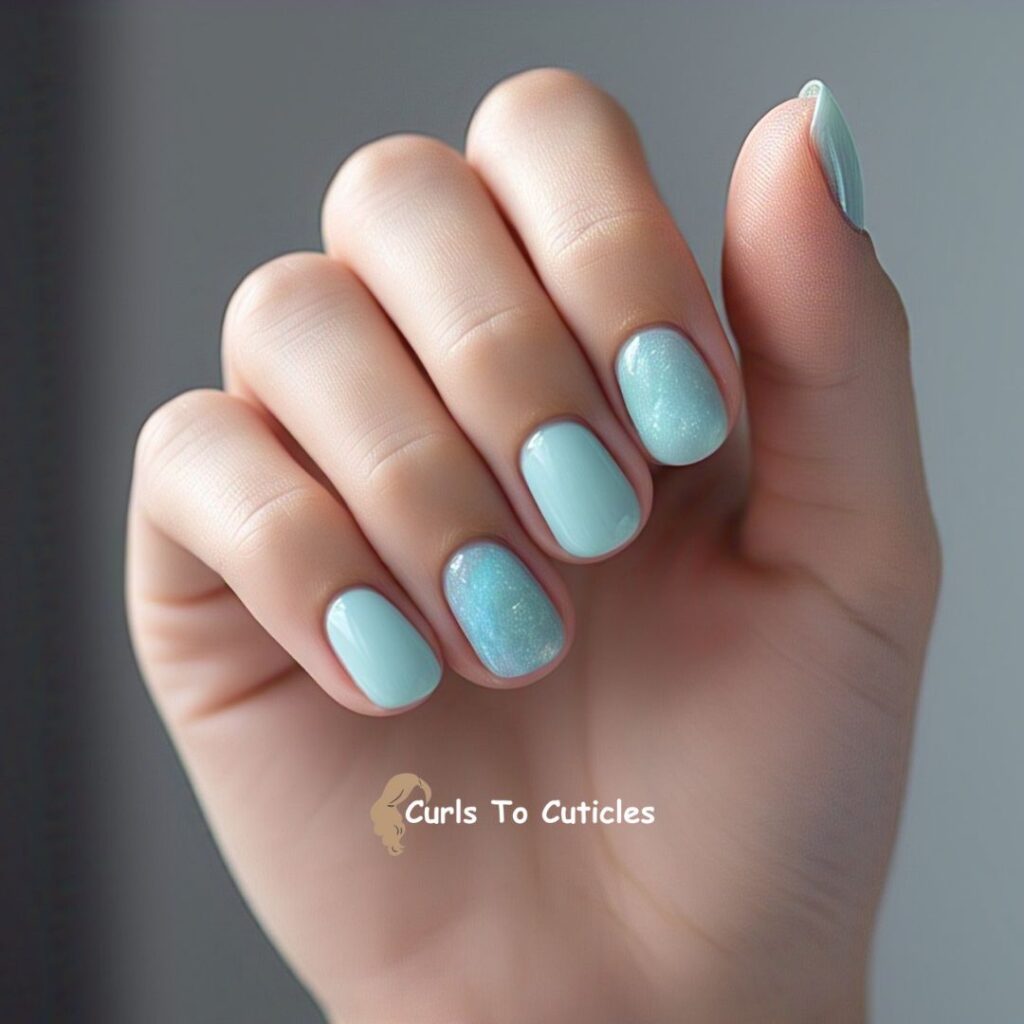
I use pale aqua polish to mimic aquamarine’s water-clear tone. It feels calm and clean. You can add glitters to one or two nails if you want your nails to be funky.
47. Ocean-Inspired Swirls

I swirl blue and white polish to mimic the movement of water, echoing aquamarine’s ocean feel.
48. Glossy Ice Effect
I add a jelly blue layer with silver shimmer to give a cold, crystal-like look.
49. Aquamarine Stone Texture
I sponge on different shades of blue and add subtle silver lines to mimic cracked stone.
50. Matte Blue Finish
I apply a soft, matte sky blue polish for a fresh, natural aquamarine vibe.
Peridot-Inspired Nail Art Designs
51. Lime Green Base
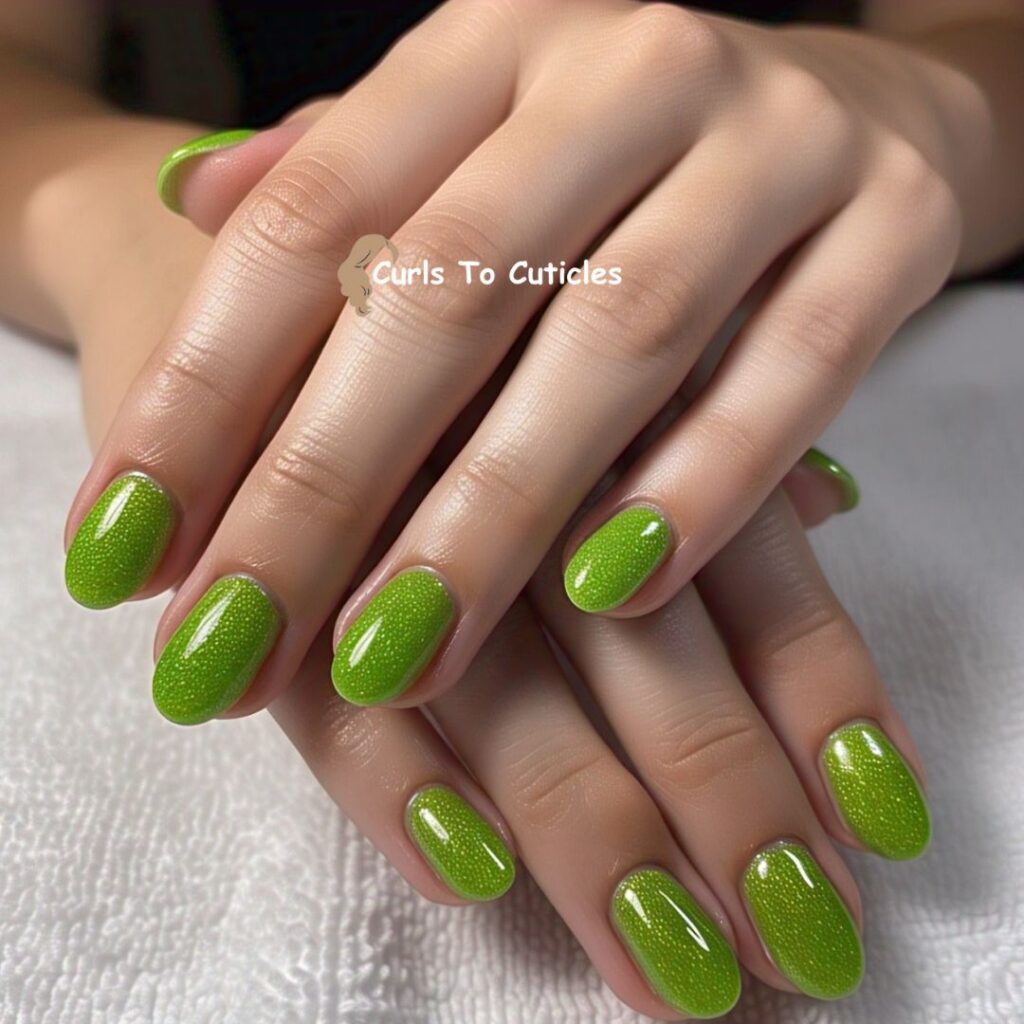
I use bright green polish to match peridot’s distinct hue. It adds brightness to any look.
52. Green Chrome Tips
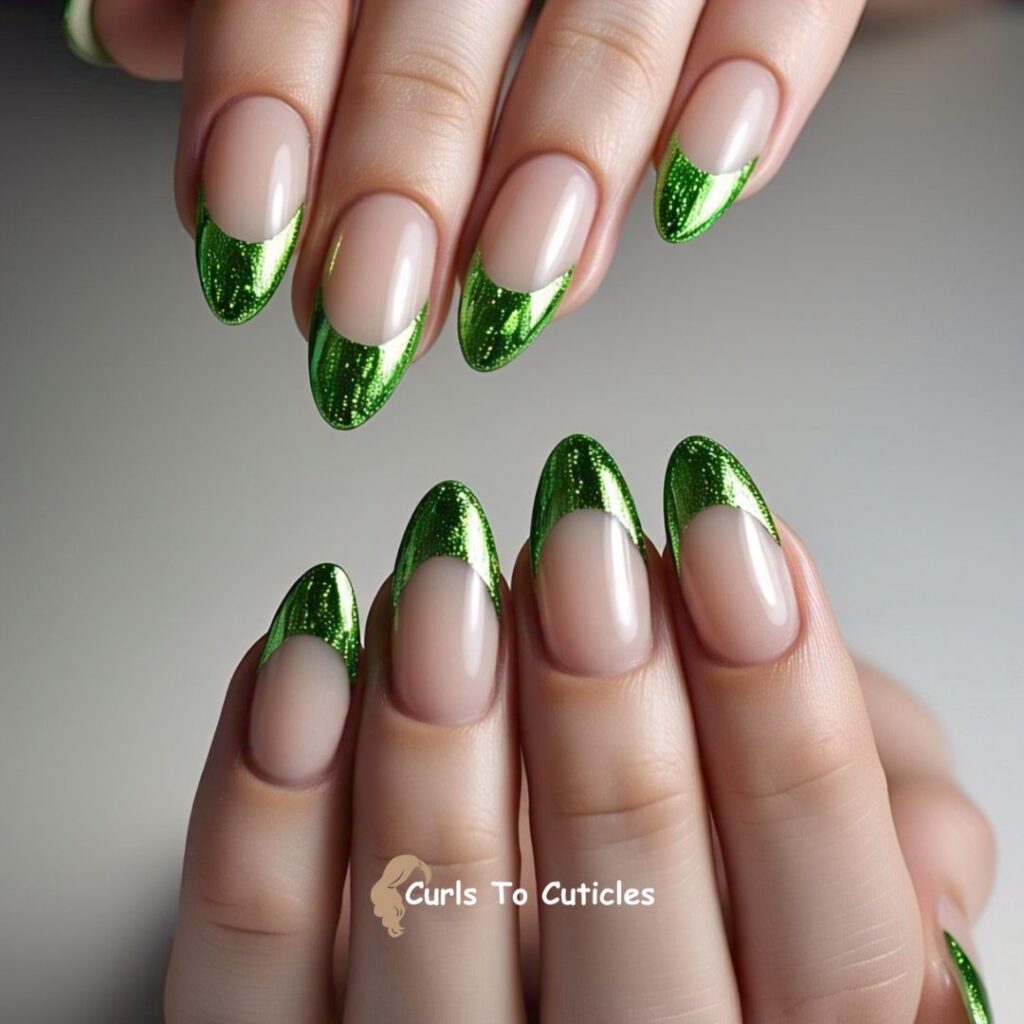
I apply a green chrome polish only to the tips, over a clear or nude base. This adds a sharp metallic edge.
53. Leaf Vein Pattern
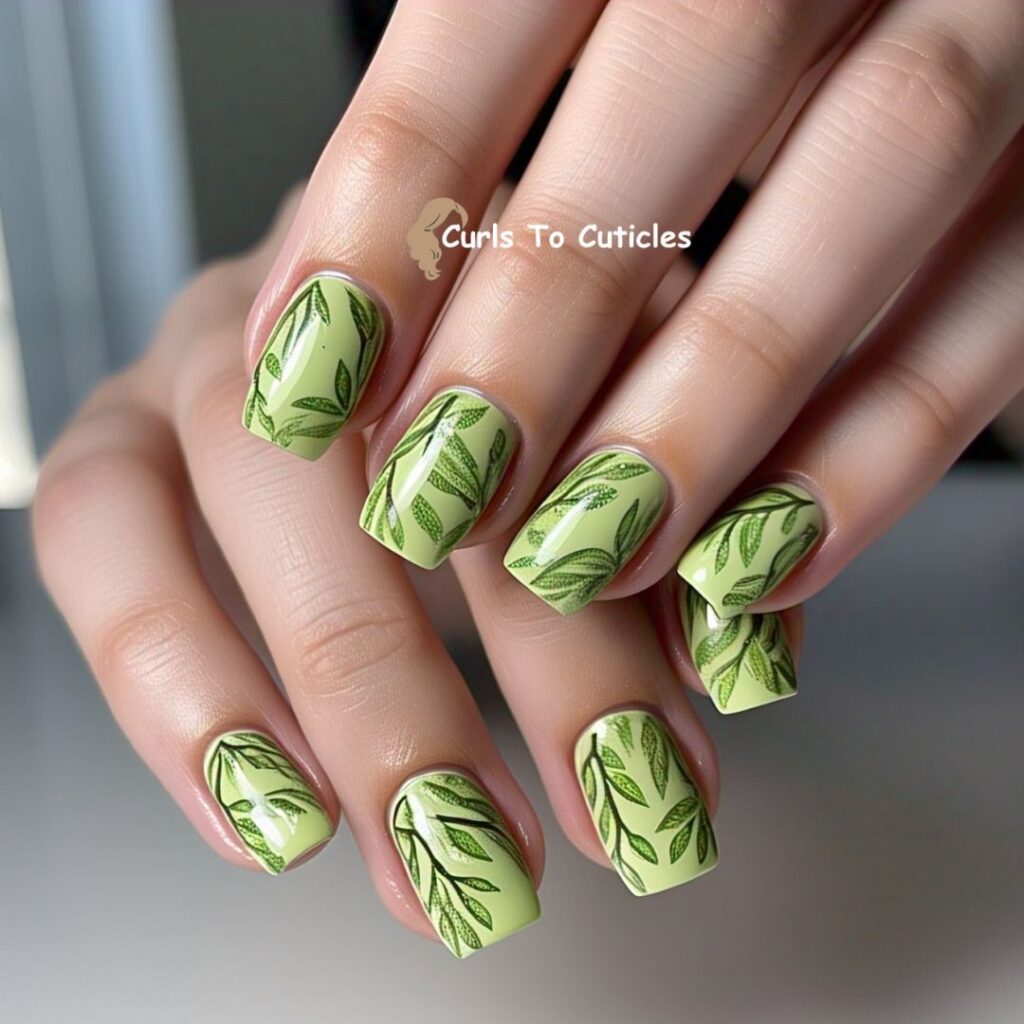
I draw fine green veins over a yellow-green base. This brings out an earthy, natural look inspired by peridot.
54. Shimmer Green Finish
I use shimmer polish in peridot green with reflective particles for a radiant finish.
55. Peridot Gradient Nails
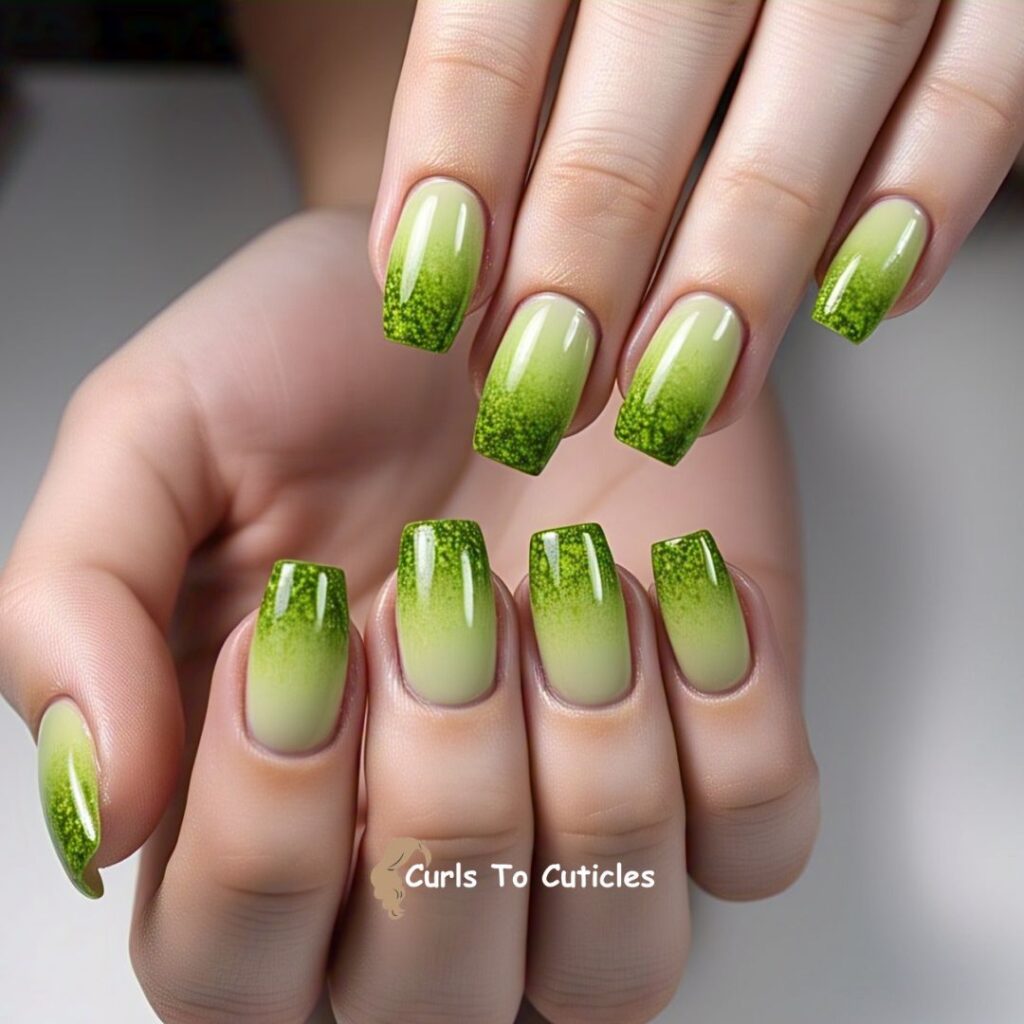
I blend light yellow-green into a deeper olive green to reflect peridot’s color range.
Citrine-Inspired Nail Art Designs
56. Bright Yellow Base

I use a pure yellow polish with golden undertones. It brings out citrine’s joyful energy.
57. Citrine and Gold
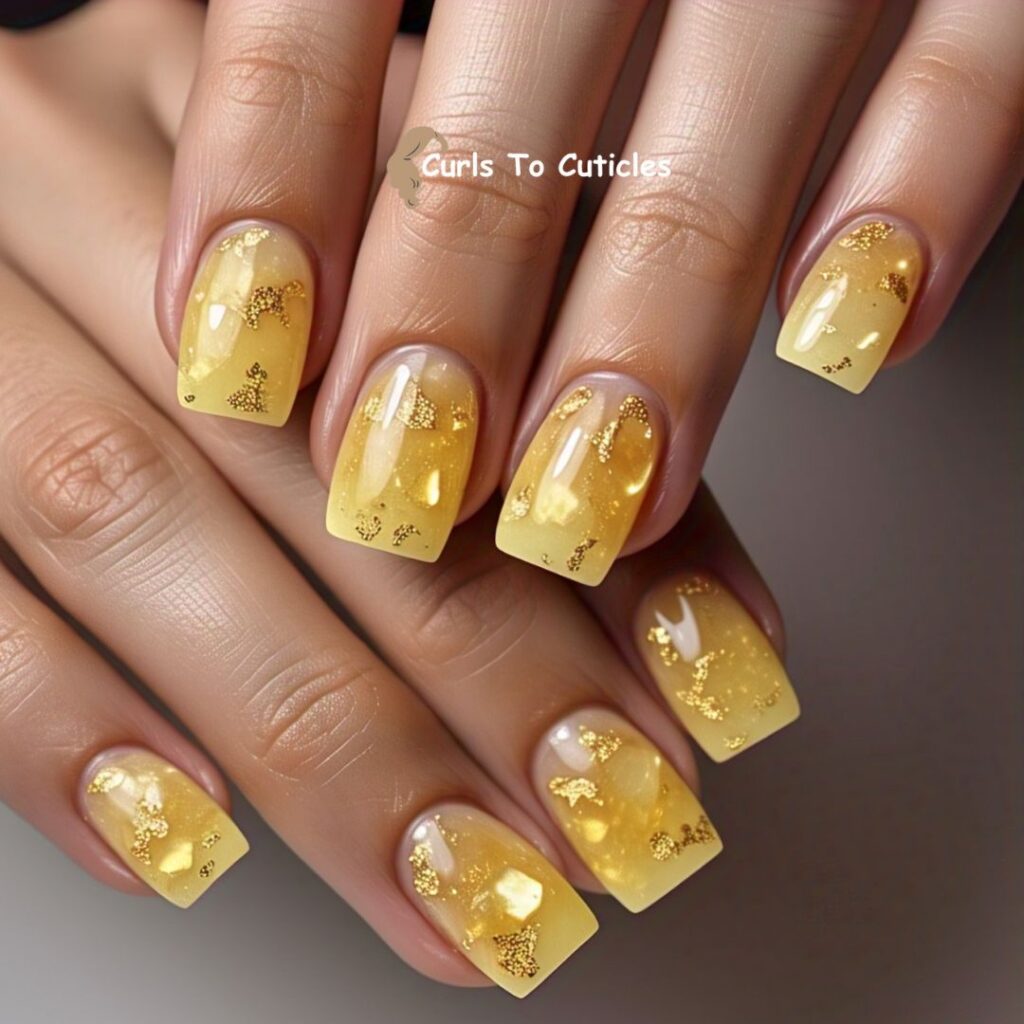
I add tiny gold flecks to a yellow polish for a soft stone-like shine.
58. Orange Citrine Blend

I blend orange into yellow to create a sunset effect, similar to fiery citrine gems.
59. Crystal Shard Art
I draw shard-like patterns using white lines over yellow, to mimic crystal formations.
60. Glossy Citrus Shine
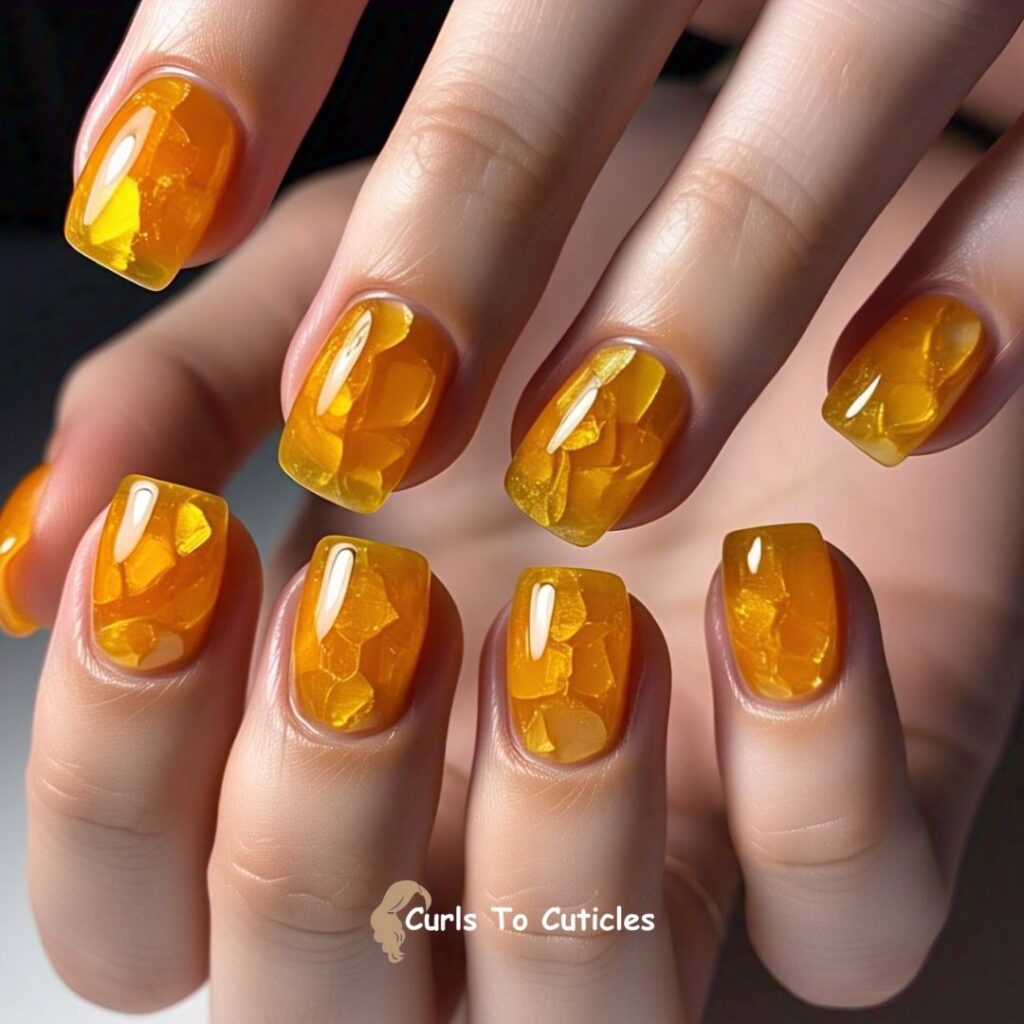
I use a jelly orange-yellow polish and add gloss to give a candied citrine appearance.
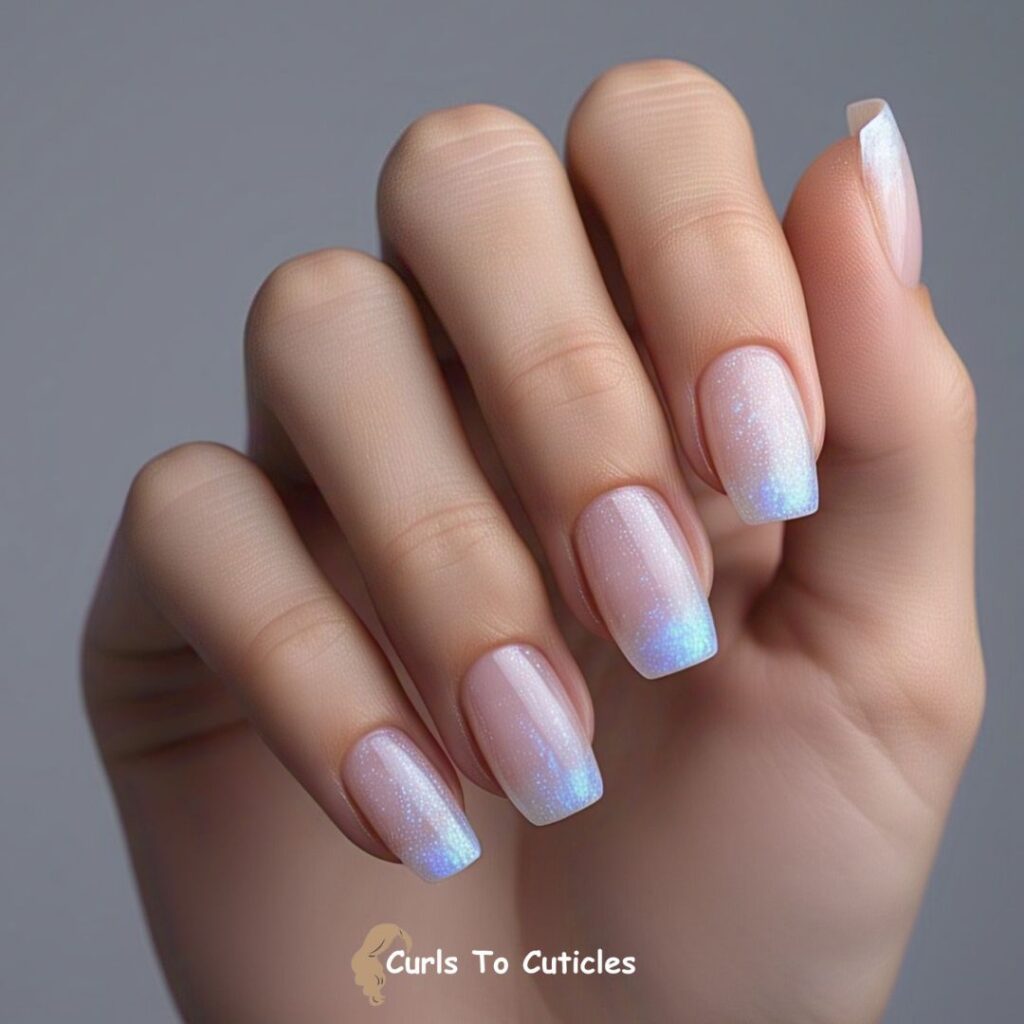
Moonstone-Inspired Nail Art Designs
61. Iridescent White Polish
I use polish with blue, pink, and purple shift to reflect the moonstone’s glow.
62. Cloudy Layers
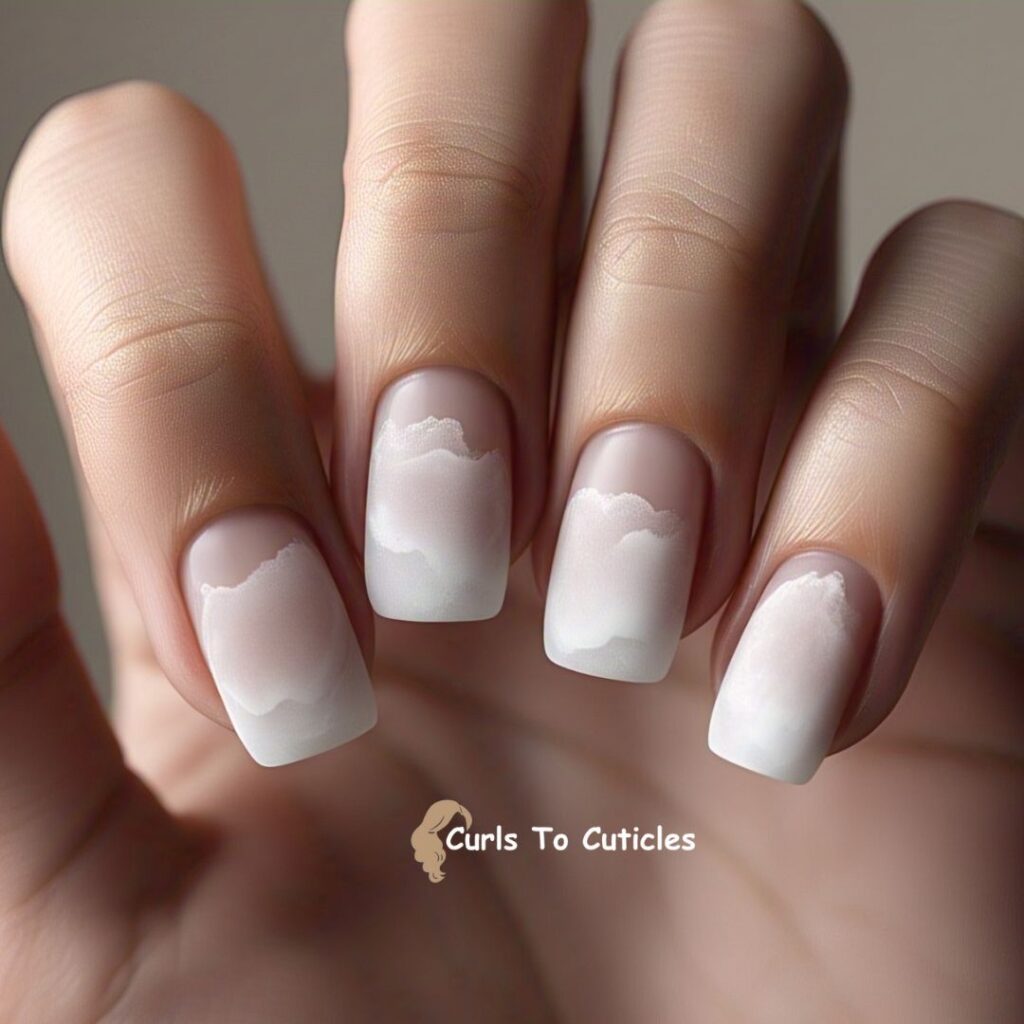
I apply sheer white polish in layers to create a soft, foggy finish.
63. Blue Flash Accent
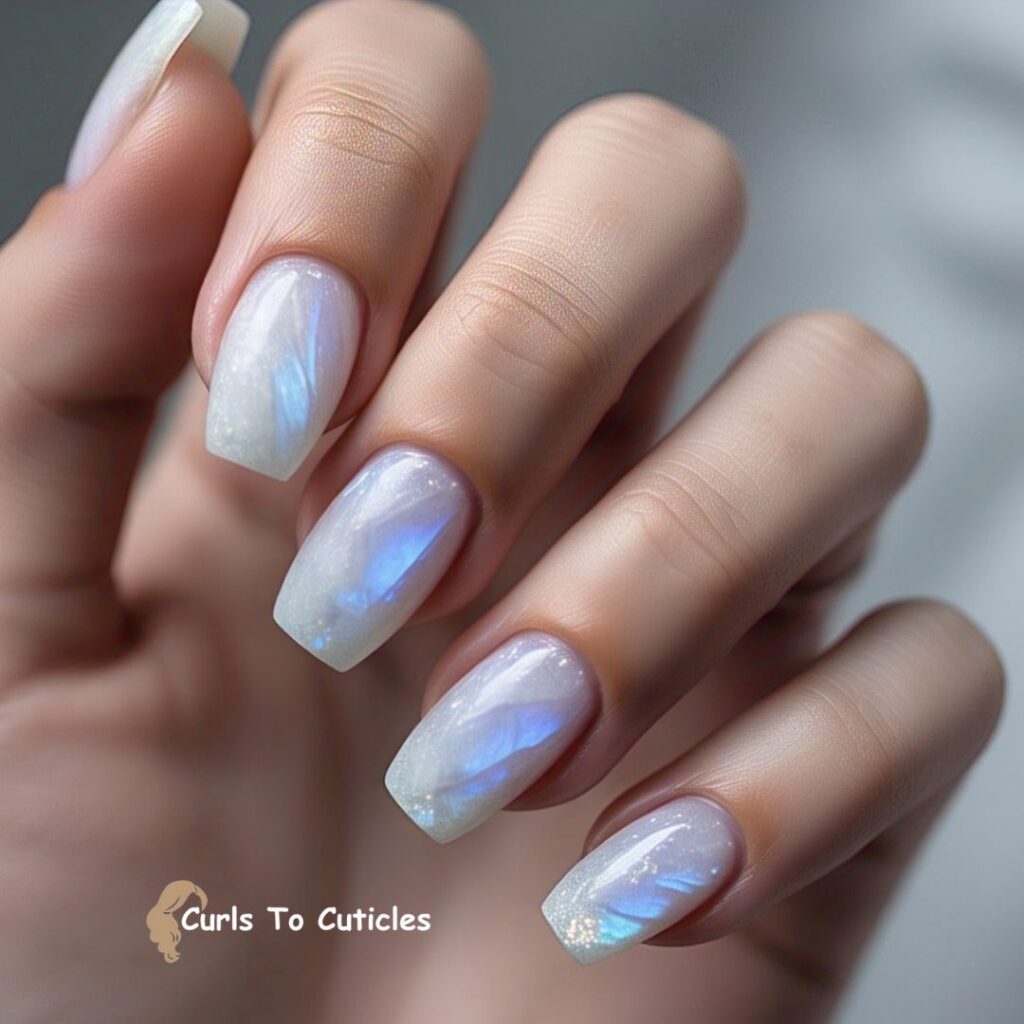
I use a white base with streaks of shimmering blue to mimic moonstone’s inner light.
64. Moonlight French Tips
I use iridescent polish only on the tips to keep the look subtle yet unique.
65. Pearl and Moonstone Combo
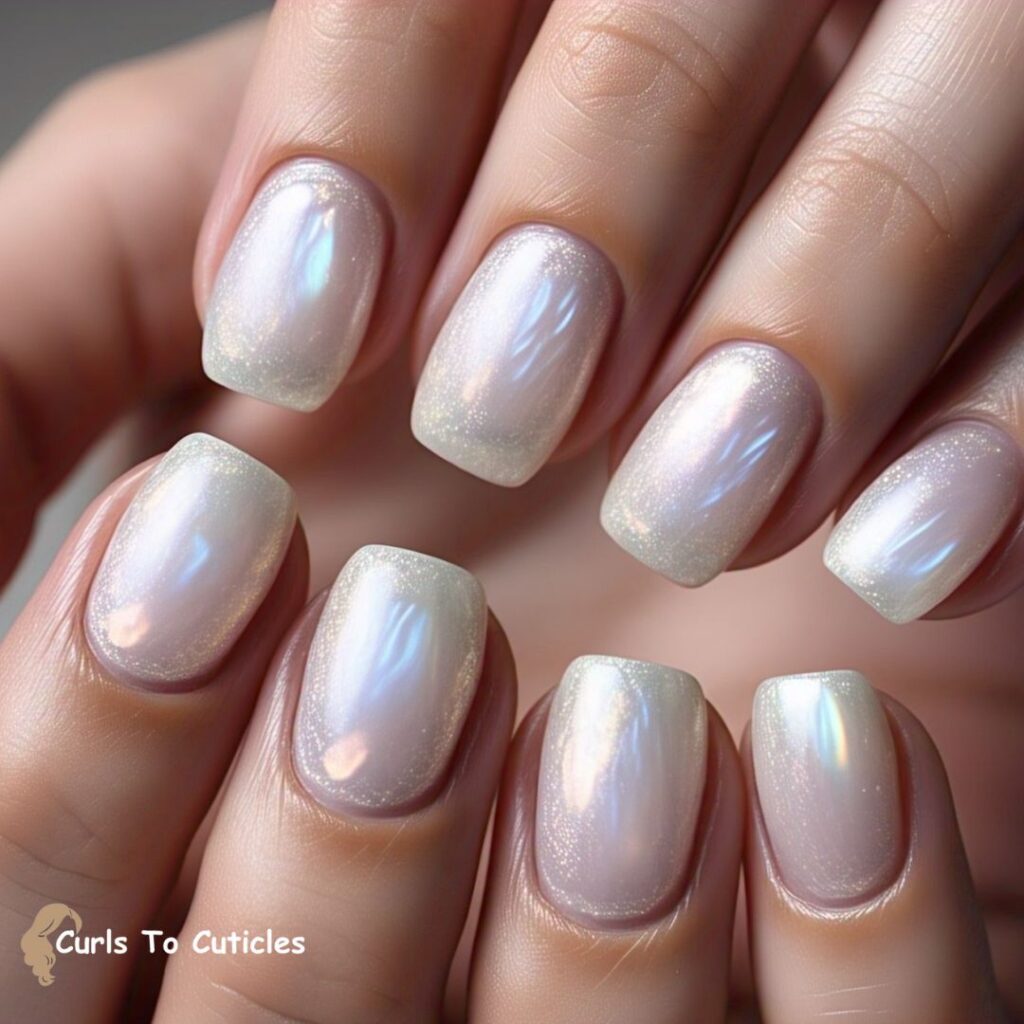
I pair pearly white polish with moonstone shimmer for a blended, ethereal design.
Labradorite-Inspired Nail Art Designs
66. Dark Gray Base
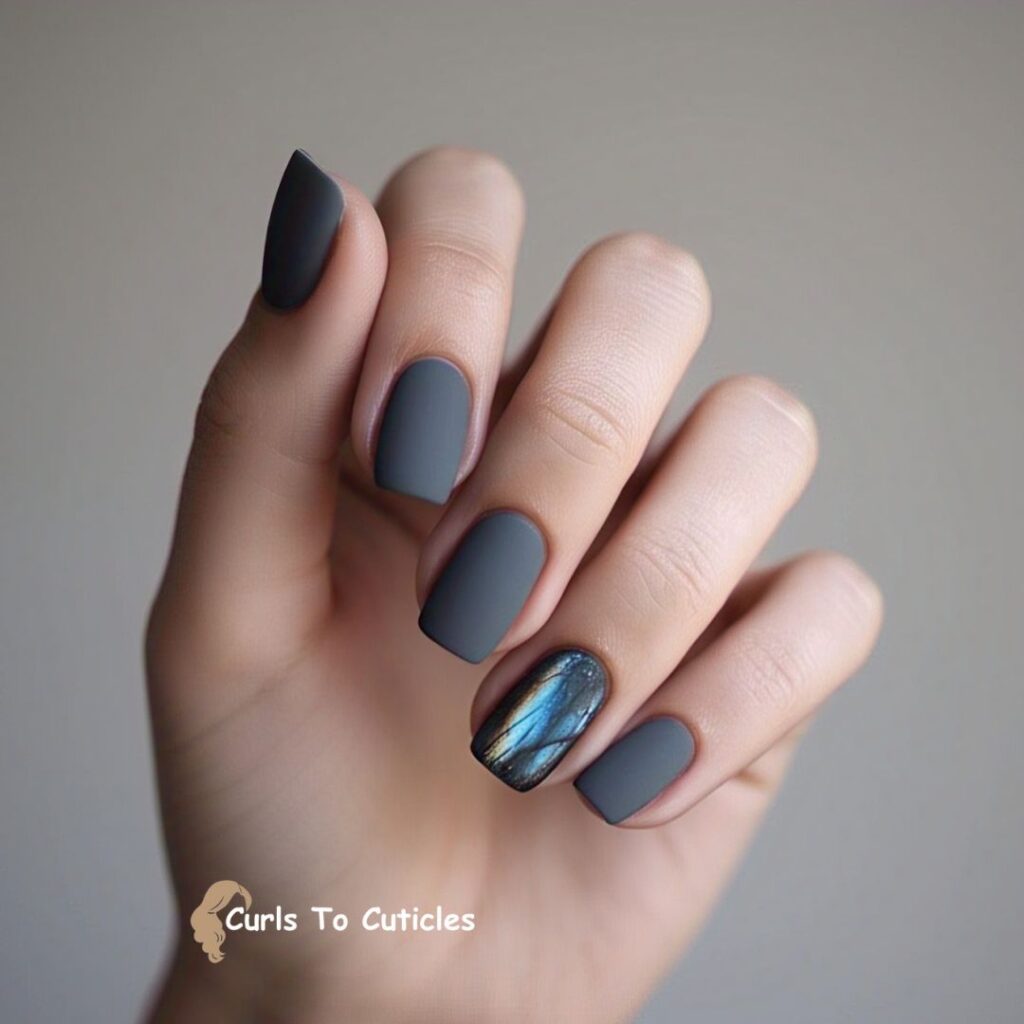
I use slate gray or charcoal polish to create the base tone of labradorite.
67. Flash Shimmer Layer
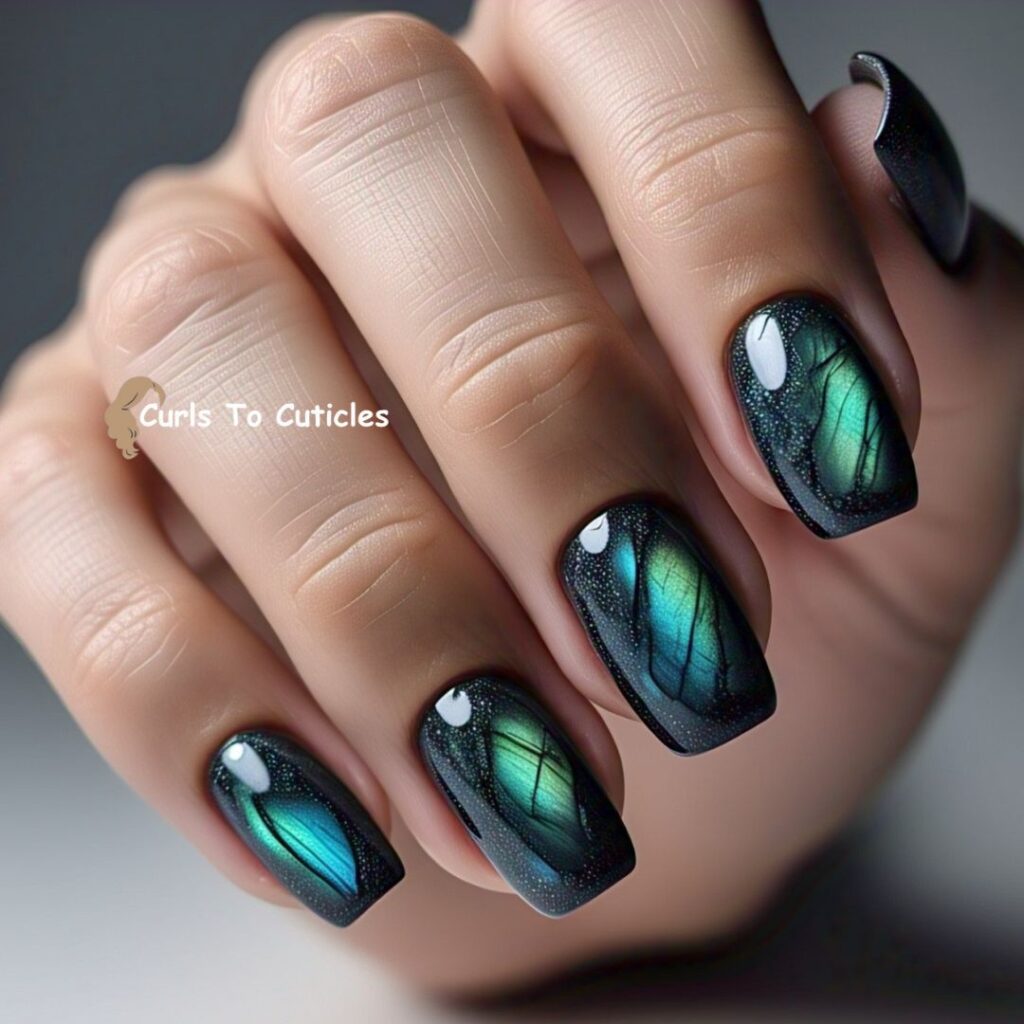
I apply shimmer in teal, green, or blue on top of the dark base to reflect labradorite’s shifting light.
68. Smoky Swirl Effect
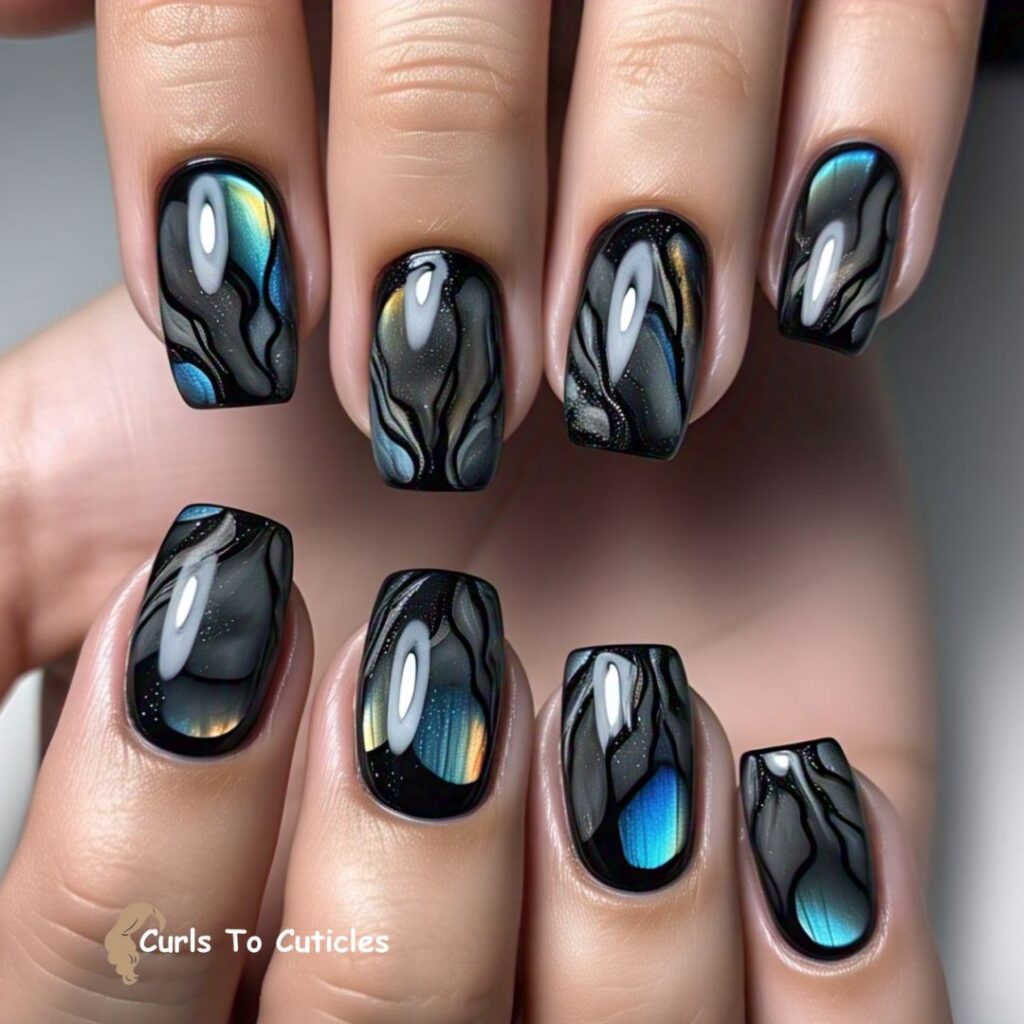
I blend black, gray, and flashes of blue into each other to mimic natural labradorite patterns.
69. Metallic Finish
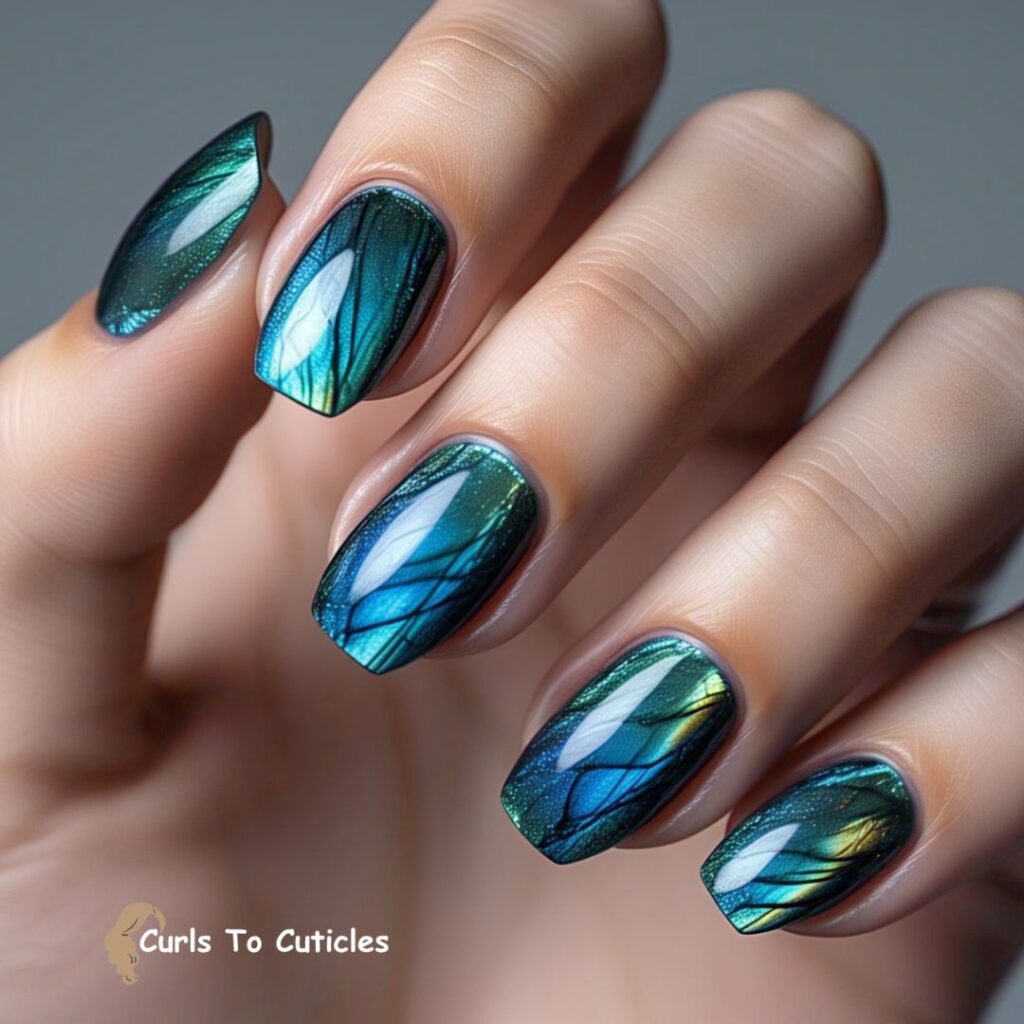
I use a metallic blue-green polish for a reflective look similar to labradorite’s color play.
70. Irregular Veins

I draw uneven white or silver lines over dark blue to create an organic cracked-stone look.
15 Practical Tips to Perfect Your Natural Stone-Inspired Nail Art Designs
1. Start with Quality Nail Tools
Invest in a basic nail art kit that includes dotting tools, fine detail brushes, striping tape, tweezers, sponges, and nail stamping plates. High-quality tools will allow for more precise details and clean designs, which are essential for recreating the depth and texture of natural stones.
2. Use Gel or Long-Lasting Polish
Stone-inspired designs often require multiple layers of polish, so using gel polish or long-lasting formulas will help prevent early chipping. Gel also gives a glossier, dimensional look—perfect for mimicking the sheen of gems like diamonds or moonstone.
3. Incorporate Sheer Polish for Depth
For gemstones like opal, labradorite, or moonstone that have internal luminescence or layers, apply a sheer or jelly polish between layers of color or flakes to create a sense of depth and dimension.
4. Practice Marble Techniques
Many stone designs like turquoise, marble, and amethyst benefit from mastering the water marble, saran wrap, or smoke effect techniques. These help create realistic stone veins and variations in color.
5. Use Nail Foil or Chrome Powder for Shine
To mimic reflective stones like diamond or topaz, add nail foils or chrome powders. Lightly press foil onto tacky polish or use powder over no-wipe top coat to enhance luminosity.
6. Mix Matte and Glossy Finishes
For stones like garnet or onyx, a mix of matte and glossy textures adds realism and elegance. For example, using a matte base with glossy vein lines or topcoat highlights can elevate the design.
7. Try Nail Decals and Stamps
If freehand painting is difficult, use nail stamps or decals that feature stone-like patterns. These provide a clean, uniform look and can be enhanced with a bit of hand-painted detail to personalize the design.
8. Add Metallic Accents
Many gemstones have metallic inclusions or settings. Use gold or silver striping tape, foil, or hand-painted metallic lines to create the effect of embedded metal or veining (especially with stones like emerald, morganite, or lapis).
9. Blend with Sponges for Color Shifts
Sponge techniques are great for blending different hues, especially for ombré effects or replicating the gradients seen in citrine, amethyst, or aquamarine. Dab gently and build color slowly.
10. Use Flakes and Crushed Shells
To recreate the shimmer and reflectiveness of opals or labradorite, use iridescent flakes, crushed shell pieces, or mylar. These mimic the internal “flash” found in real stones.
11. Seal with a High-Shine Top Coat
Always use a high-quality top coat to seal your design. It not only protects your nail art but enhances the gem-like shine. For stones that should look matte (like sandstone or unpolished crystal), opt for a satin or matte top coat instead.
12. Work with Color Theory
Understanding color theory helps in selecting polish shades that closely mimic real gemstones. For example, amethyst features purples and lavenders, while turquoise combines sky blue with brown or black veining.
13. Customize with Nail Charms or Crystals
Enhance the stone design with tiny rhinestones, studs, or 3D nail crystals to make it look like a real jewel setting—especially effective for diamond- or sapphire-inspired nails.
14. Take Your Time with Curing
If you’re using gel polish, be patient with curing times between layers to avoid bubbling or wrinkling, which can ruin intricate details.
15. Experiment on Nail Tips First
Before applying directly to your nails, test the designs on plastic nail tips or a nail art practice board. This lets you refine the technique before committing to your full manicure.
Related Posts
Previous Post
Next Post


Hey, y’all! I’m Sophia!
A 31-year-old hair and nail care enthusiast from a small town in Tennessee. I love testing products, creating simple DIY treatments, and sharing what works through my blog. Everything I post is based on real experience and a love for everyday self-care. Whether it’s finding the right shampoo or growing stronger nails, I keep it easy, honest, and helpful.. Learn more