Taking care of my nails every week helps keep them strong, smooth, and clean. I follow a routine that is simple, effective, and easy to repeat. This routine improves the look of my nails and prevents breakage, peeling, and infections. Below, I share the exact steps I take every week to care for my nails and keep them in good shape.
Step 1: Remove Old Nail Polish (Day 1)
I start my nail care routine by removing any old polish. I use a gentle, acetone-free nail polish remover. This prevents my nails from drying out. I soak a cotton pad with the remover, press it on each nail for a few seconds, and wipe it clean. If the polish is stubborn, I repeat the step until it comes off.
Tip: I avoid peeling polish off with my fingers. This can damage the top layer of my nails.
Step 2: Soak Nails in Warm Water (Day 1)
After removing the polish, I soak my nails in warm water for about 10 minutes. I add a little mild soap to the water. This softens my cuticles and loosens dirt around the nails. It also helps relax my hands.
Optional: I sometimes add a few drops of olive oil or lemon juice to the water. Olive oil moisturizes, and lemon juice helps lighten stains.
Step 3: Clean Under the Nails (Day 1)
Once my nails are soft, I use a nail brush or an orange stick to clean under them. I move gently to avoid hurting the nail bed. I make sure there’s no dirt or buildup left under or around the nails.
Important: I avoid using sharp tools that can poke the skin or damage the nail.
Step 4: Trim and File Nails (Day 1)
Next, I trim my nails using clean, sharp nail clippers. I cut straight across and avoid trimming too close to the skin. After trimming, I use a nail file to shape them. I always file in one direction to prevent splitting.
Common shapes I choose from:
- Round (easy to maintain)
- Square (clean and modern)
- Oval (slightly longer, elegant look)
Step 5: Push Back Cuticles (Day 1)
I never cut my cuticles. Instead, I use a cuticle pusher to gently push them back. This makes my nails look longer and keeps the nail bed clean. I always do this after soaking because the cuticles are soft and easy to move.
Warning: Cutting cuticles can lead to infection or irritation.
Step 6: Apply Cuticle Oil (Day 1)
I apply cuticle oil after pushing back the cuticles. It keeps the skin soft and prevents cracks. I massage it in for a few minutes using small, circular motions. This also improves blood flow to the nail area.
If I don’t have cuticle oil, I use coconut oil or vitamin E oil as a substitute.
Step 7: Buff the Nail Surface (Day 1)
Once my nails are dry, I gently buff the surface with a nail buffer. I use the smoothest side of the buffer to avoid thinning my nails. Buffing helps smooth ridges and gives my nails a natural shine.
I do this once a week only, to prevent over-buffing and weakening the nail.
Step 8: Moisturize Hands and Nails (Day 1)
I apply a thick hand cream or lotion after nail care. I pay special attention to my nails and cuticles. Moisturizing locks in hydration and keeps my hands soft. It also helps protect my nails from becoming brittle.
Daily tip: I reapply lotion after washing my hands.
Step 9: Let Nails Breathe (Day 2-3)
I usually take a break between polishes. I leave my nails bare for 1–2 days. This helps them “breathe” and recover. During this time, I keep applying cuticle oil and lotion daily.
If I notice yellowing or weakness, I use a nail strengthener or a nail serum during these off days.
Step 10: Apply Base Coat (Day 4)
If I decide to apply nail polish, I always start with a base coat. It creates a smooth layer and protects my nails from staining. It also helps the polish last longer.
I use a strengthening base coat that contains ingredients like biotin or keratin to support nail health.
Step 11: Paint Nails with Color (Day 4)
Once the base coat is dry, I apply my favorite nail polish. I usually go for two thin layers instead of one thick layer. Thin layers dry faster and chip less. I let each layer dry fully before applying the next.
Pro tip: I paint a small stroke across the tip to seal the edge and reduce chipping.
Step 12: Apply Top Coat (Day 4)
After the color dries, I apply a top coat. It adds shine and protects the color from scratches. I use a quick-dry top coat when I am in a hurry. I also reapply the top coat every 2–3 days to keep the shine and extend the wear.
Step 13: Clean Up Mistakes (Day 4)
I dip a small brush or cotton swab in nail polish remover to fix any mistakes around the edges. Clean edges make the manicure look neat and professional.
Step 14: Apply Cuticle Oil Again (Day 4)
Even after polishing, I go back and apply a little cuticle oil. It keeps the skin soft and adds a final touch of care.
Step 15: Protect My Nails During Daily Tasks (Day 5–7)
I wear gloves when washing dishes or cleaning. Water and harsh chemicals can weaken my nails. Gloves create a barrier and keep my nails safe. I also avoid using my nails to open cans or scratch off labels.
Daily reminder: Nails are not tools. I use proper tools instead.
Step 16: Touch Up and Maintain (Day 6–7)
By day six or seven, I do a quick check. If there are chips or cracks, I touch up with the same polish. If the color still looks good, I add another layer of top coat. This refreshes the shine and helps the manicure last longer.
I continue applying cuticle oil and hand cream daily.
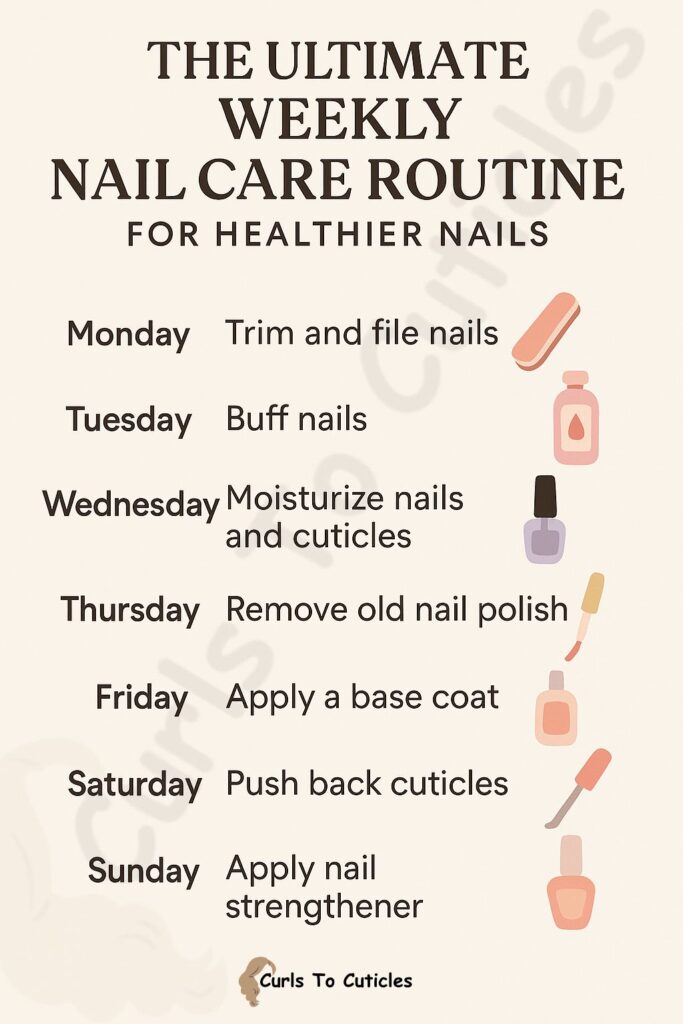
Weekly Nail Care Checklist (Summary)
| Task | Day | Notes |
|---|---|---|
| Remove Old Polish | Day 1 | Use acetone-free remover |
| Soak Nails | Day 1 | 10 minutes in warm water |
| Clean Under Nails | Day 1 | Use a soft brush or stick |
| Trim and File | Day 1 | File in one direction |
| Push Back Cuticles | Day 1 | Never cut cuticles |
| Apply Cuticle Oil | Day 1 | Massage in gently |
| Buff Nails | Day 1 | Use light pressure |
| Moisturize | Day 1 | Use thick cream or lotion |
| Let Nails Breathe | Day 2–3 | Apply nail serum if needed |
| Apply Base Coat | Day 4 | Choose strengthening base |
| Apply Nail Color | Day 4 | Two thin coats |
| Apply Top Coat | Day 4 | Reapply every 2–3 days |
| Clean Up Mistakes | Day 4 | Use a brush or swab |
| Apply Cuticle Oil Again | Day 4 | Keep cuticles soft |
| Wear Gloves | Day 5–7 | Protect from water and chemicals |
| Touch Up | Day 6–7 | Refresh the top coat or polish |
A Shorter & Easier Way For You To Understand
Common Mistakes I Avoid
- Skipping base coat: This leads to stained nails.
- Over-buffing: It makes nails thin and weak.
- Biting or picking nails: It spreads germs and causes damage.
- Ignoring hydration: Dry nails break easily.
- Using nails as tools: This can cause cracks and tears.
Extra Tips for Healthy Nails
- Drink more water: Hydration helps nails grow stronger.
- Eat protein-rich foods: Eggs, nuts, and beans support nail growth.
- Take breaks from polish: Nails need time to stay healthy.
- Avoid harsh nail products: I choose non-toxic, breathable polishes.
- Use nail strengtheners: Especially during colder months.
Final Thoughts
Sticking to a weekly nail care routine has changed the way my nails look and feel. It only takes a bit of time each week, but the results are long-lasting. My nails stay clean, strong, and polished without expensive treatments. This routine keeps my hands healthy and helps me feel more put together.
If you want healthier nails, I recommend starting with these simple steps. Stick to the routine for a few weeks, and you’ll notice the difference.

Hi, I’m Mia Sophia, a 31-year-old hair and nail care enthusiast from a small town in Tennessee. I love testing products, creating simple DIY treatments, and sharing what works through my blog. Everything I post is based on real experience and a love for everyday self-care. Whether it’s finding the right shampoo or growing stronger nails, I keep it easy, honest, and helpful.