Now Reading: The Ultimate Curly Hair Girl Routine – Beginner-Friendly Guide
-
01
The Ultimate Curly Hair Girl Routine – Beginner-Friendly Guide

Learning to love and care for your natural curls can be life-changing—but let’s be real, it can also be overwhelming. With so many products, methods, and advice out there, it’s easy to feel lost, especially if you’re new to the curly hair journey.
The good news? You don’t need a shelf full of expensive products or a 10-step process to make your curls thrive. What you do need is the right knowledge, a little consistency, and the confidence to rock your natural texture.
This beginner-friendly guide is here to break down the Curly Girl Method (CGM) in a way that’s simple, approachable, and—most importantly—customizable. Whether you’ve got waves, spirals, coils, or something in between, this is your one-stop roadmap to healthy, hydrated, bouncy curls.

What is the Curly Girl Method (CGM)?
Created by Lorraine Massey (author of Curly Girl: The Handbook), the Curly Girl Method is a hair care approach specifically designed for naturally curly and wavy hair. The idea is to eliminate ingredients and habits that damage curls, and replace them with techniques and products that nourish and define your natural texture.
The core principles:
- Avoid sulfates, silicones, drying alcohols, and heat styling
- Use gentle cleansing methods
- Moisturize consistently
- Style while wet for maximum definition
- Air dry or diffuse with care
Step 1: Determine Your Curl Type
Before building a hair care routine, you need to know your curl type. This helps you choose the right products, techniques, and maintenance steps for your specific needs. Your curl pattern affects how much moisture your hair needs, how you should style it, and how often you should wash it.
Hair types fall into three main curl categories: Type 2 (Wavy), Type 3 (Curly), and Type 4 (Coily). Each type has three sub-categories: A, B, and C, based on curl shape and density.

Type 2 (Wavy Hair)
Wavy hair forms an “S” shape. It lies closer to the scalp and tends to be more oily than curly or coily hair. It ranges from soft waves to well-defined waves.
Type 2A Curly:
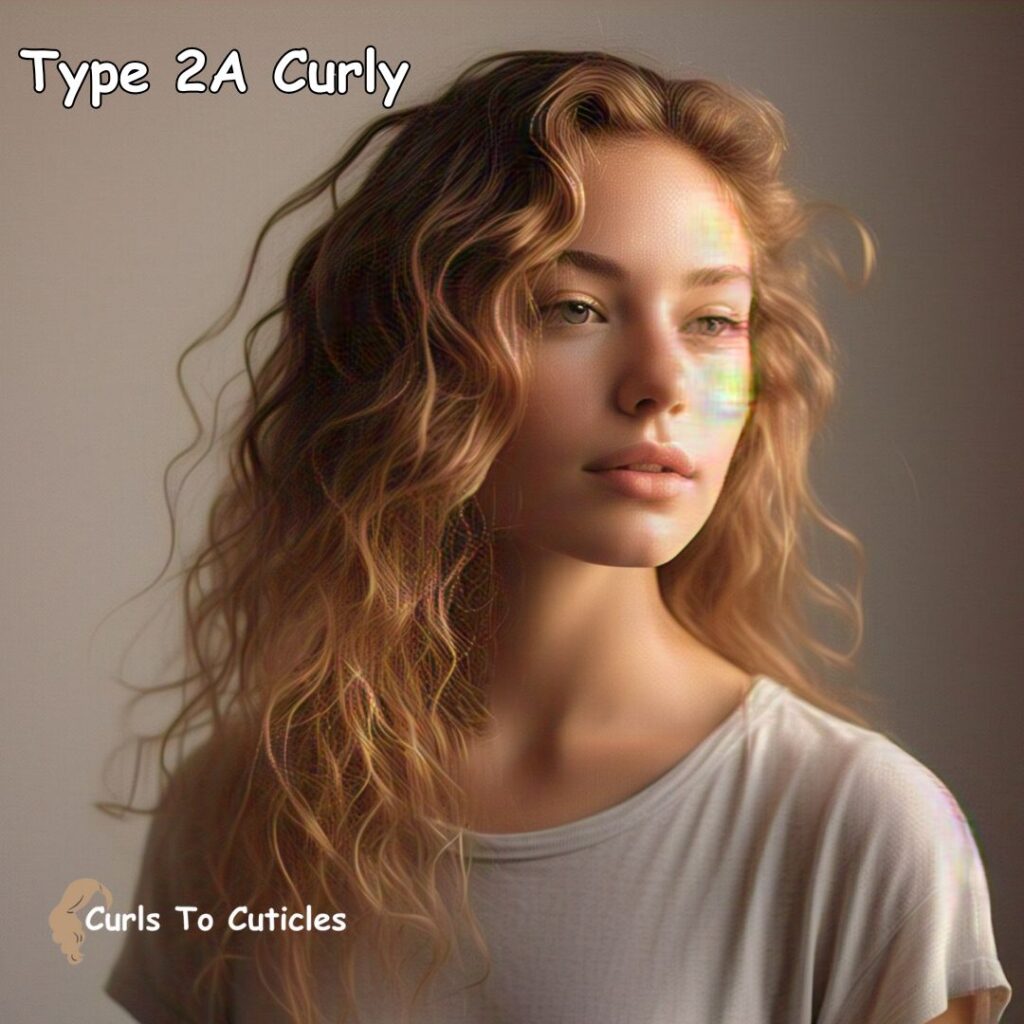
Very loose, fine waves. Hair looks almost straight but with a slight bend. It lacks volume and holds styles poorly.
Type 2B Curly:

Hair has more noticeable S-shaped waves that start from the mid-length. It can get frizzy, especially in humid weather.
Type 2C Curly:
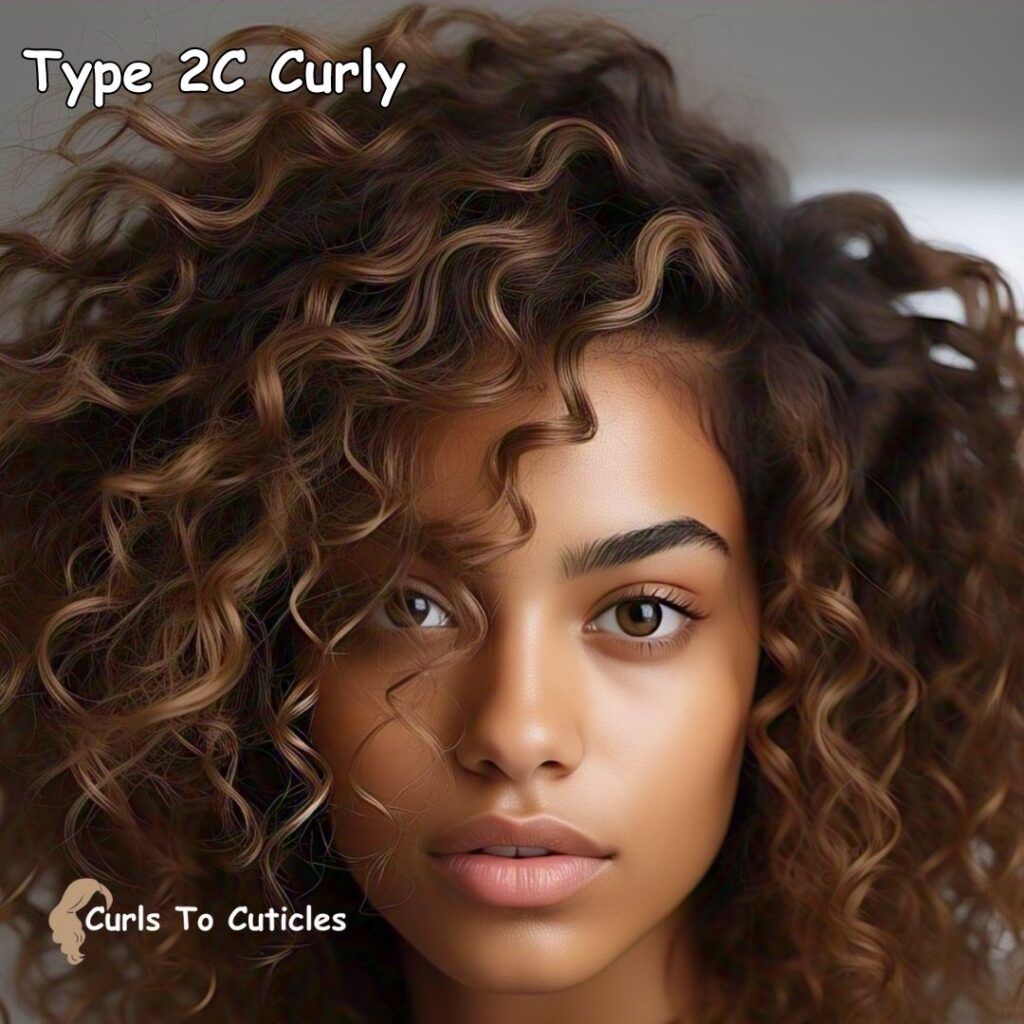
Thick, coarse waves with some loose curls. Waves start from the roots and create volume and moderate frizz.
Best products for Type 2 (Wavy Hair):
Use lightweight mousses to add volume without making waves feel heavy. Sea salt sprays help boost natural texture for a beachy look. Frizz control creams smooth flyaways and keep waves defined. Gel-based stylers offer light hold and shape without stiffness.
Type 3 (Curly Hair)
Curly hair forms springy, well-defined curls. It is prone to dryness and frizz and needs more moisture than wavy hair. The curls range from loose spirals to tight ringlets.
Type 3A Curly:
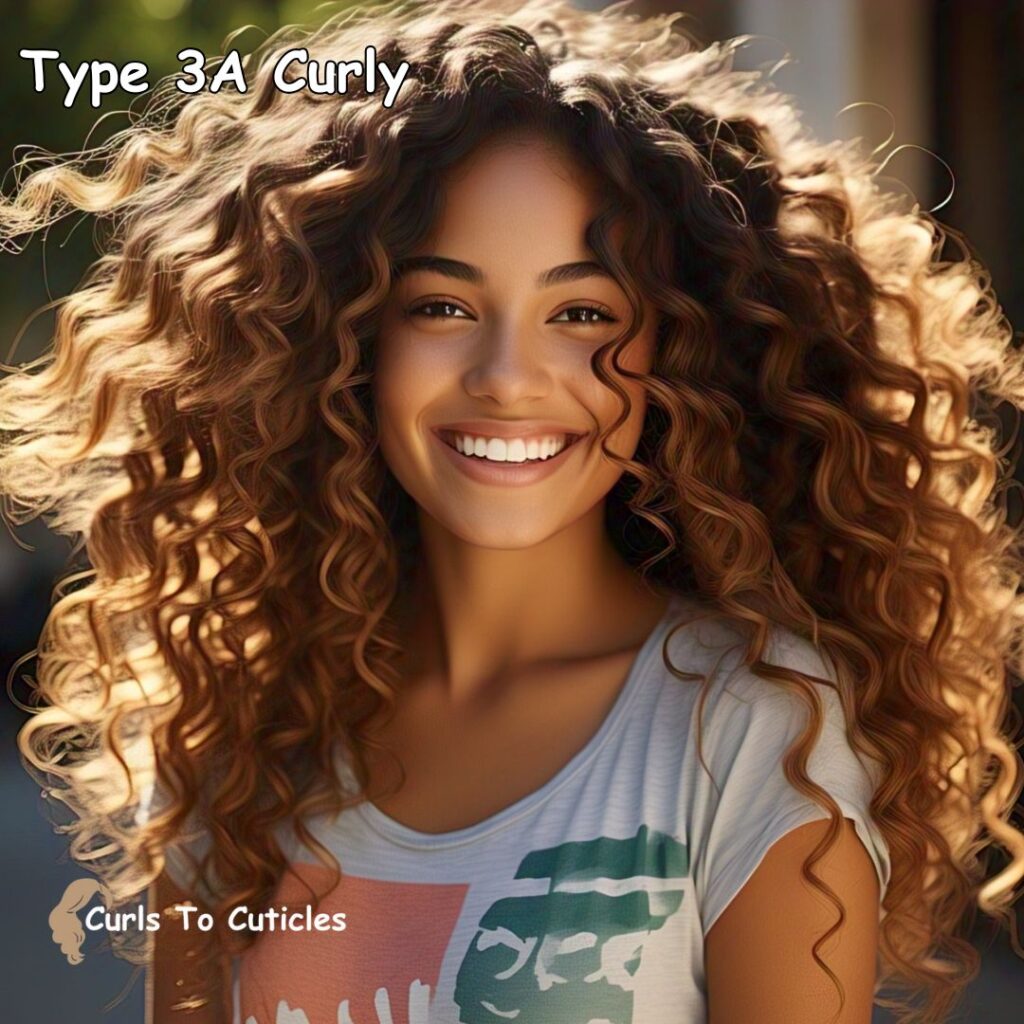
Big, soft curls about the size of sidewalk chalk. The curls are shiny, loose, and well-defined but prone to frizz without moisture.
Type 3B Curly:
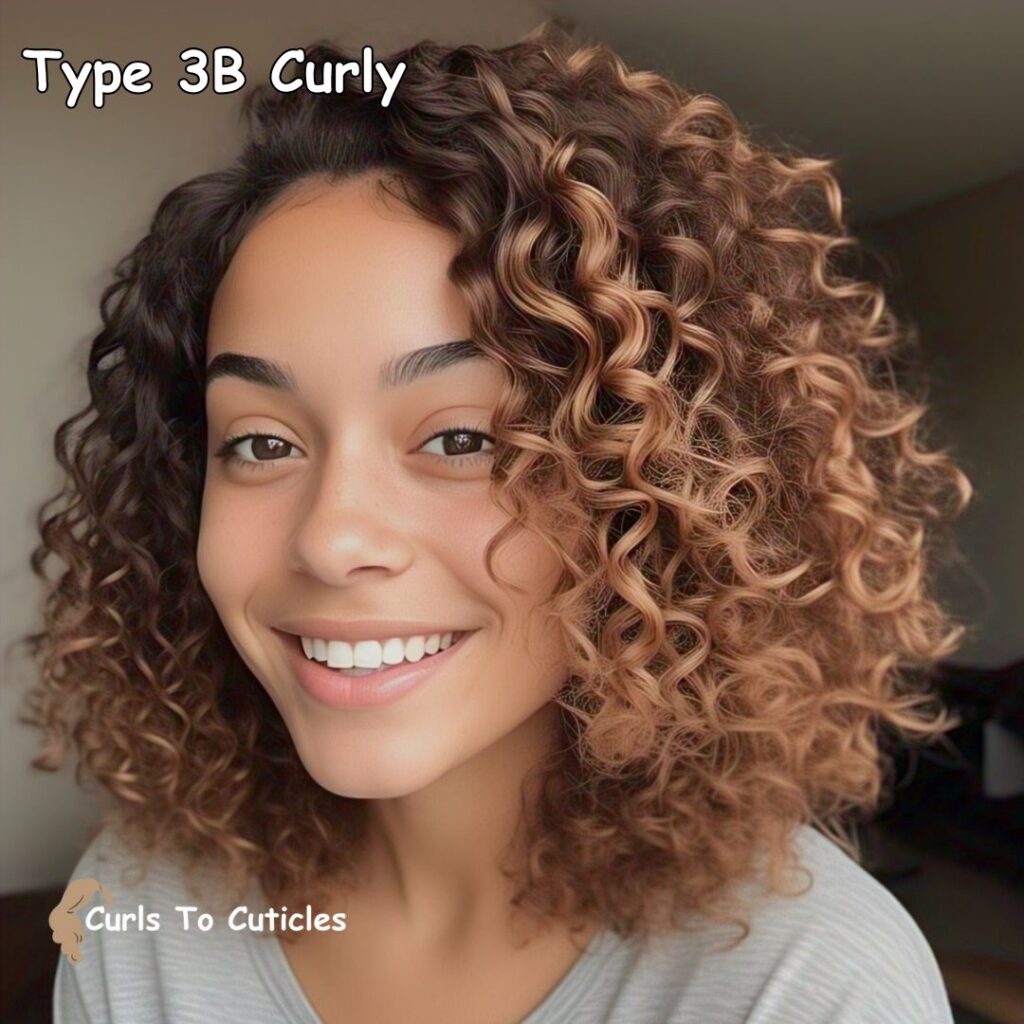
Tighter curls about the width of a marker. The hair has more volume and density. It can be dry and frizzy if not moisturized regularly.
Type 3C Curly:
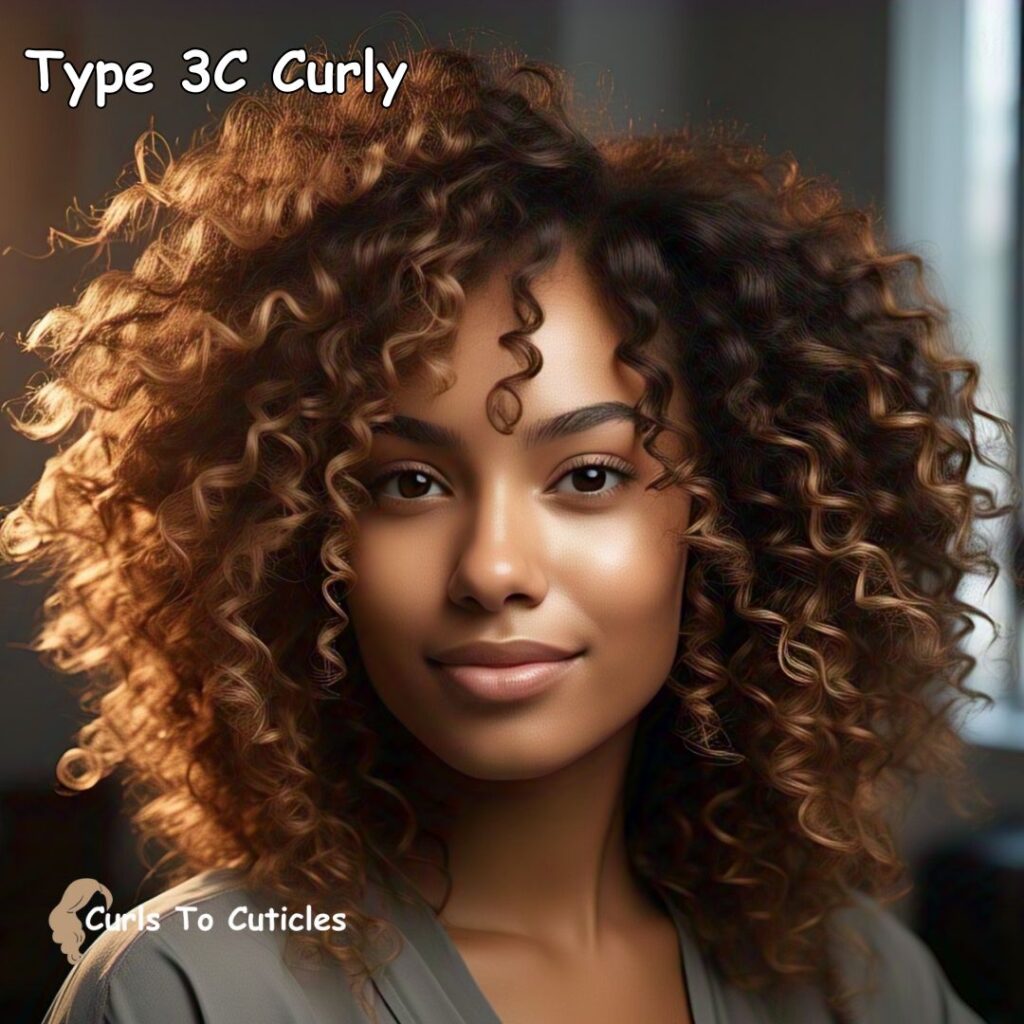
Dense curls or corkscrews about the width of a pencil. The curl pattern is tight and packed, creating a lot of volume and texture.
Best products for Type 3 (Curly Hair):
Curl creams give moisture and help curls stay soft and bouncy. Leave-in conditioners keep hair hydrated between washes. Defining gels lock in curl shape and reduce frizz. Hydrating shampoos clean gently without stripping natural oils.
Type 4 (Coily/Kinky Hair)
Type 4 hair forms very tight curls or coils. It is the most fragile and dry hair type and needs regular deep conditioning and moisture. The coils are smaller and can have different patterns on different parts of your head.
Type 4A Curly:

Tight coils with a visible S-shaped pattern. The hair is soft and springy and retains moisture better than 4B and 4C.
Type 4B Curly:
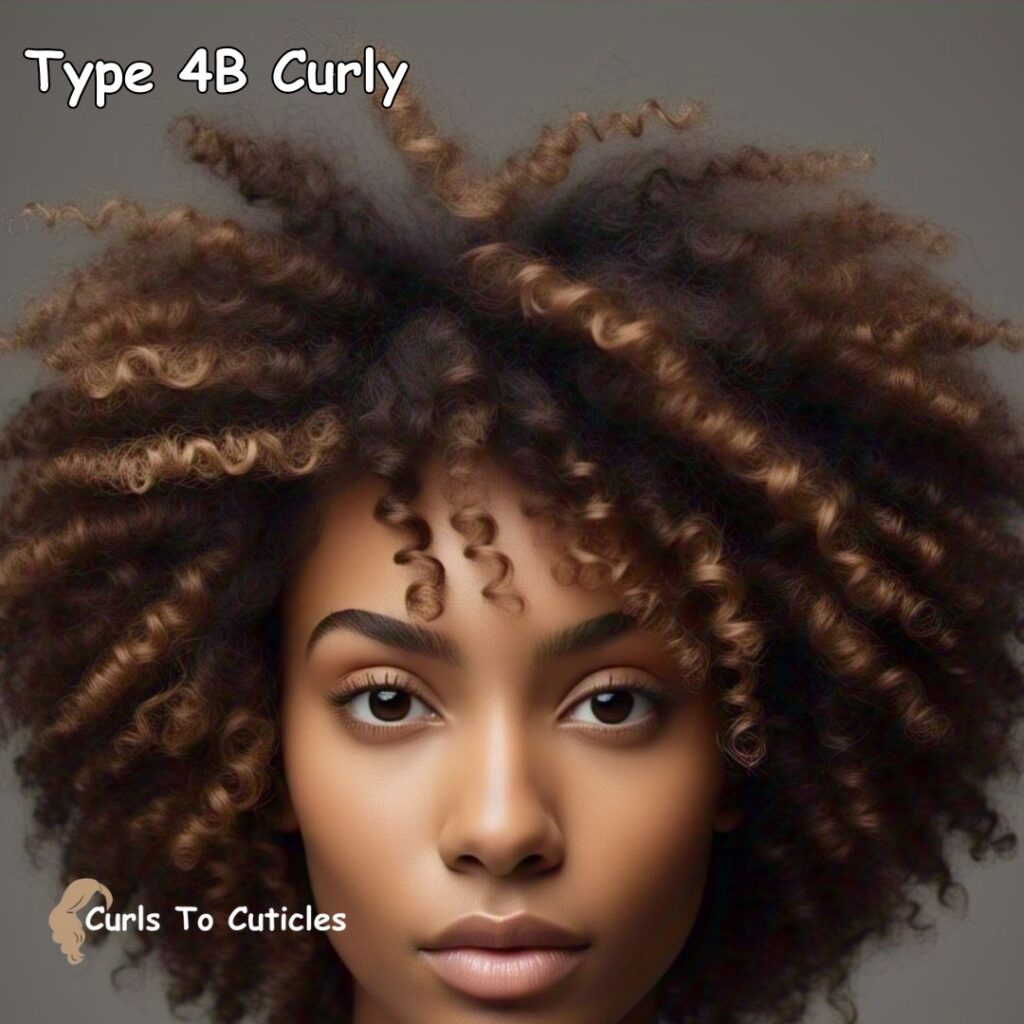
Coils bend in sharp angles and form a zigzag pattern. Hair is fluffy and less defined. It shrinks significantly when dry.
Type 4C Curly:
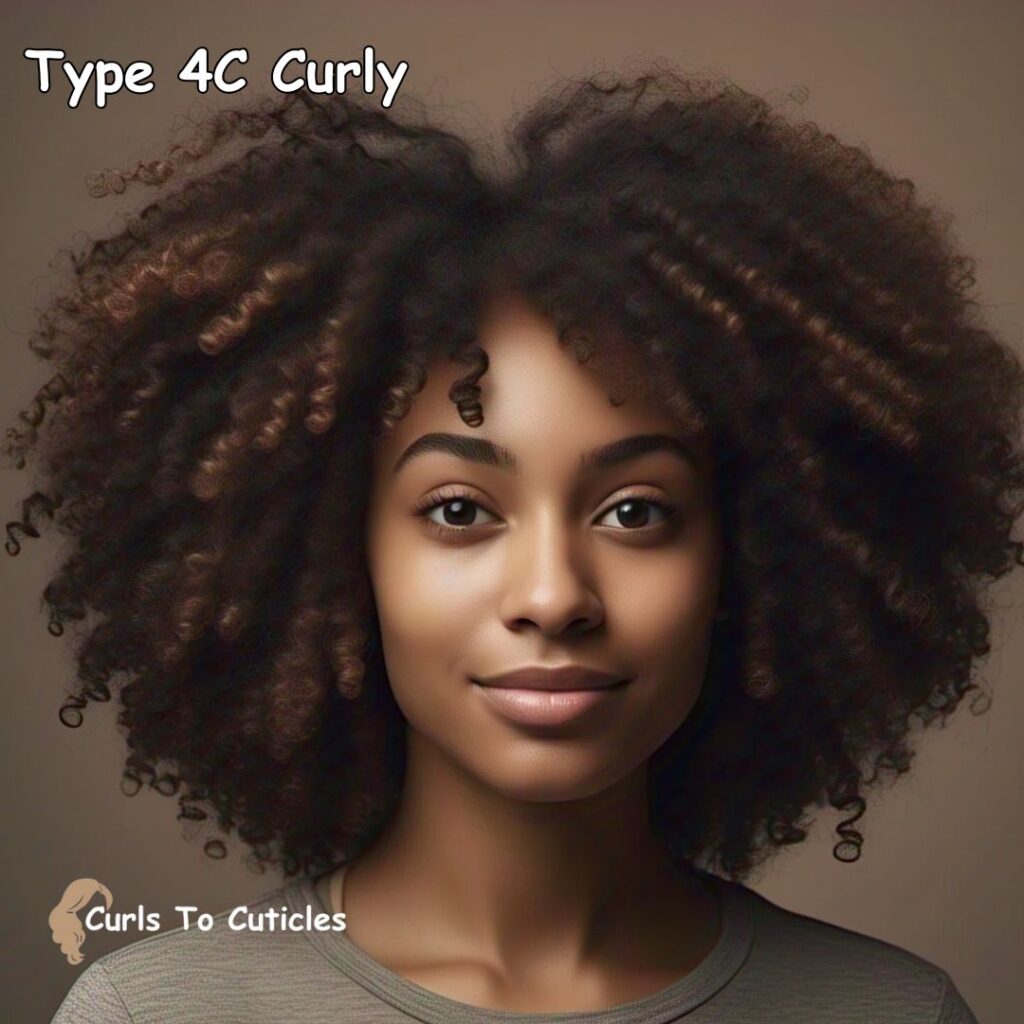
Very tight coils with little to no visible curl definition. The texture is dense and soft. Hair has the most shrinkage and tends to be the most fragile.
Best products for Type 4 (Coily Hair):
Thick creams coat each strand to lock in moisture. Natural oils like coconut or castor oil seal in hydration. Butter-based moisturizers (like shea butter) soften and protect fragile coils. Co-washes clean without drying out the hair. Protein treatments strengthen strands and help reduce breakage.
Important Note: Mixed Curl Patterns Are Normal
It’s common to have more than one curl type on your head. You might have 3B curls at the crown, 3C curls at the sides, and 4A coils at the nape. That’s completely normal.
When building your hair care routine, focus on what each section of your hair needs. Some areas might need more moisture or stronger hold, while others might need lighter products. Don’t be afraid to mix and match products based on how your hair behaves in each area.
Step 2: Understand Your Hair’s Needs
Besides curl pattern, you also need to assess:
Porosity
- Low porosity: Water-resistant, product tends to sit on hair
- Medium porosity: Absorbs moisture well, holds style
- High porosity: Absorbs quickly but loses moisture just as fast (often due to damage or genetics)
Density
- How closely packed your strands are—dense hair can handle heavier products.
Width
- Fine, medium, or coarse strands—determines how much moisture and protein your hair can handle.
Step 3: The Beginner Curly Girl Routine
This routine follows the CG method but is beginner-friendly with easy-to-follow steps and minimal products.
WEEKLY SCHEDULE AT A GLANCE:
| Step | Frequency | Products Needed |
|---|---|---|
| Final Wash | One-time | Sulfate shampoo |
| Cleanse | 1–2x/week | CG-friendly cleanser or co-wash |
| Condition | Every wash | Moisturizing conditioner |
| Deep Condition | 1x/week | Protein or moisture mask |
| Style | After every wash | Leave-in + gel/cream |
| Refresh | As needed | Water + lightweight styler |
Step 4: Final Wash (Do This Once)
Before you begin the Curly Girl Method, it’s important to remove any product buildup, silicones, and residue from previous hair products. This helps your curls start fresh.
- Use a clarifying shampoo with sulfates but no silicones
- Wash thoroughly, focusing on your scalp
- Rinse and follow with a conditioner
💡 After this step, you’ll stop using any shampoo with sulfates or any product with silicones.
Step 5: Cleansing Without Stripping
Replace harsh shampoos with:
- Co-wash (Conditioner Wash): Great for dry curls. It cleanses with conditioner instead of shampoo.
- Low-poo: Gentle, sulfate-free shampoo alternative.
How to cleanse:
- Wet your hair fully.
- Apply cleanser to scalp and massage for a few minutes.
- Rinse thoroughly.
- Repeat only if hair feels oily or has heavy buildup.
Best tip: Always focus cleanser on the scalp, not the ends.
Step 6: Condition Like a Pro
Curly hair is naturally drier because the oils from the scalp have a harder time traveling down the curl shaft. That’s why conditioning is key.
How to:
- Apply a generous amount of conditioner to soaking wet hair.
- Use your fingers or a wide-tooth comb to detangle gently.
- Leave it in for 3–5 minutes (or more if needed).
- Rinse lightly—or leave some in for extra hydration.
Signs of good conditioning: Hair feels smooth and slippery, not squeaky or stripped.
Step 7: Deep Condition Weekly
Once a week, treat your curls to a deep conditioning treatment. Alternate between:
- Moisture masks: For dry, frizzy, or dull hair
- Protein treatments: For limp, weak, or overly soft curls
⚠️ Too much protein can make hair brittle, too much moisture can cause mushy curls—balance is key.
Step 8: Styling While Wet
This is where the magic happens! Styling correctly helps define curls, reduce frizz, and lock in moisture.
Your styling arsenal:
- Leave-in conditioner: Adds moisture
- Curl cream: Defines and softens
- Gel or mousse: Adds hold and fights frizz
Method:
- Apply styling products to soaking wet hair.
- Use the “praying hands” method to smooth product over strands.
- Scrunch your curls upward to encourage shape.
- Optional: Use the “rake and shake” or “finger coiling” for more definition.
🎯 The goal: Curls should feel coated but not greasy or heavy.
Step 9: Dry Gently
Towels and heat can wreck your curls. Here’s how to dry the CG way:
- Plop: Use a microfiber towel or T-shirt to wrap your curls upside-down and let them dry partially.
- Air dry: Best for minimal frizz.
- Diffuse: Use a blow dryer with a diffuser attachment on low heat and low airflow.
🚫 Avoid rubbing your hair with a towel—it creates frizz and disrupts curl clumps.
Step 10: Refresh Between Washes
Curls don’t need daily washing. You can refresh them in between with a little water and product.
How to refresh:
- Mist with water or a DIY refresh spray (water + leave-in conditioner)
- Re-scrunch with a tiny bit of gel or cream
- Diffuse or air dry
🌿 Don’t overload product while refreshing or you’ll end up with buildup.
Beginner-Friendly Curly Girl Routine Example
Wash Day (1–2x/week):
- Cleanse with a sulfate-free shampoo or co-wash
- Apply conditioner, detangle, rinse lightly
- Apply leave-in conditioner + curl cream
- Scrunch, plop, air dry or diffuse
Midweek Refresh (as needed):
- Mist with water or refresh spray
- Add a tiny bit of curl cream or gel
- Air dry or diffuse
Weekly Treatment:
- Deep condition or use a protein treatment
Must-Know Curly Girl Tips for Beginners
1. Read Product Labels Carefully
Avoid these common ingredients:
- Sulfates (SLS, SLES)
- Silicones (dimethicone, amodimethicone)
- Drying alcohols (like isopropyl alcohol)
Look for:
- Water-based ingredients
- Oils and butters (for coarse curls)
- Protein (in moderation)
2. Transition Takes Time
If your curls are damaged from heat or chemicals, give them time to bounce back. You might see frizz or uneven curl patterns at first—don’t panic!
3. Less Is More
It’s easy to overdo product. Start with small amounts and build up. Too much can weigh curls down.
4. Protect While You Sleep
Use a satin or silk pillowcase or sleep in a pineapple (loose high ponytail). You can also try a satin bonnet or scarf.
5. Document Your Progress
Take pictures after every wash day. It helps you track what works—and motivates you when you see growth and definition over time.
Download Below infographic For Future Use

Suggested Starter Products (Drugstore Friendly)
Cleansers:
- SheaMoisture Coconut & Hibiscus Curl & Shine Shampoo
- As I Am Coconut CoWash
Conditioners:
- Garnier Fructis Curl Nourish Conditioner
- Not Your Mother’s Curl Talk Conditioner
Leave-Ins:
- Cantu Shea Butter Leave-In Conditioning Repair Cream
- Kinky Curly Knot Today
Stylers:
- Eco Styler Gel (Olive Oil or Flaxseed)
- Aunt Jackie’s Curl La La Defining Curl Custard
Deep Conditioners:
- Mielle Organics Babassu & Mint Deep Conditioner
- SheaMoisture Manuka Honey & Mafura Oil Masque
Frequently Asked Questions (FAQ)
Q: Can I straighten my curls occasionally?
If you’re following CGM strictly, avoid heat. But if you do straighten occasionally, use a heat protectant and deep condition afterward.
Q: My hair feels greasy after co-washing. Why?
You may be using too much product or need a clarifying cleanse with a low-poo.
Q: I don’t see results. Should I give up?
Nope! Curls take time to recover. Stick with your routine for 4–6 weeks before making changes.
Your Curly Hair Journey Starts Now
Caring for curly hair is about more than just aesthetics—it’s about self-acceptance, empowerment, and learning what your hair truly needs. Whether your curls are wavy, springy, or tightly coiled, the Curly Girl Method gives you the tools to nourish them from the inside out.
Remember, there’s no “one-size-fits-all” in the curly world. Use this guide as a foundation, then experiment and find what works best for you.
Your curls are beautiful—and so are you.

Hi, I’m Mia Sophia, a 31-year-old hair and nail care enthusiast from a small town in Tennessee. I love testing products, creating simple DIY treatments, and sharing what works through my blog. Everything I post is based on real experience and a love for everyday self-care. Whether it’s finding the right shampoo or growing stronger nails, I keep it easy, honest, and helpful.
Related Posts


Previous Post
Next Post
Hey, y’all! I’m Sophia!
A 31-year-old hair and nail care enthusiast from a small town in Tennessee. I love testing products, creating simple DIY treatments, and sharing what works through my blog. Everything I post is based on real experience and a love for everyday self-care. Whether it’s finding the right shampoo or growing stronger nails, I keep it easy, honest, and helpful.. Learn more